Help Center
Business Registration Guide
Learn how to register your business on BizResolve with our step-by-step guide
Register Your BusinessHow to Register Your Business
Follow this comprehensive guide to register your business on BizResolve. The process takes about 10-15 minutes to complete.
Getting Started
Navigate to your dashboard and start the registration process
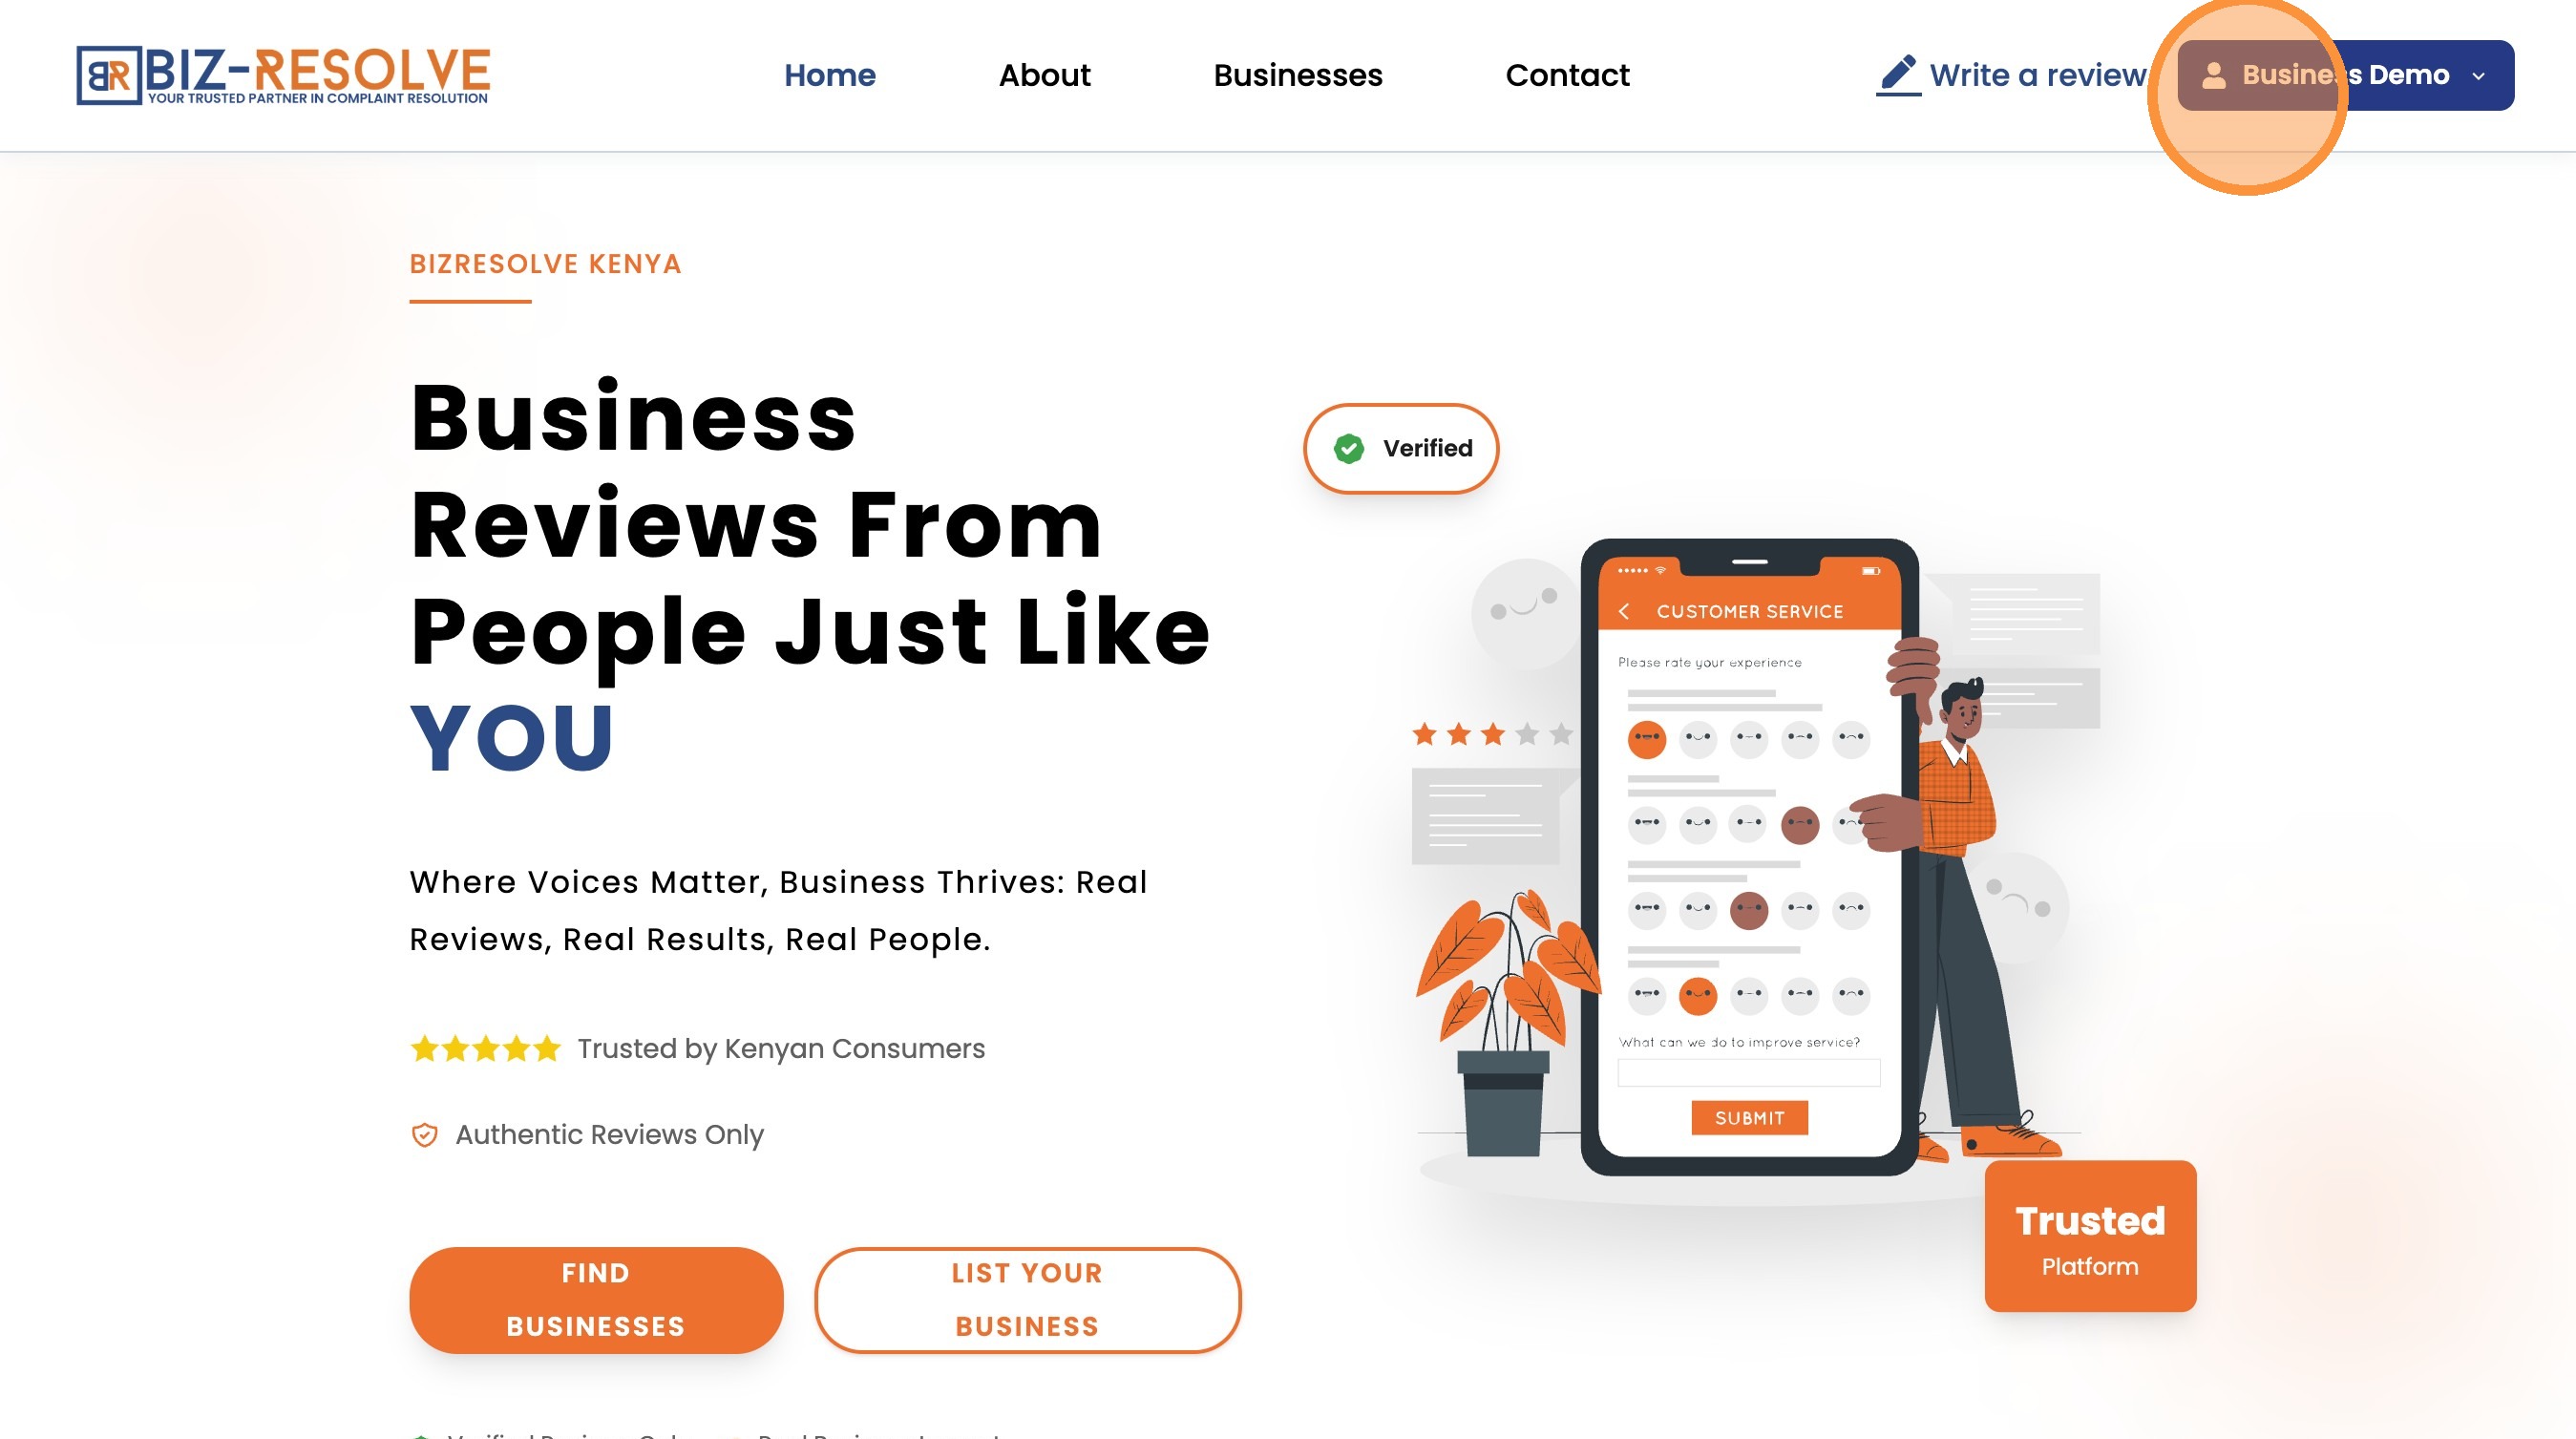
Navigate to biz-resolve.com

Click your profile name in the top-right corner
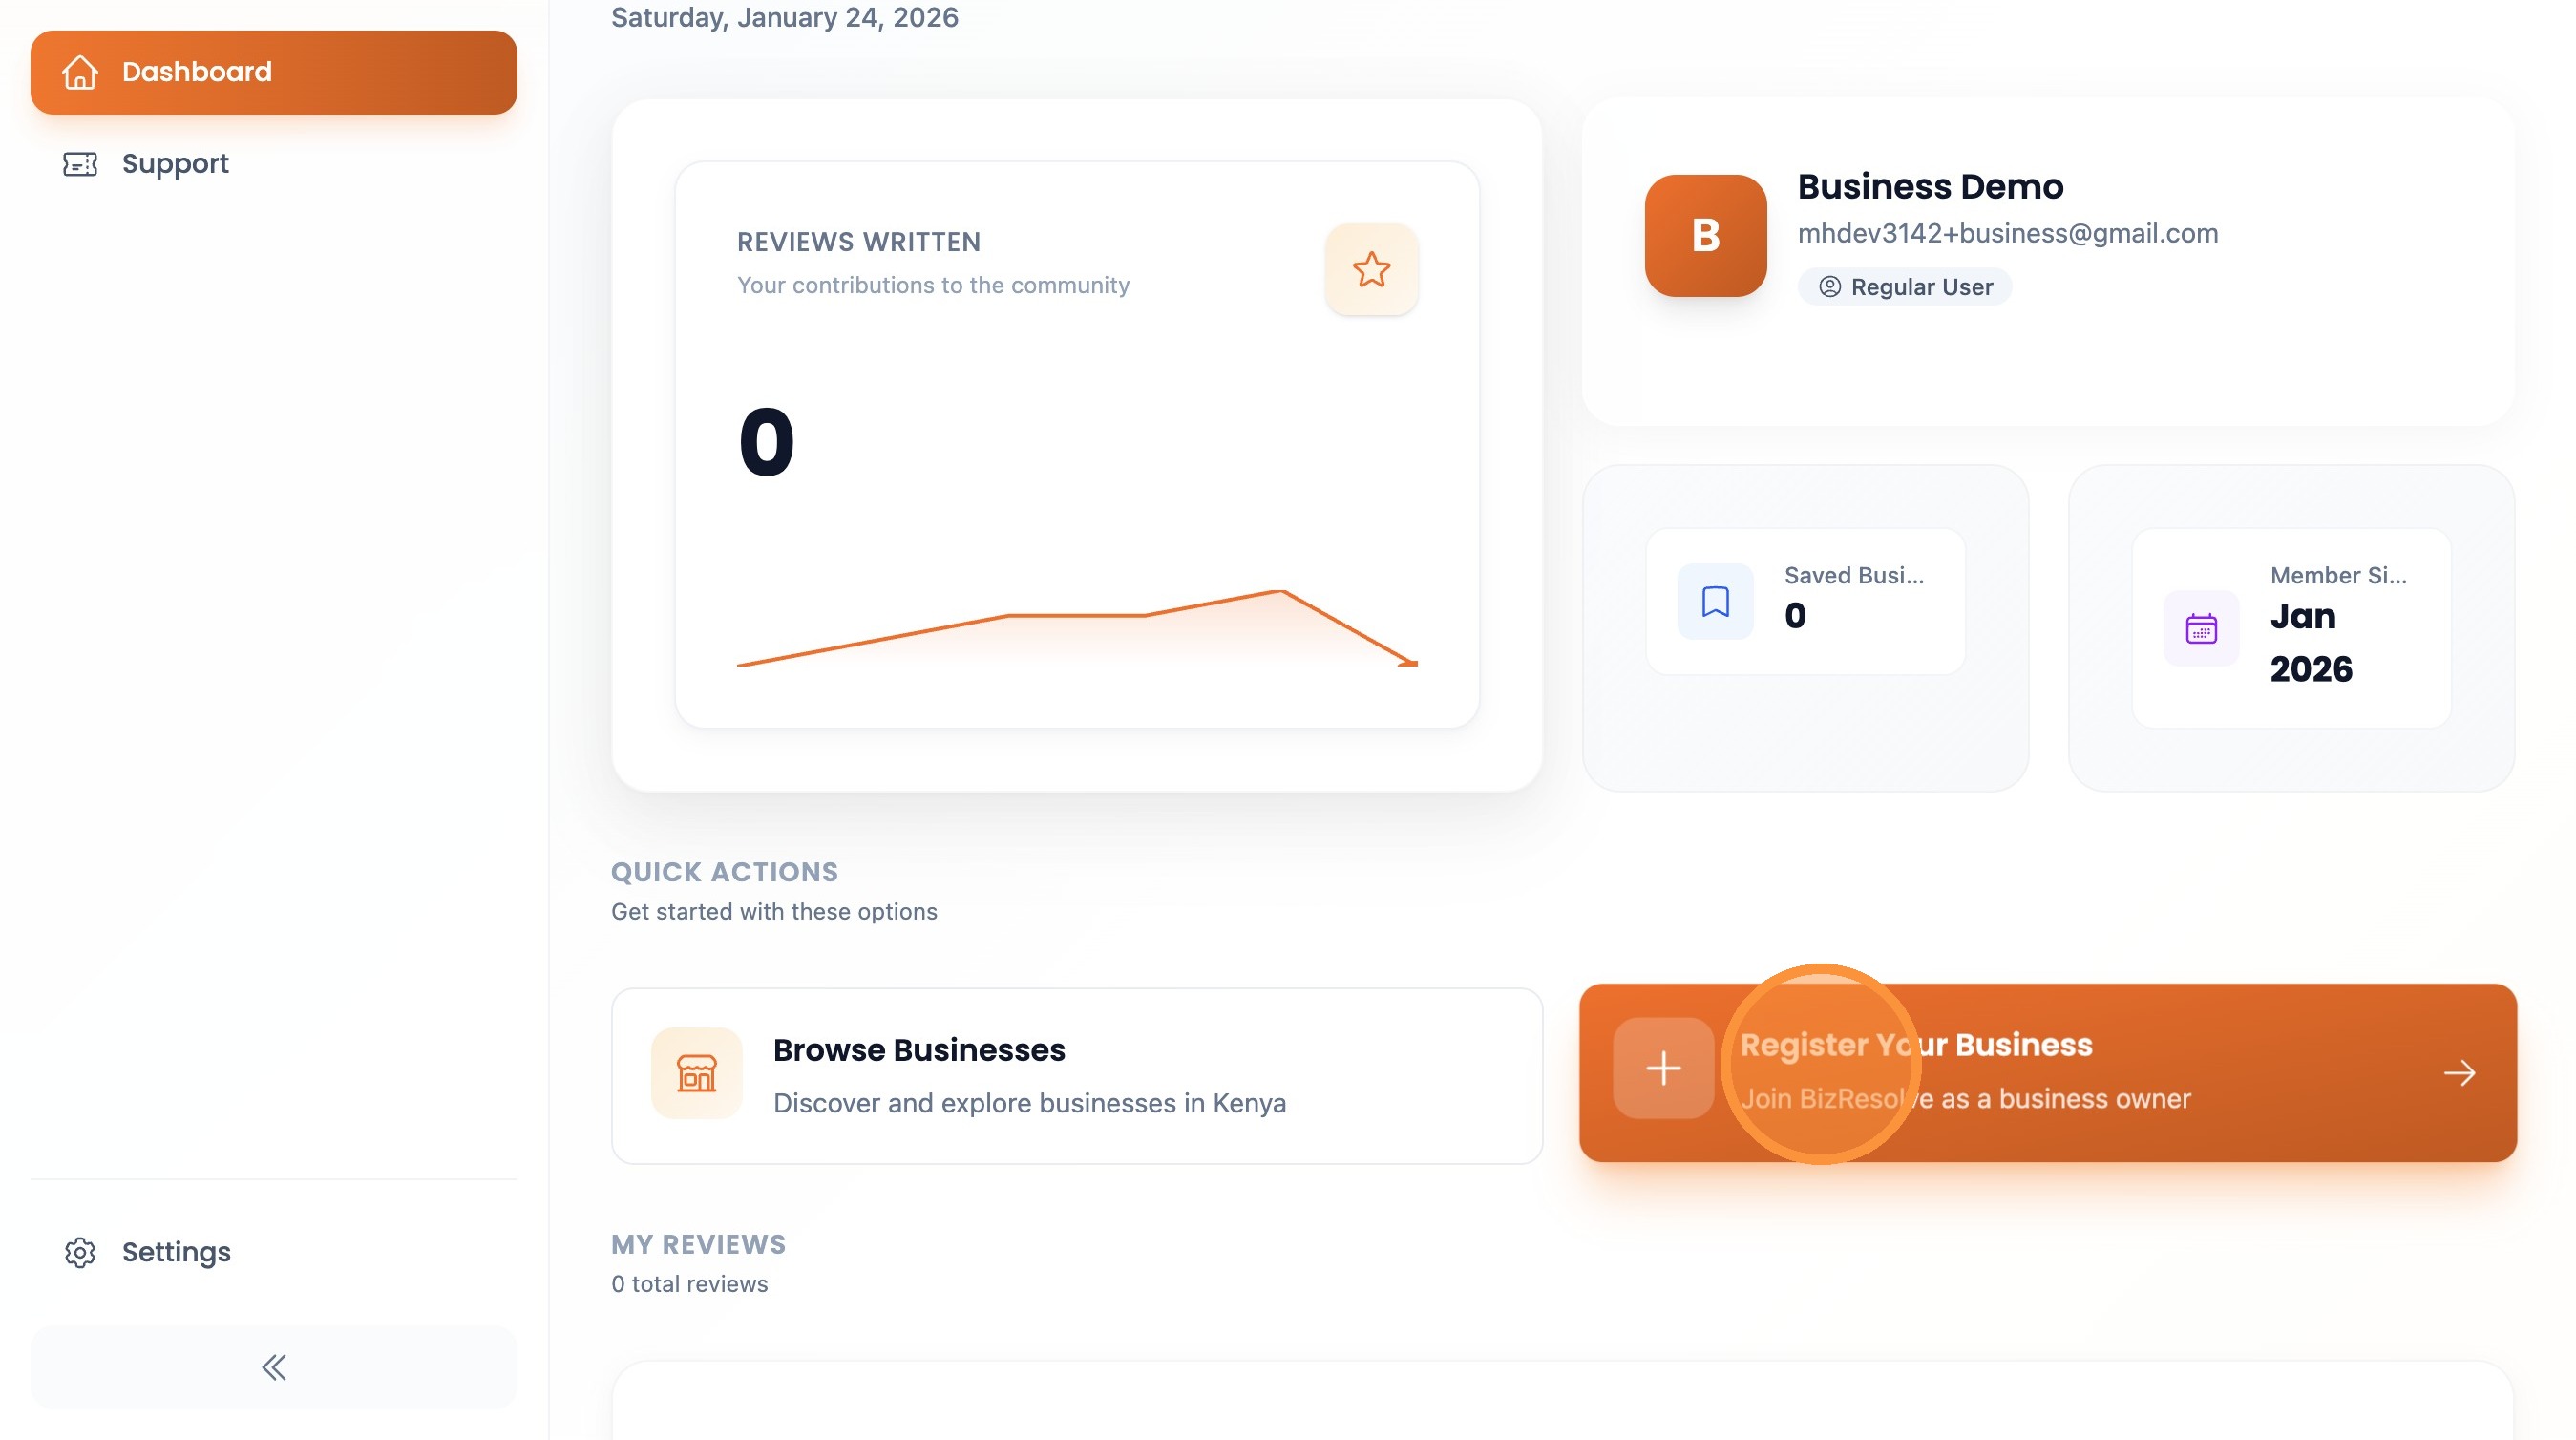
Click "Dashboard"

Click "Register Your Business"
Business Information
Enter your business details including name, description, and contact info
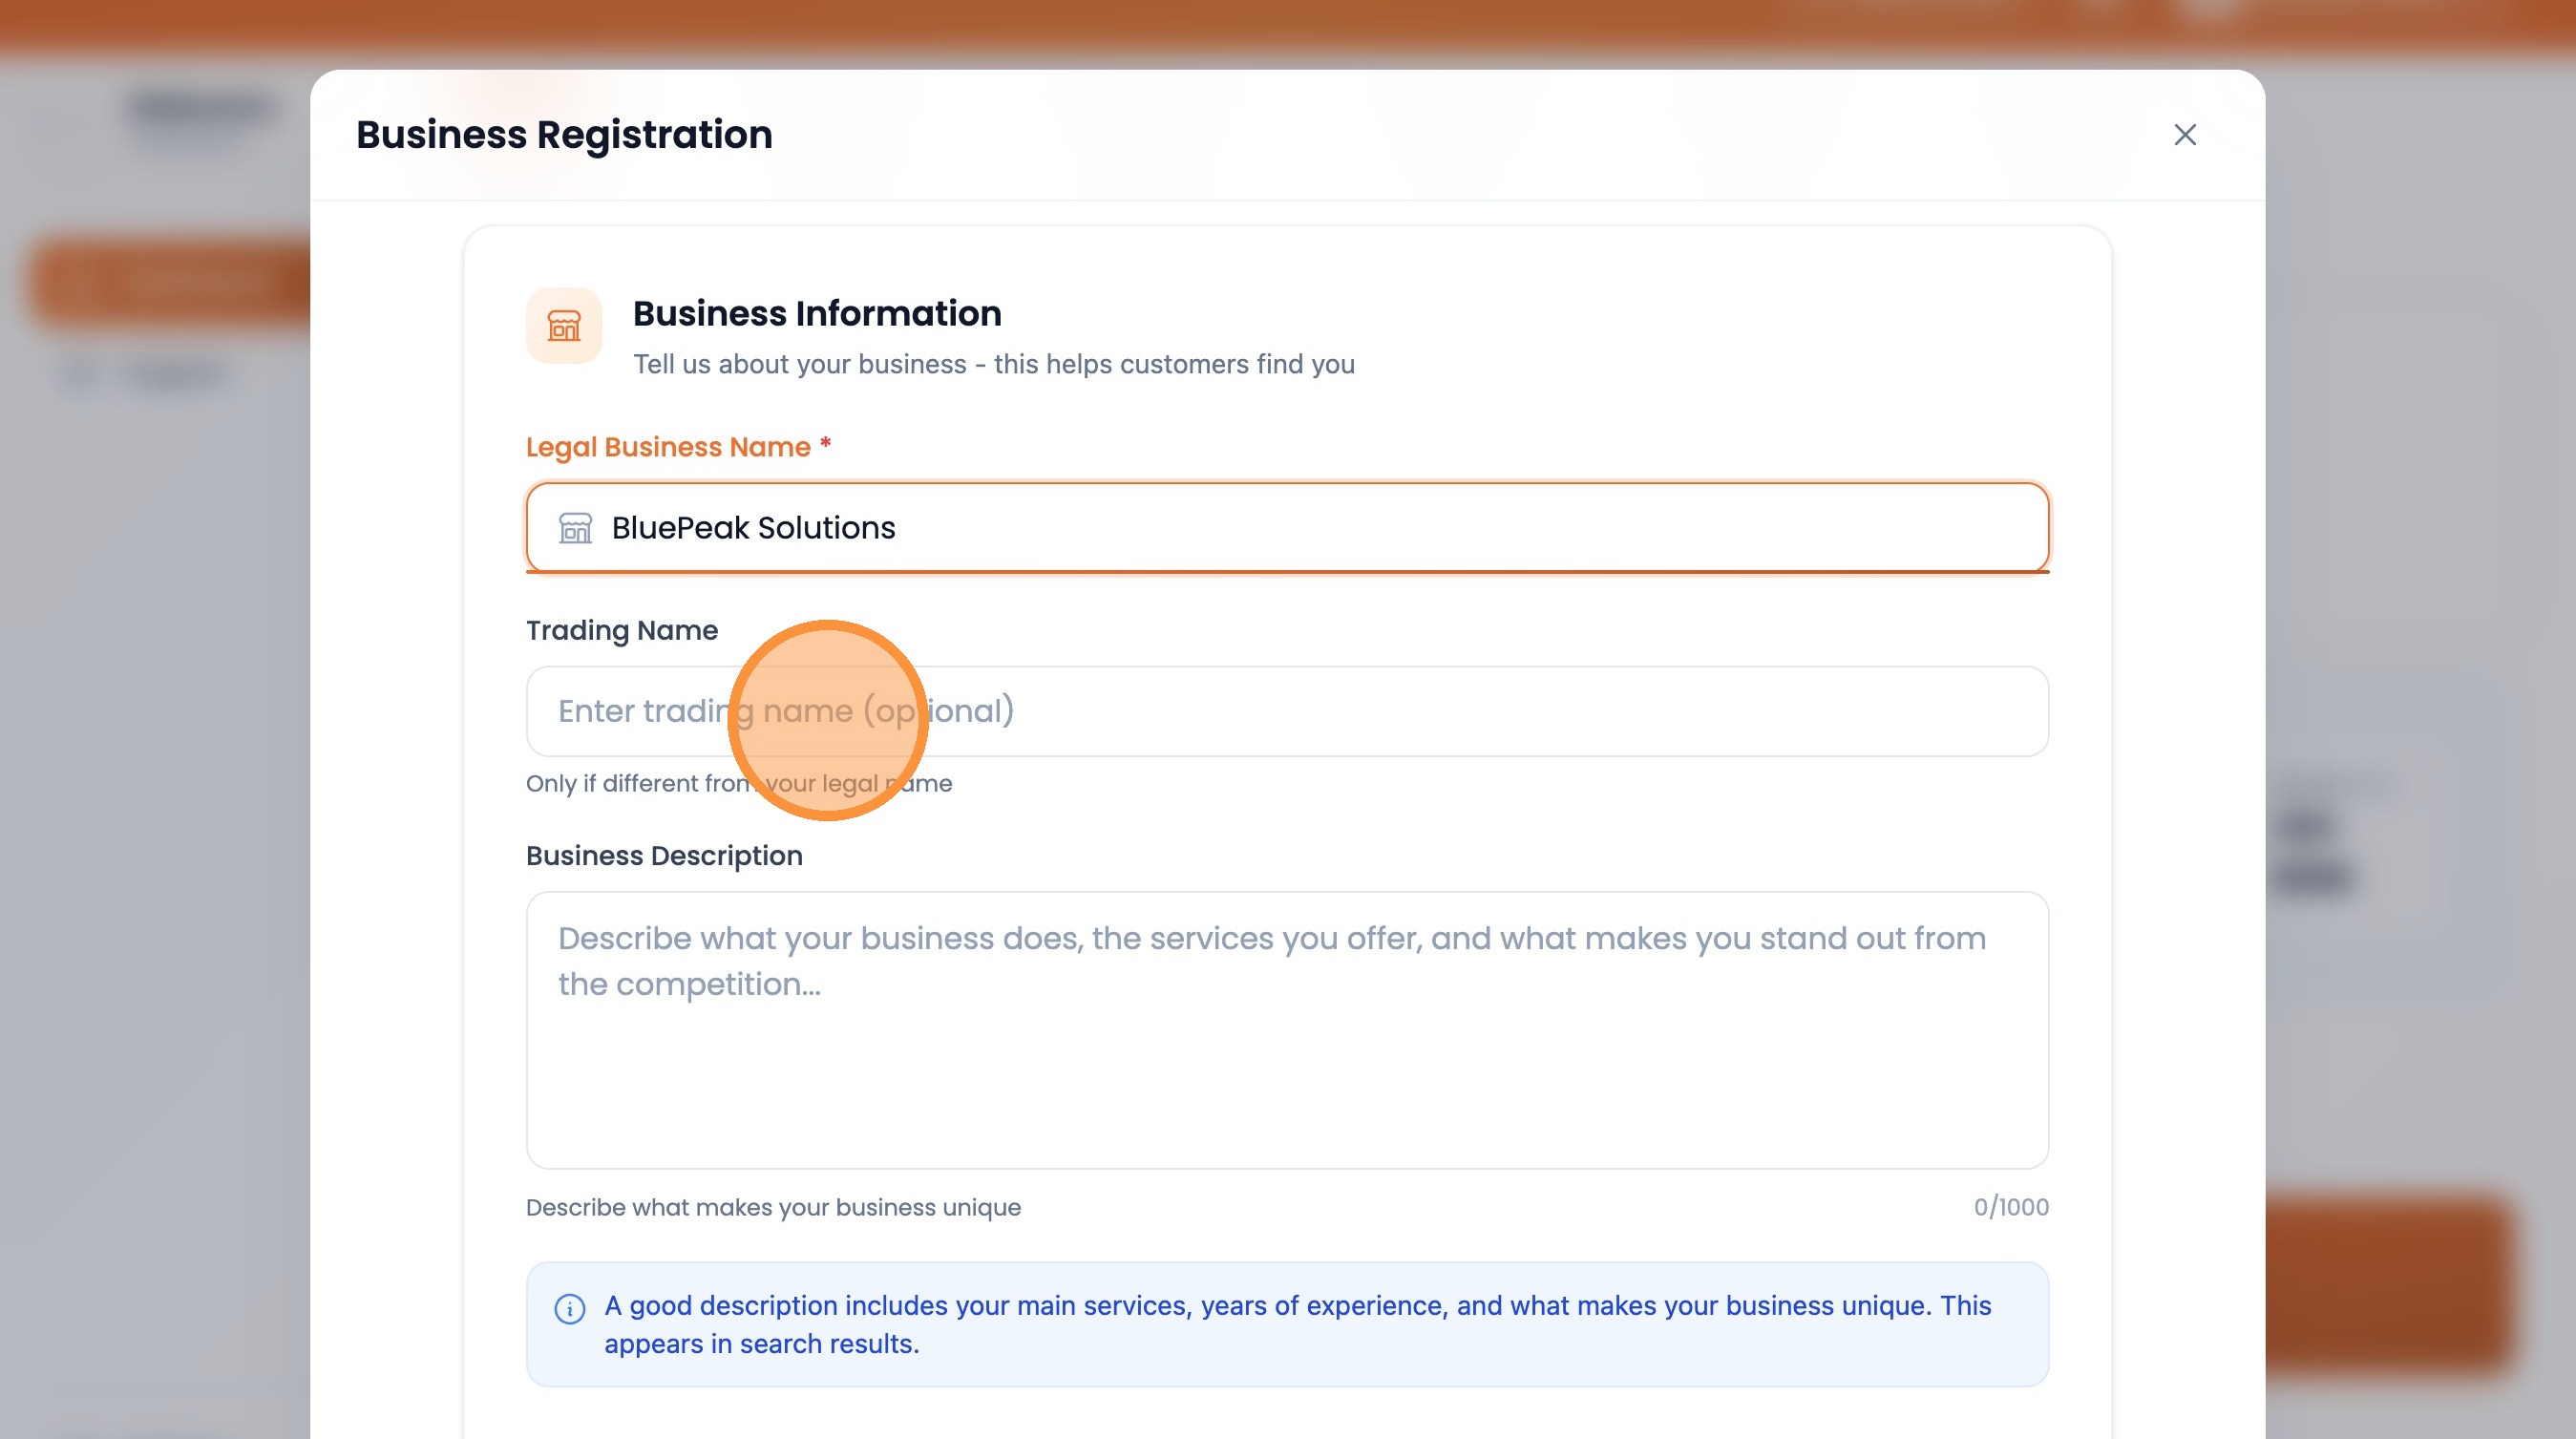
Enter your registered business name

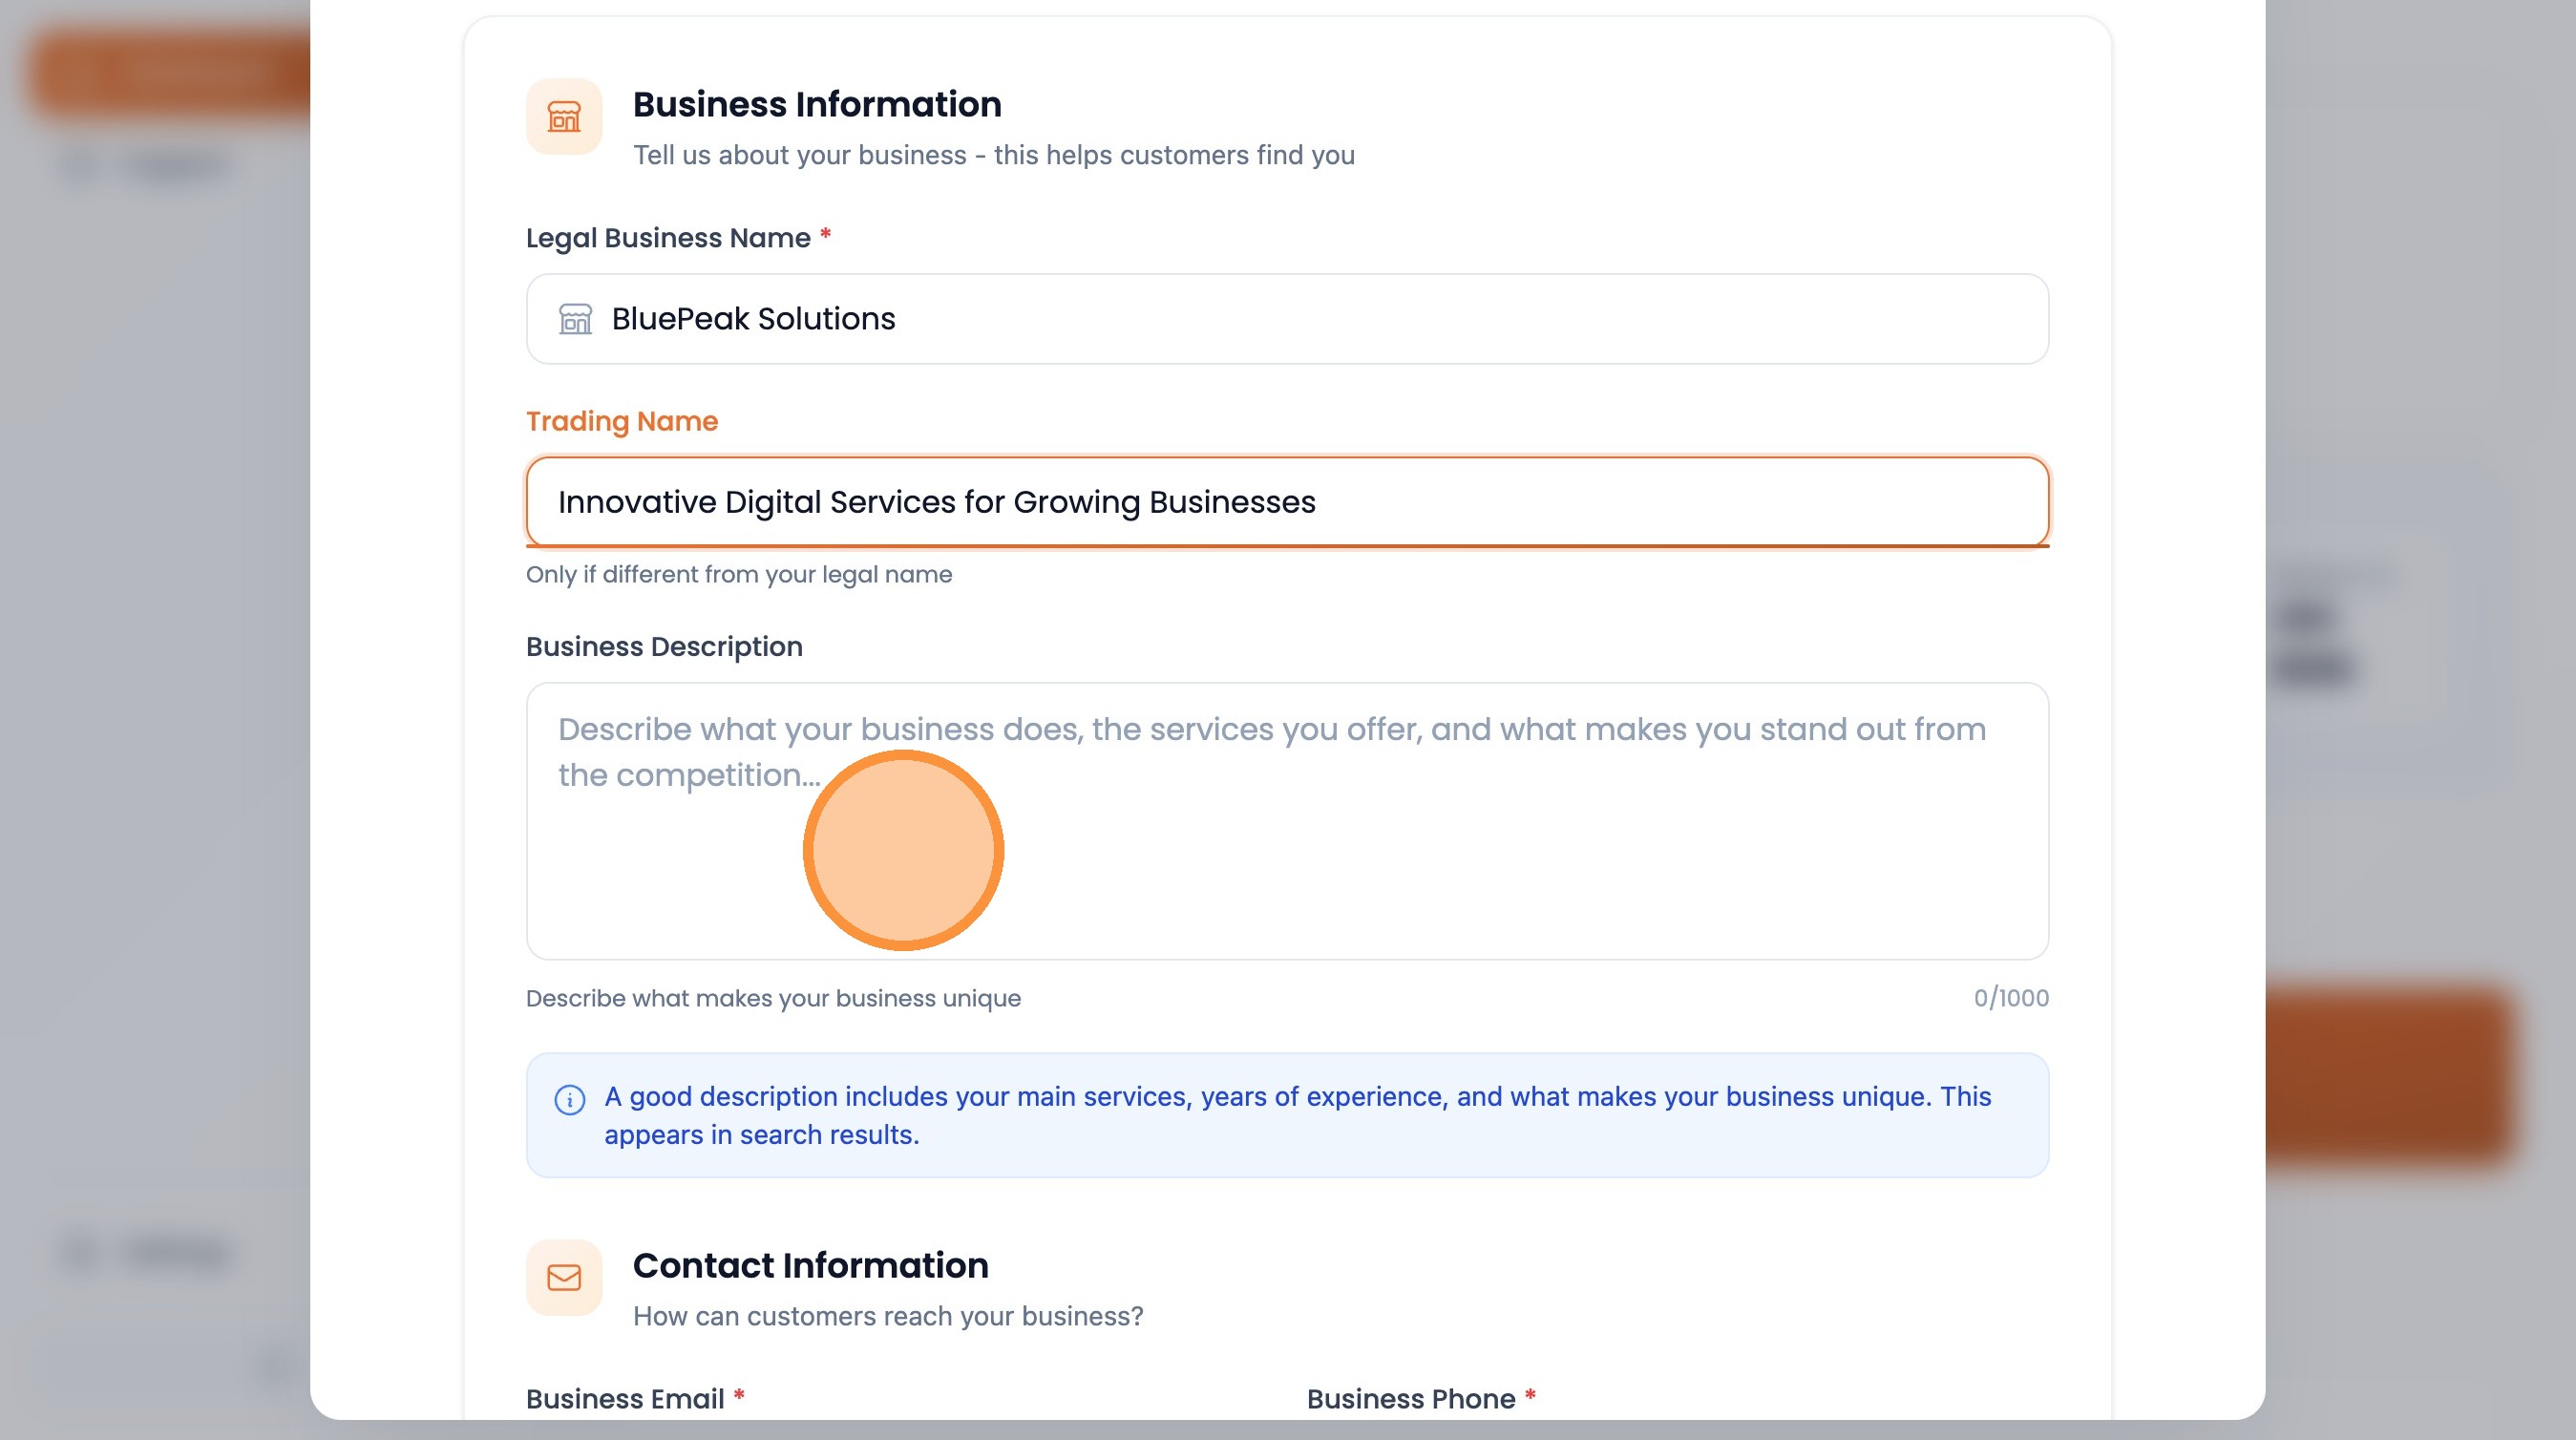
Enter trading name (optional)
Enter your business description
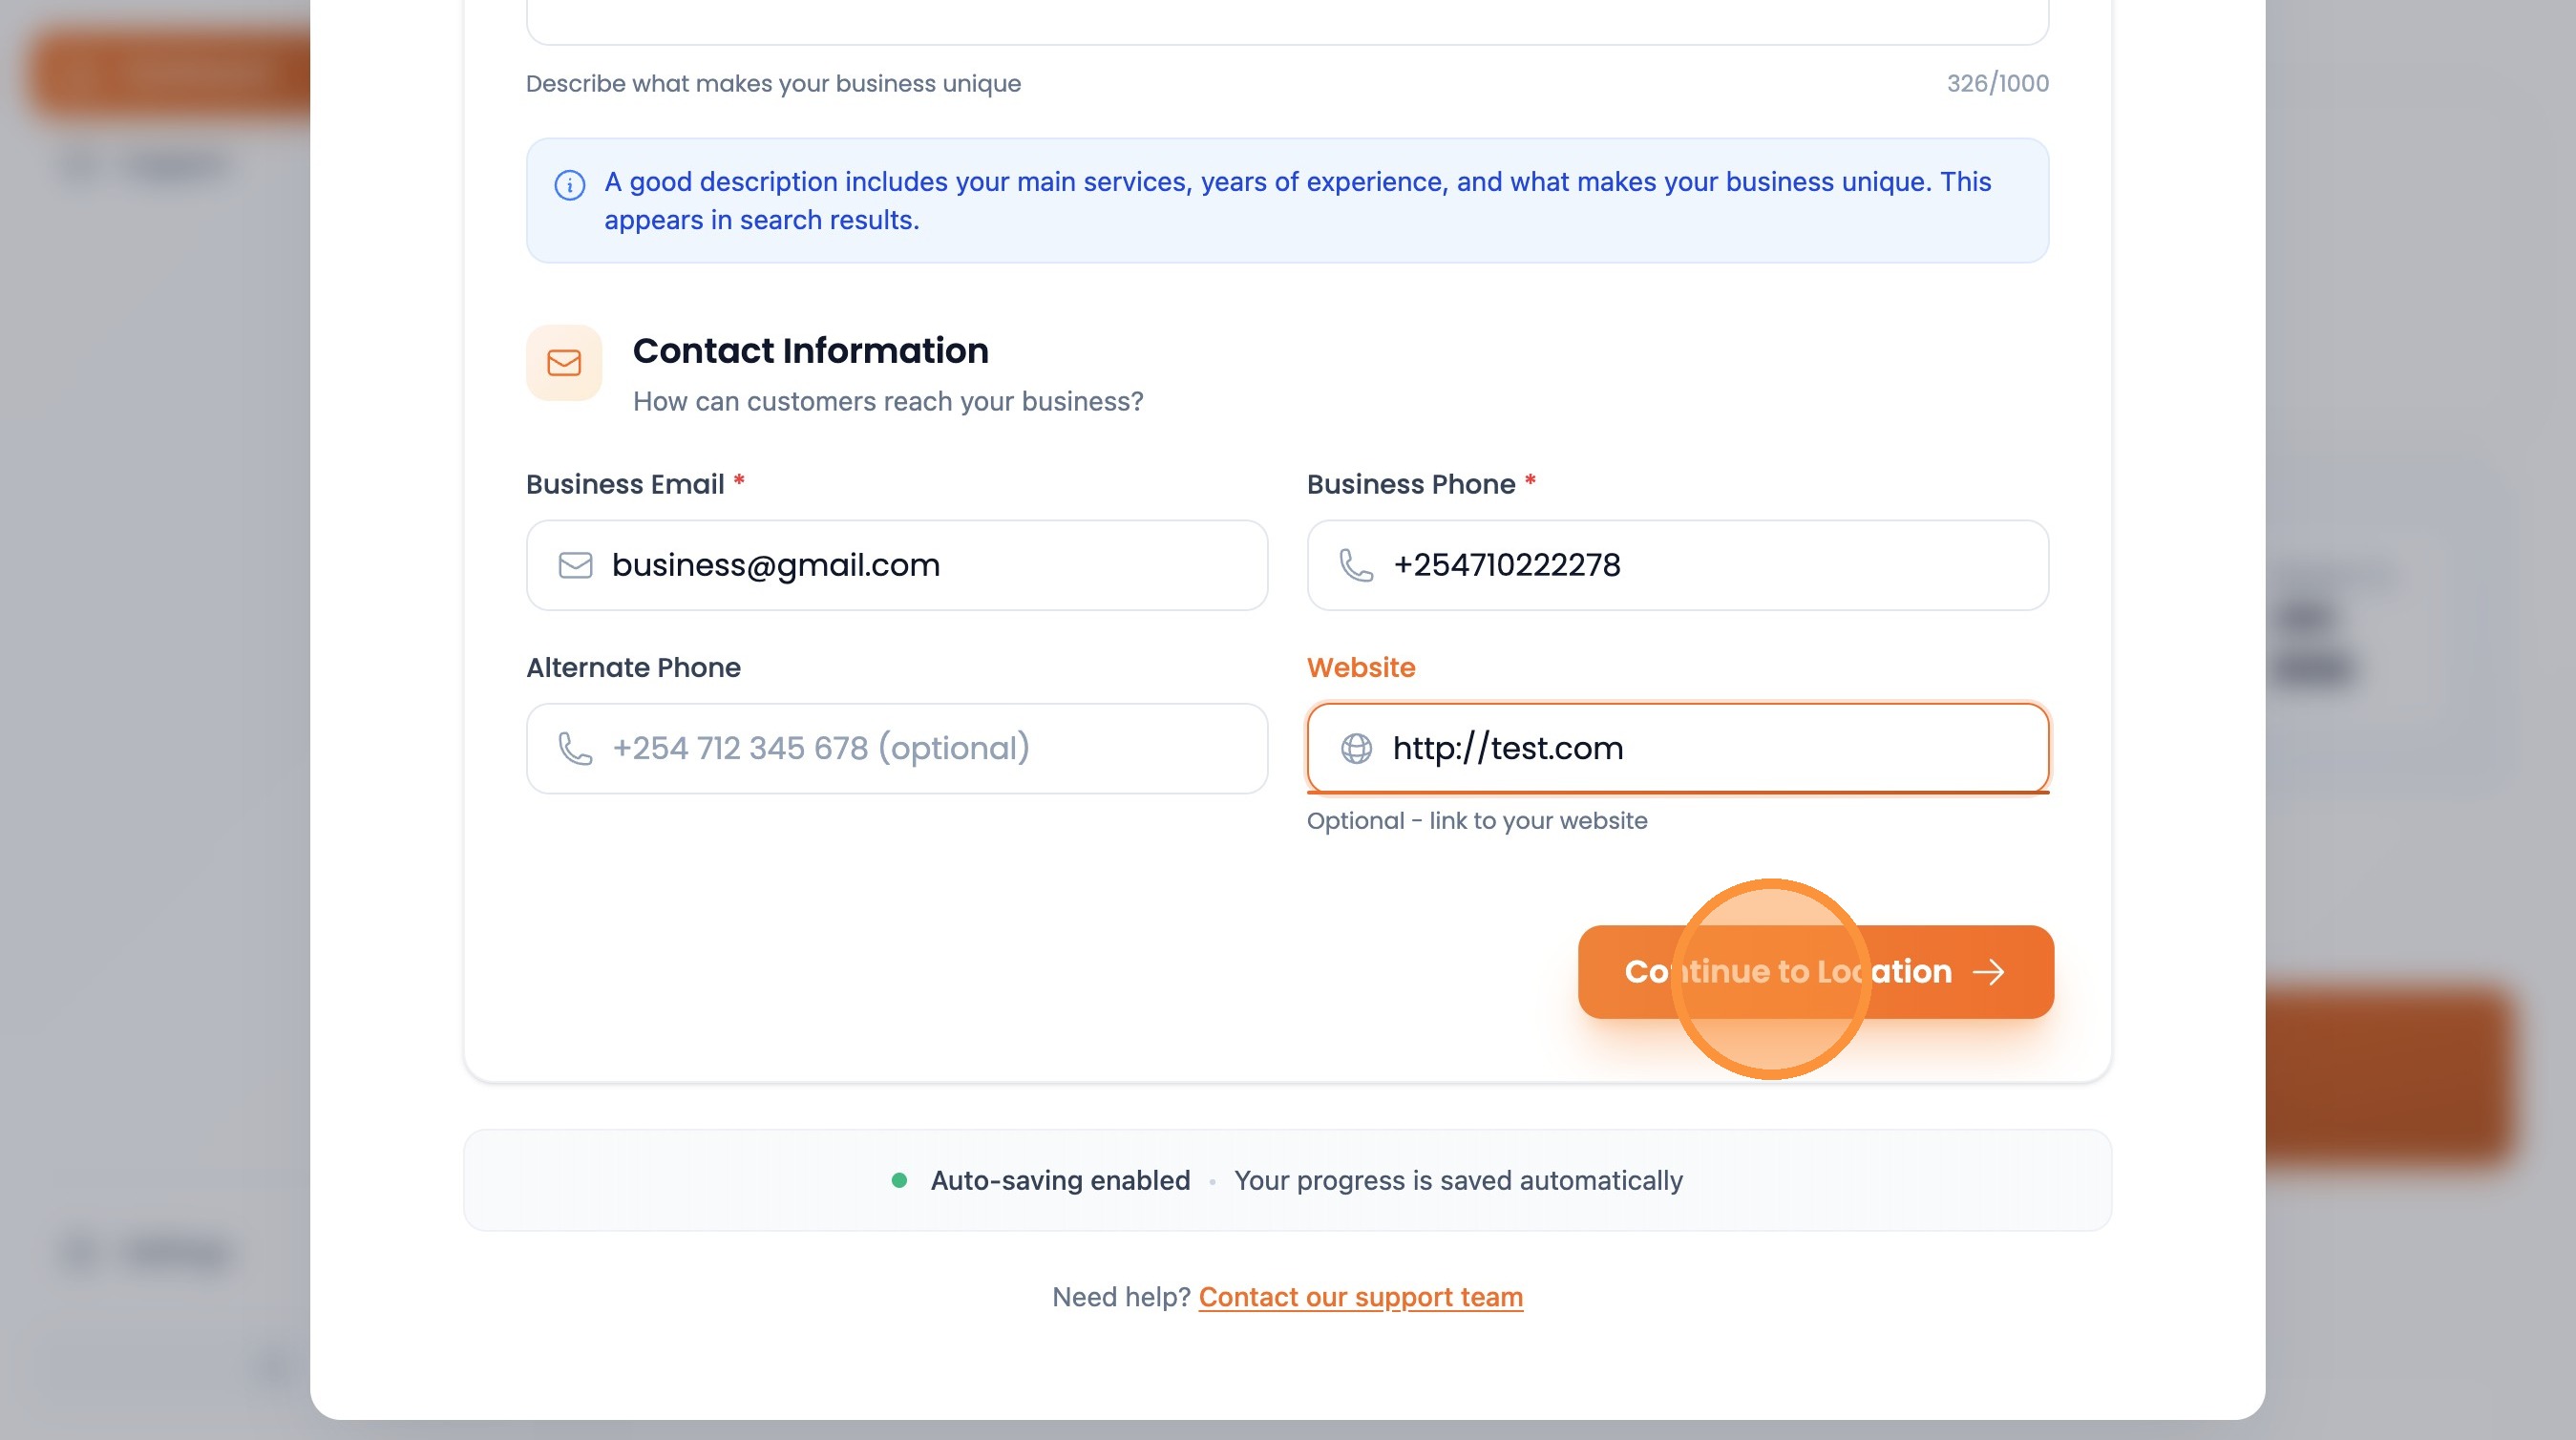
Enter your business email address
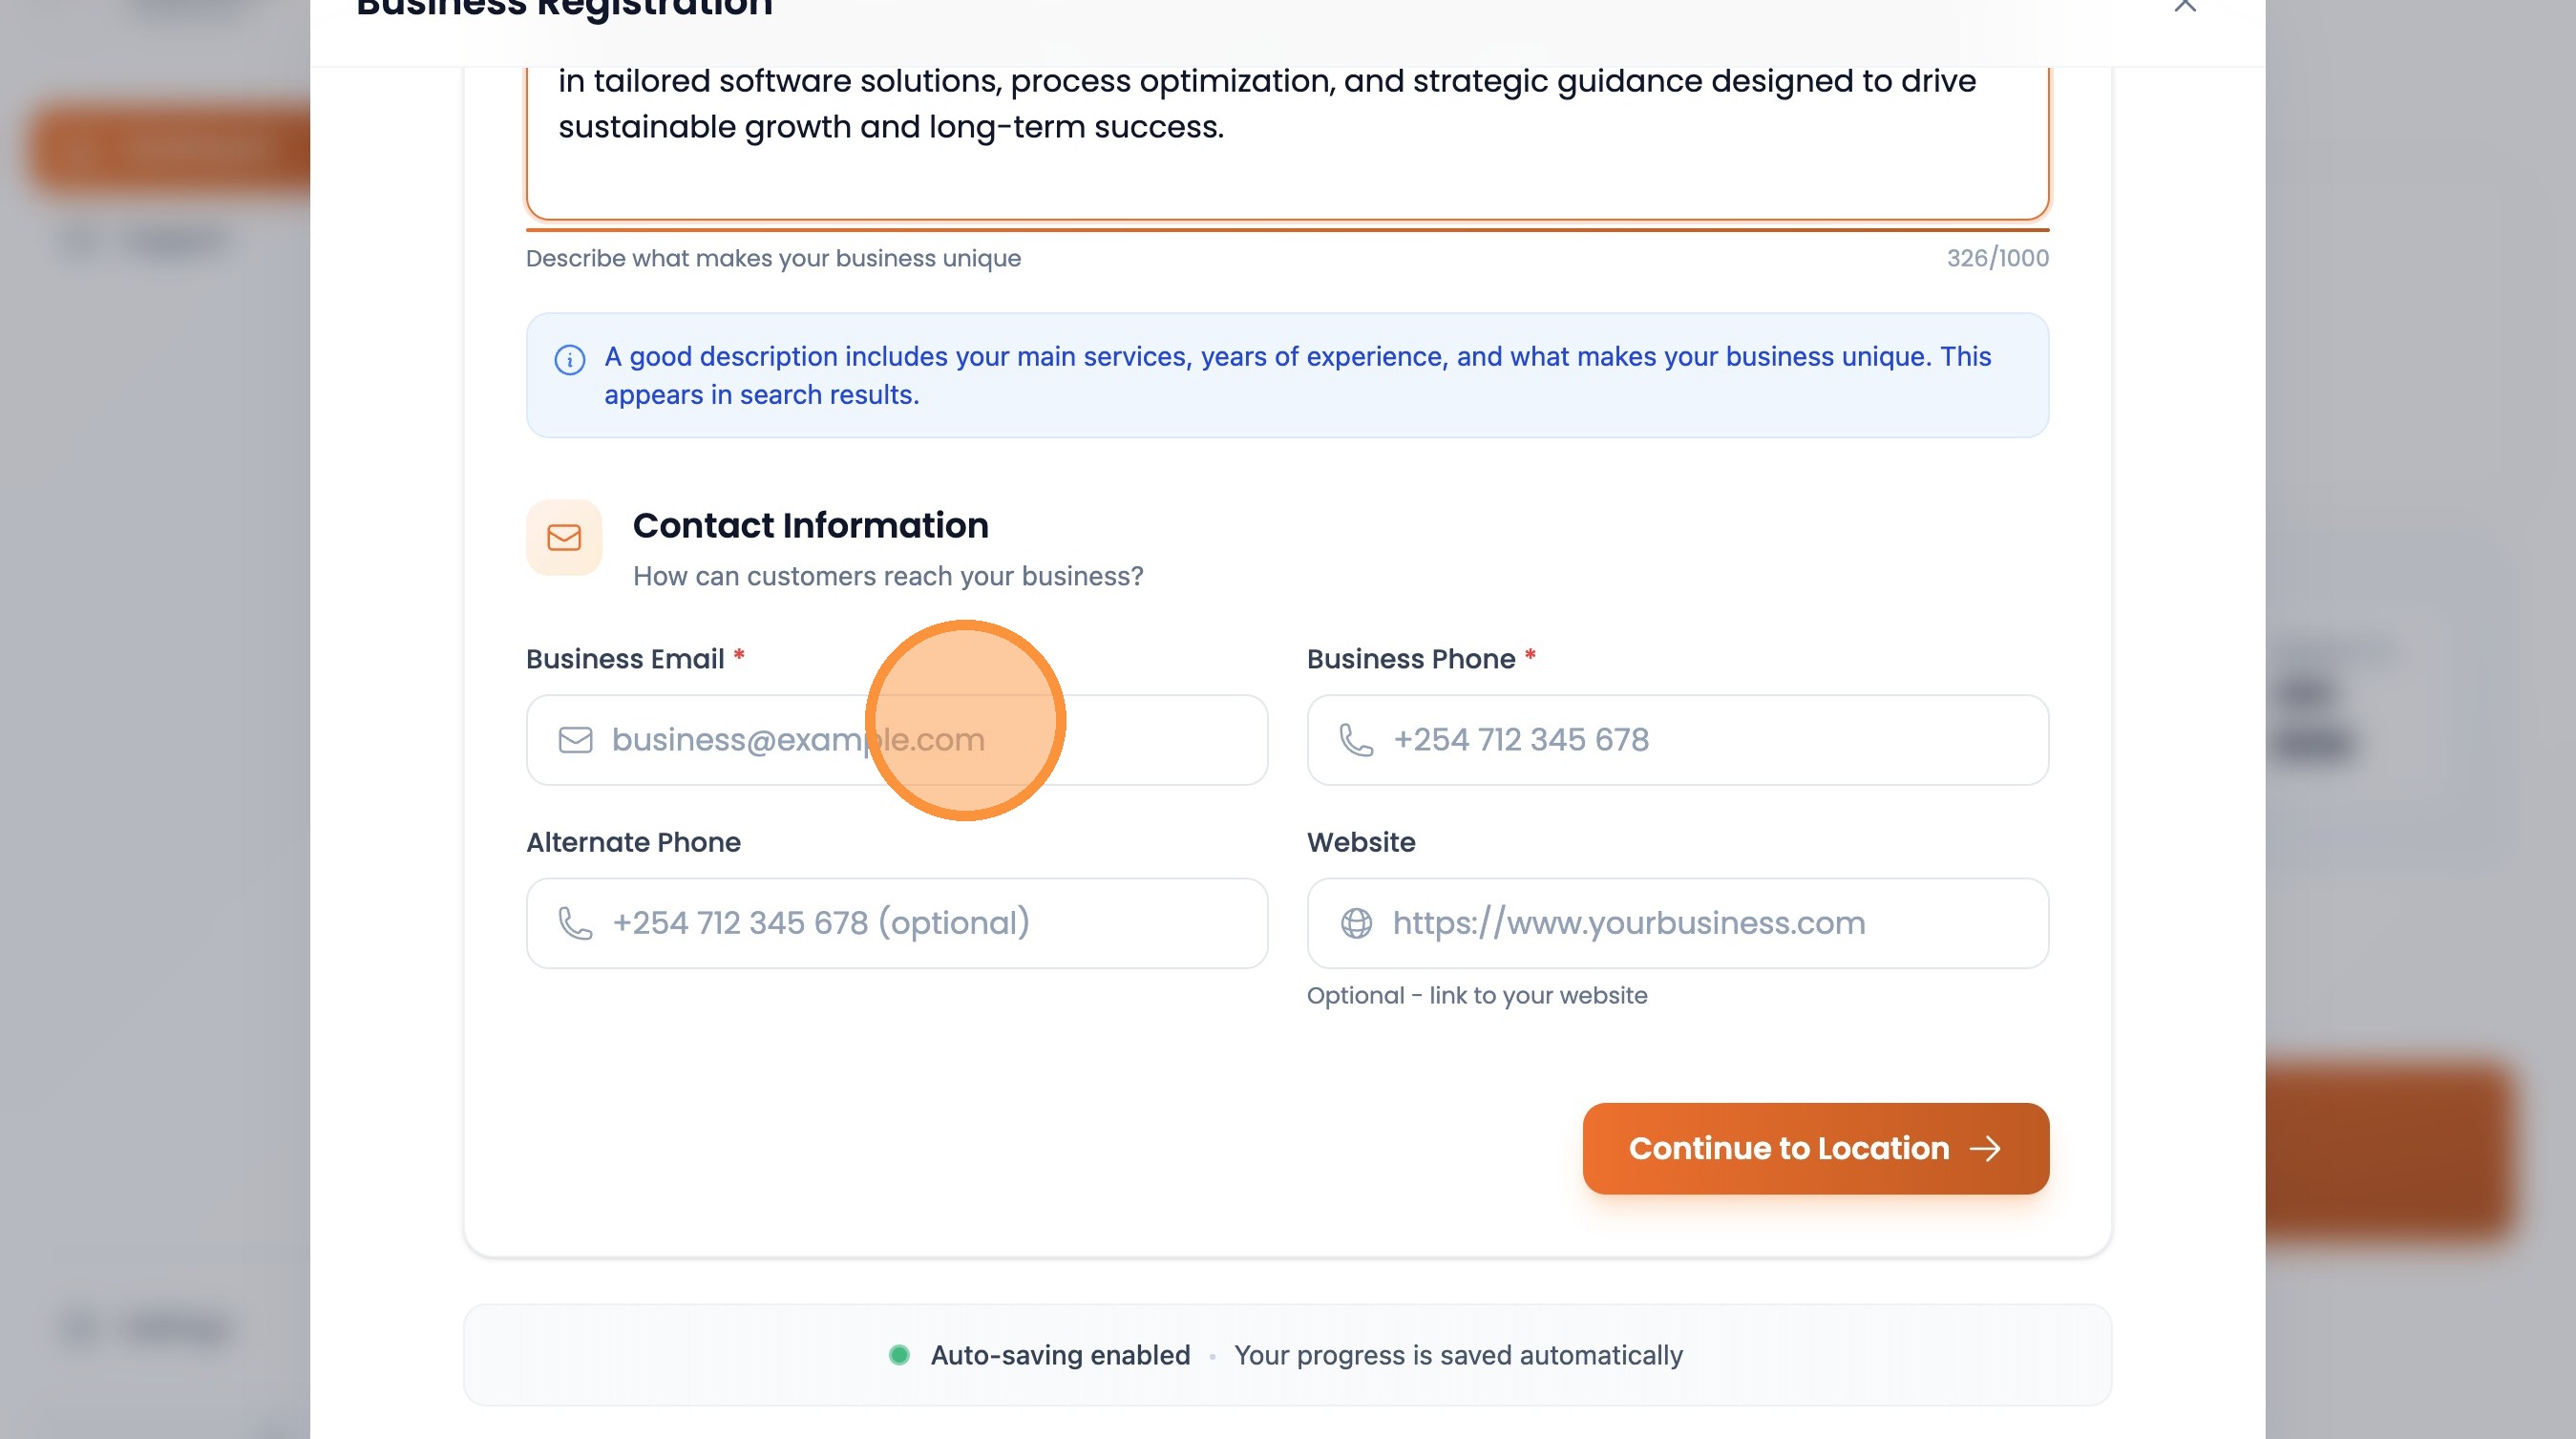
Enter your business phone number
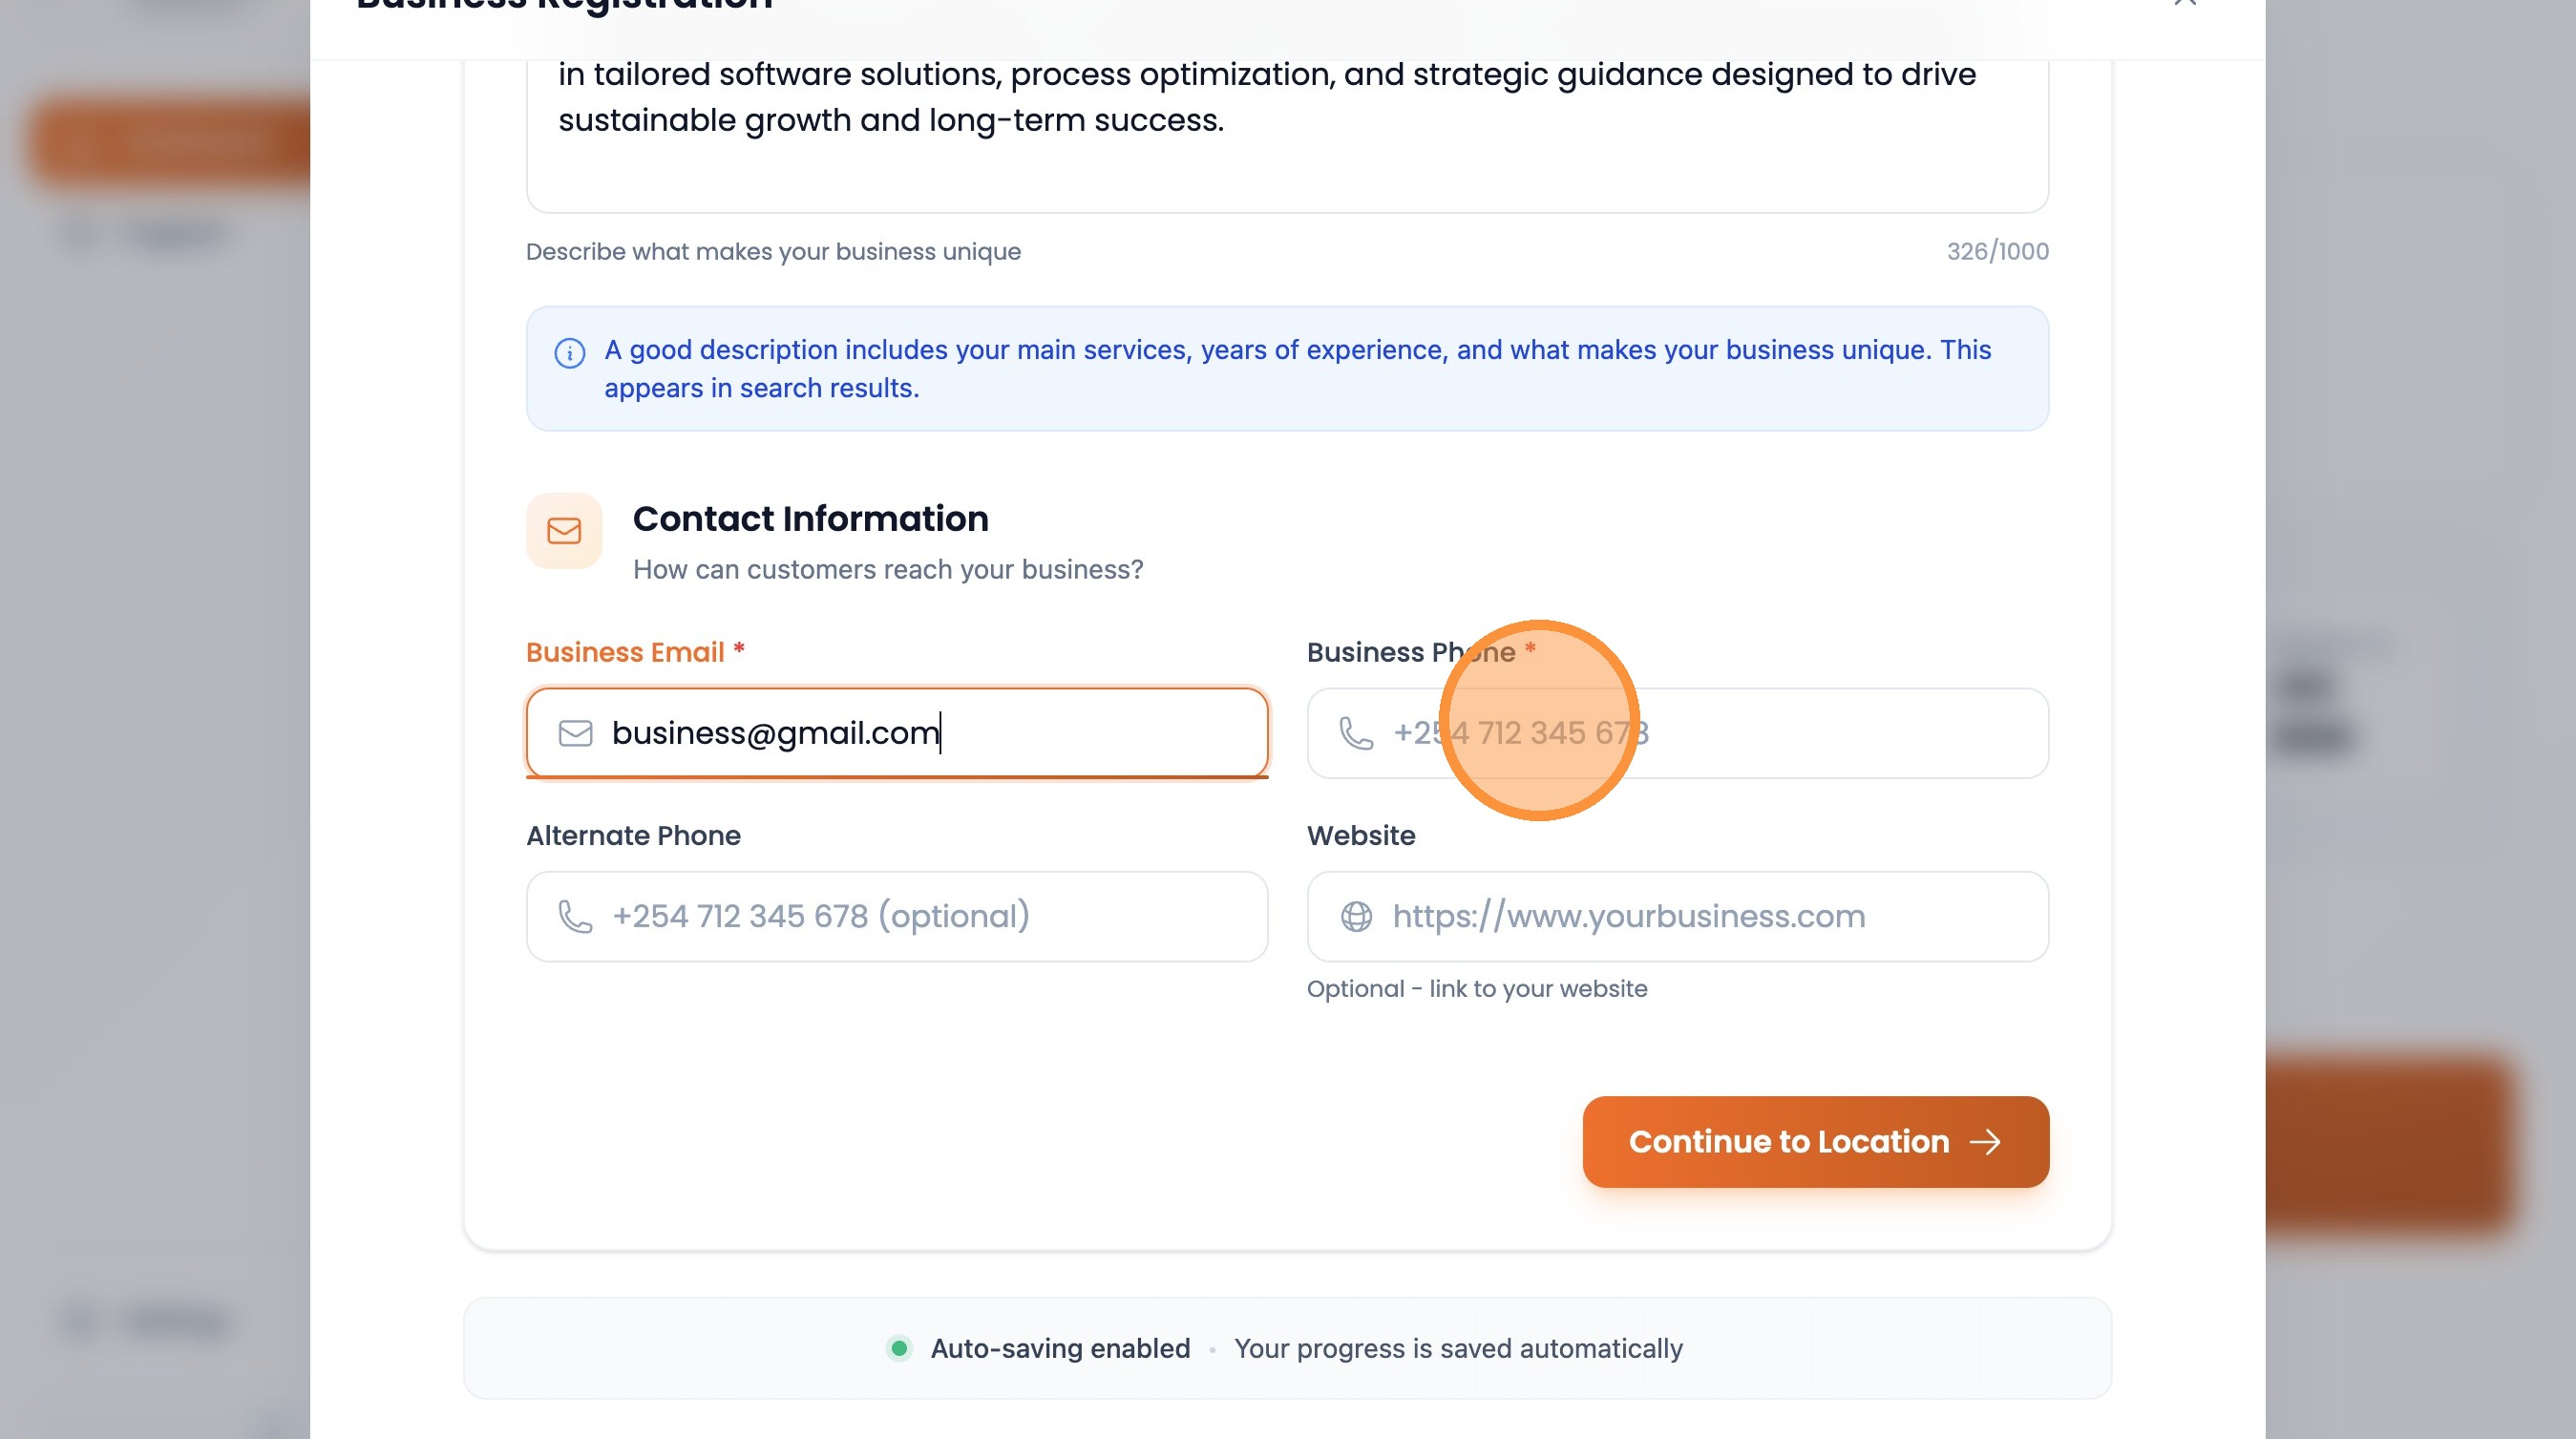
Enter your business website URL

Click "Continue to Location"
Location Details
Provide your business location and service areas
Select your city
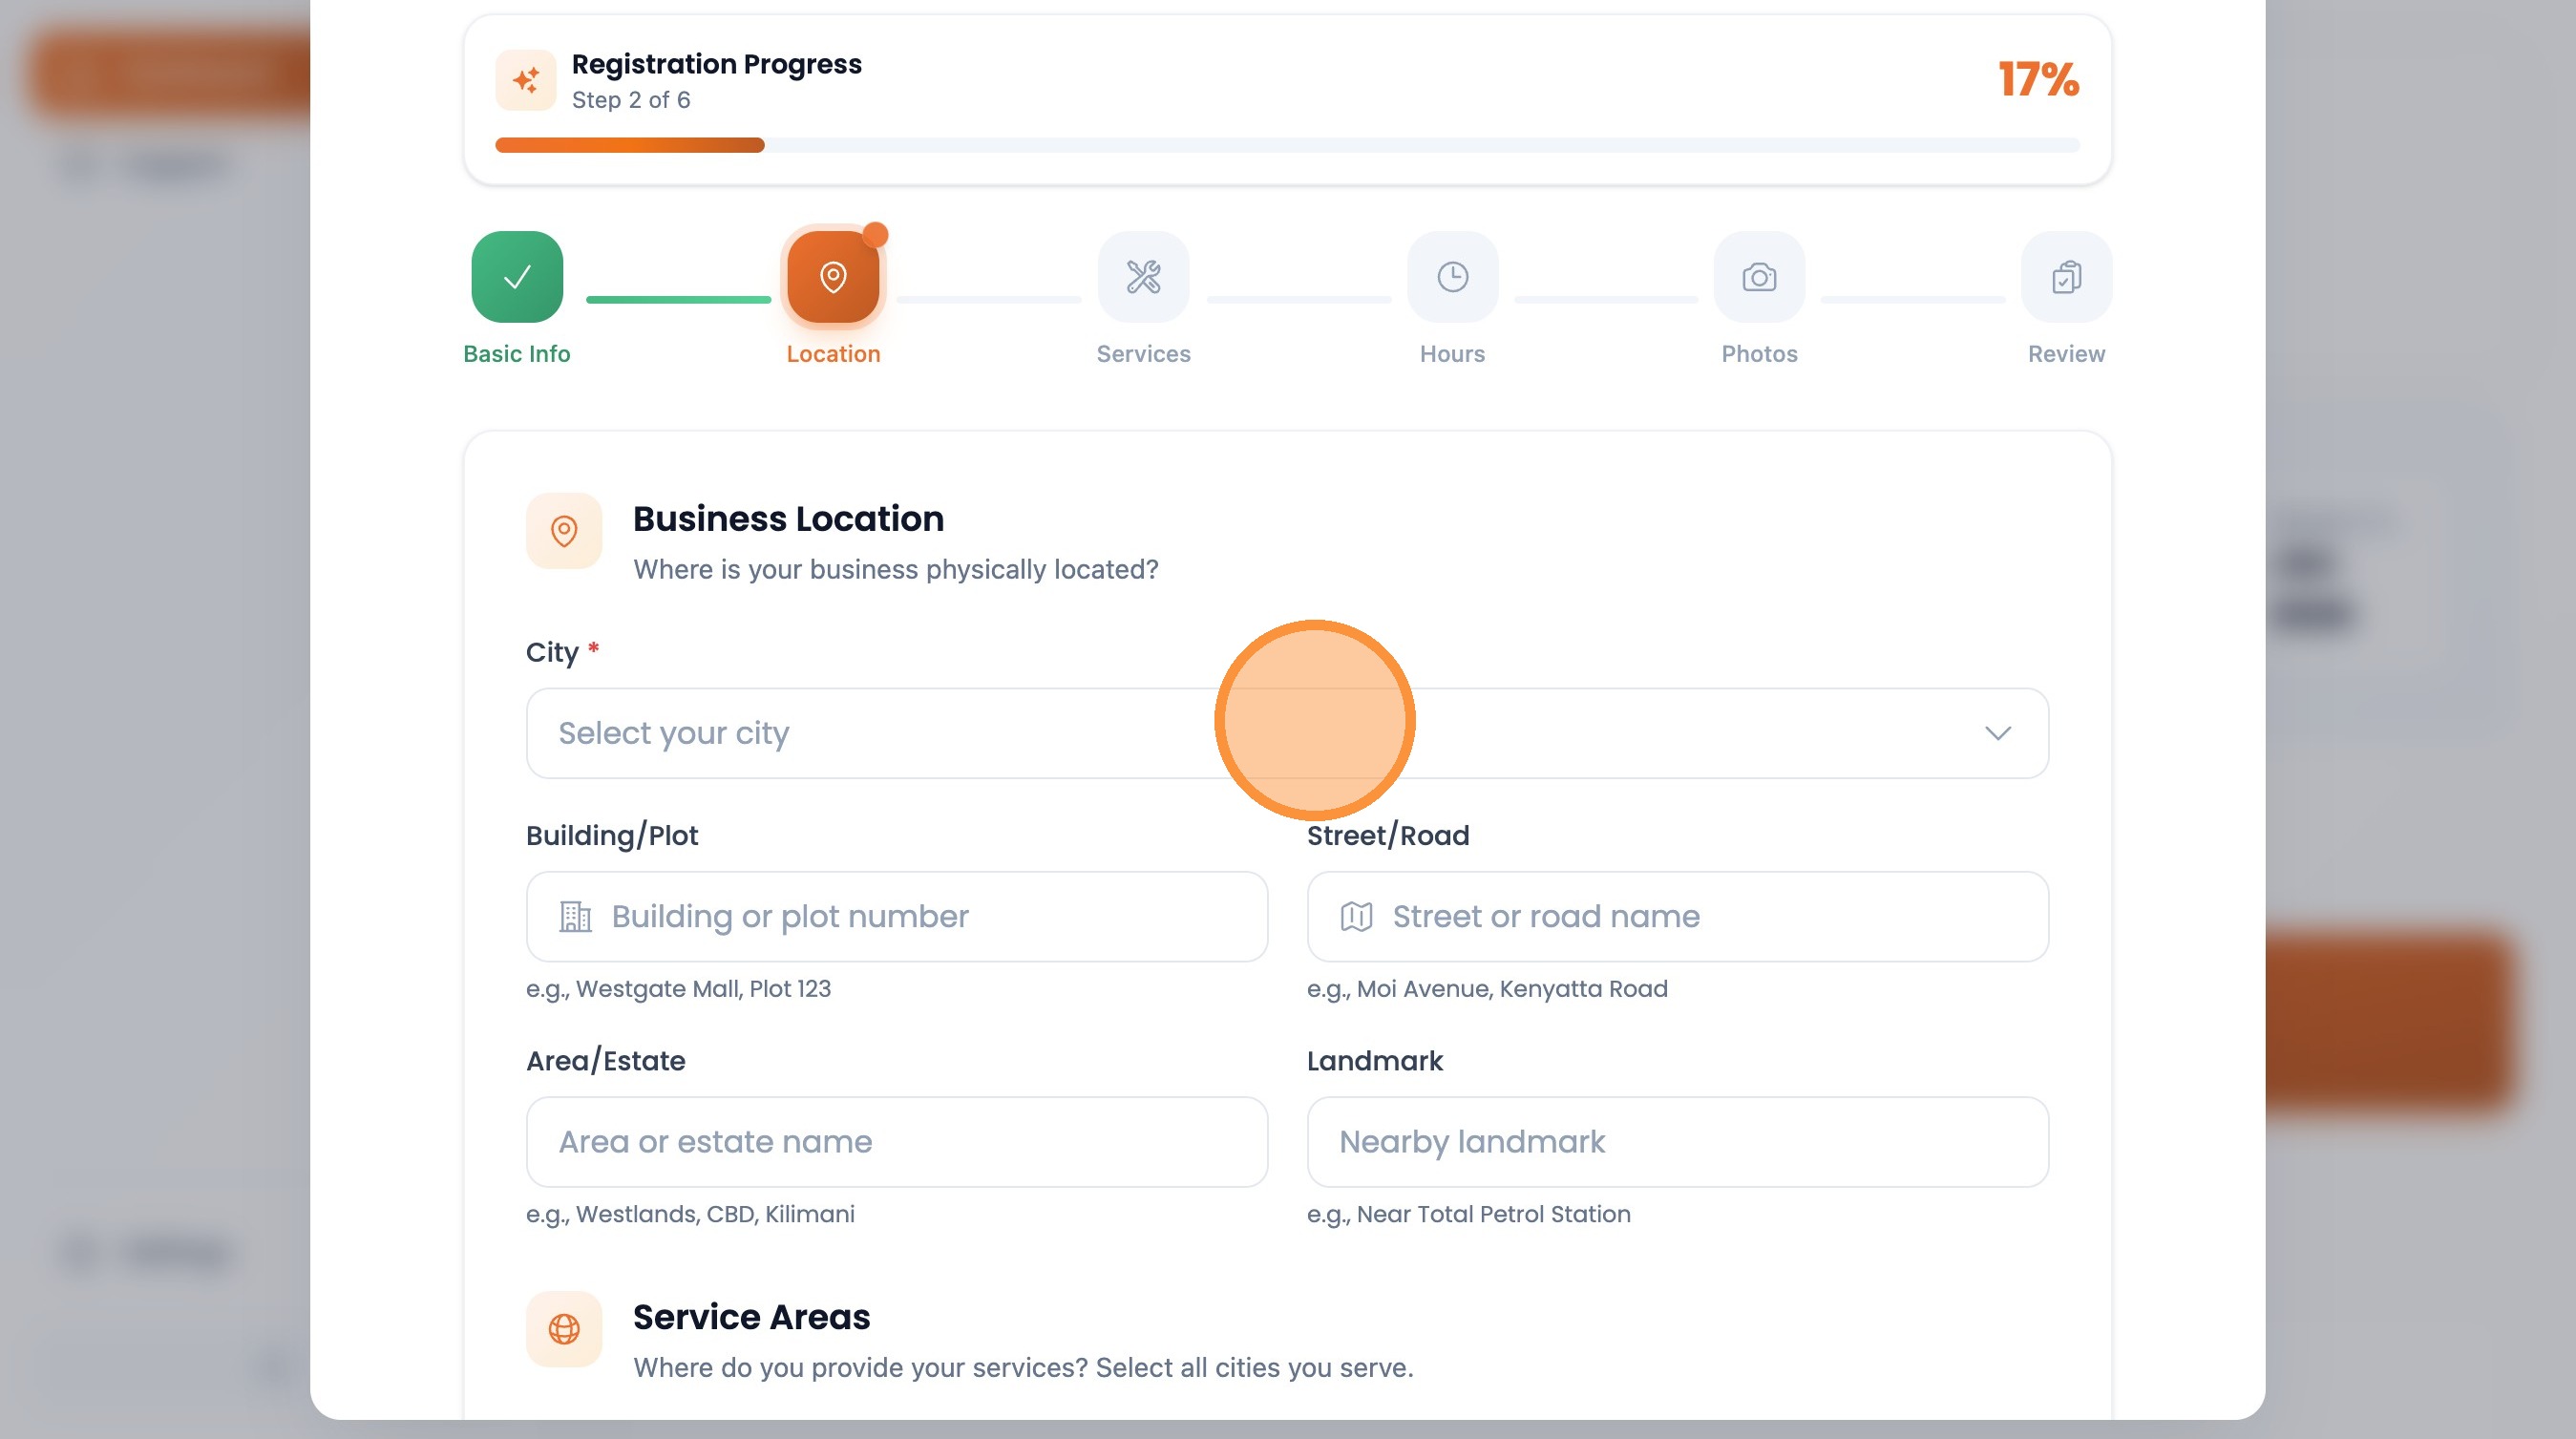
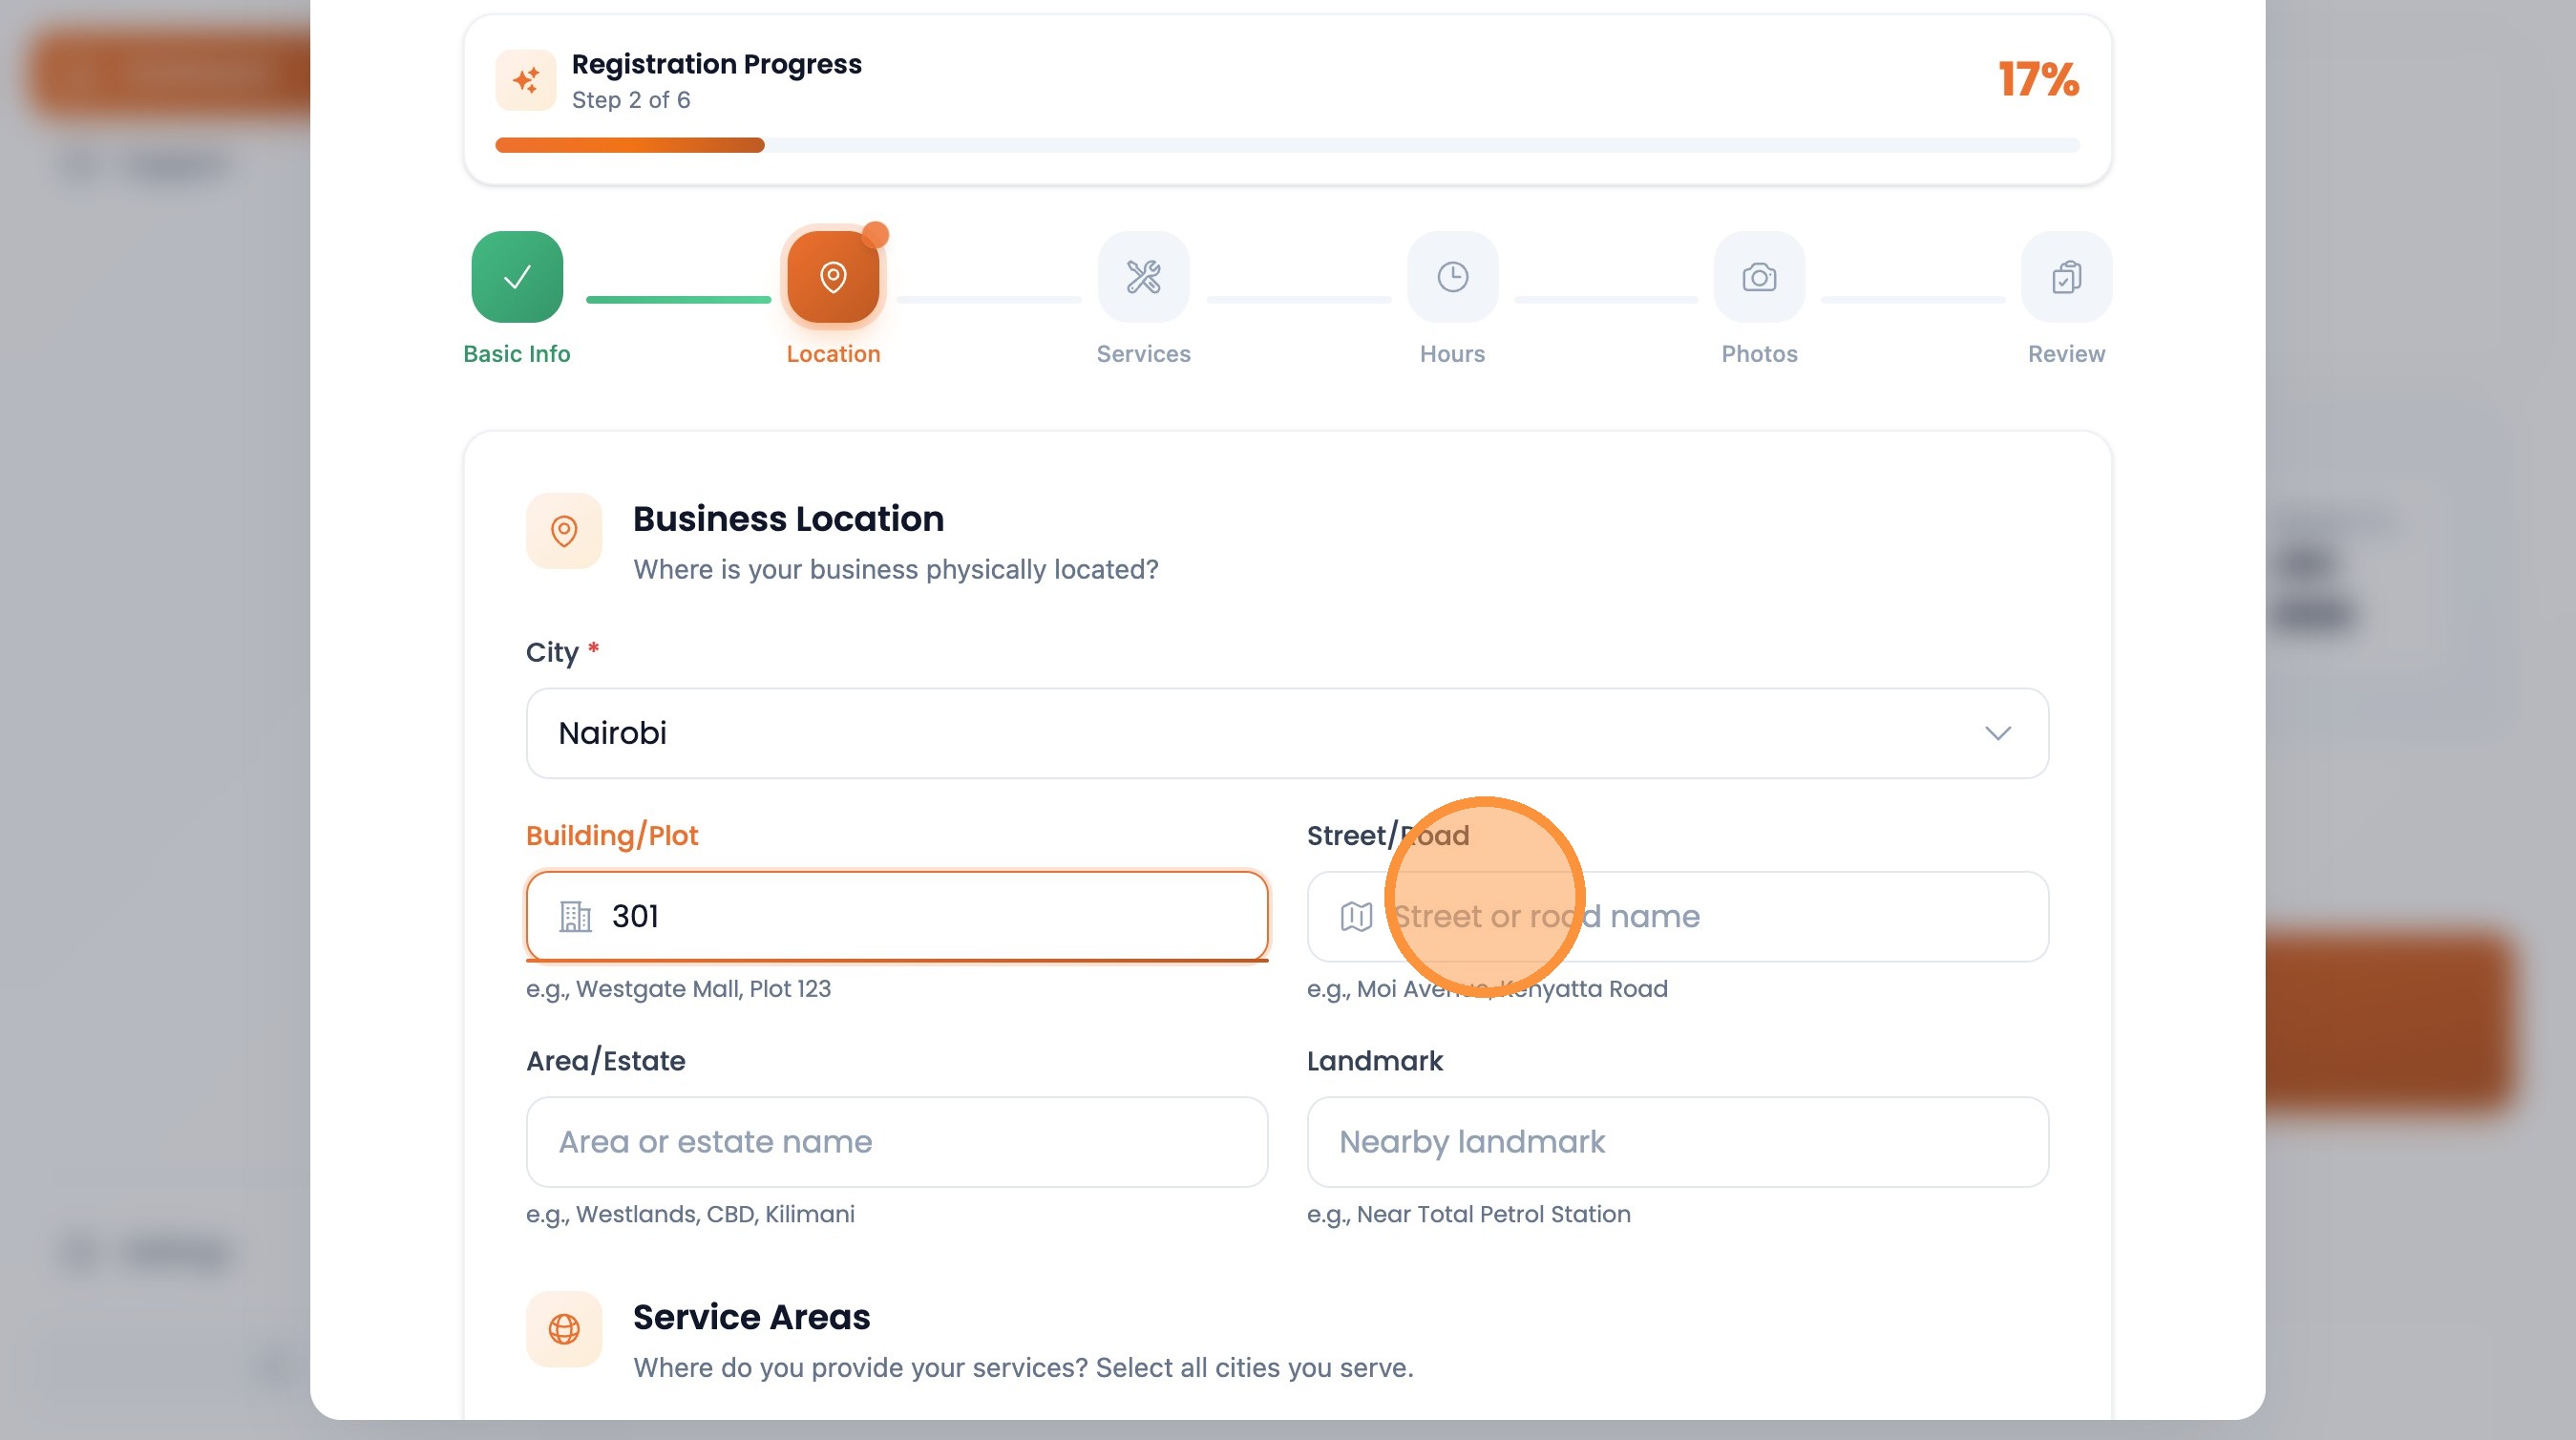
Enter the building or plot number
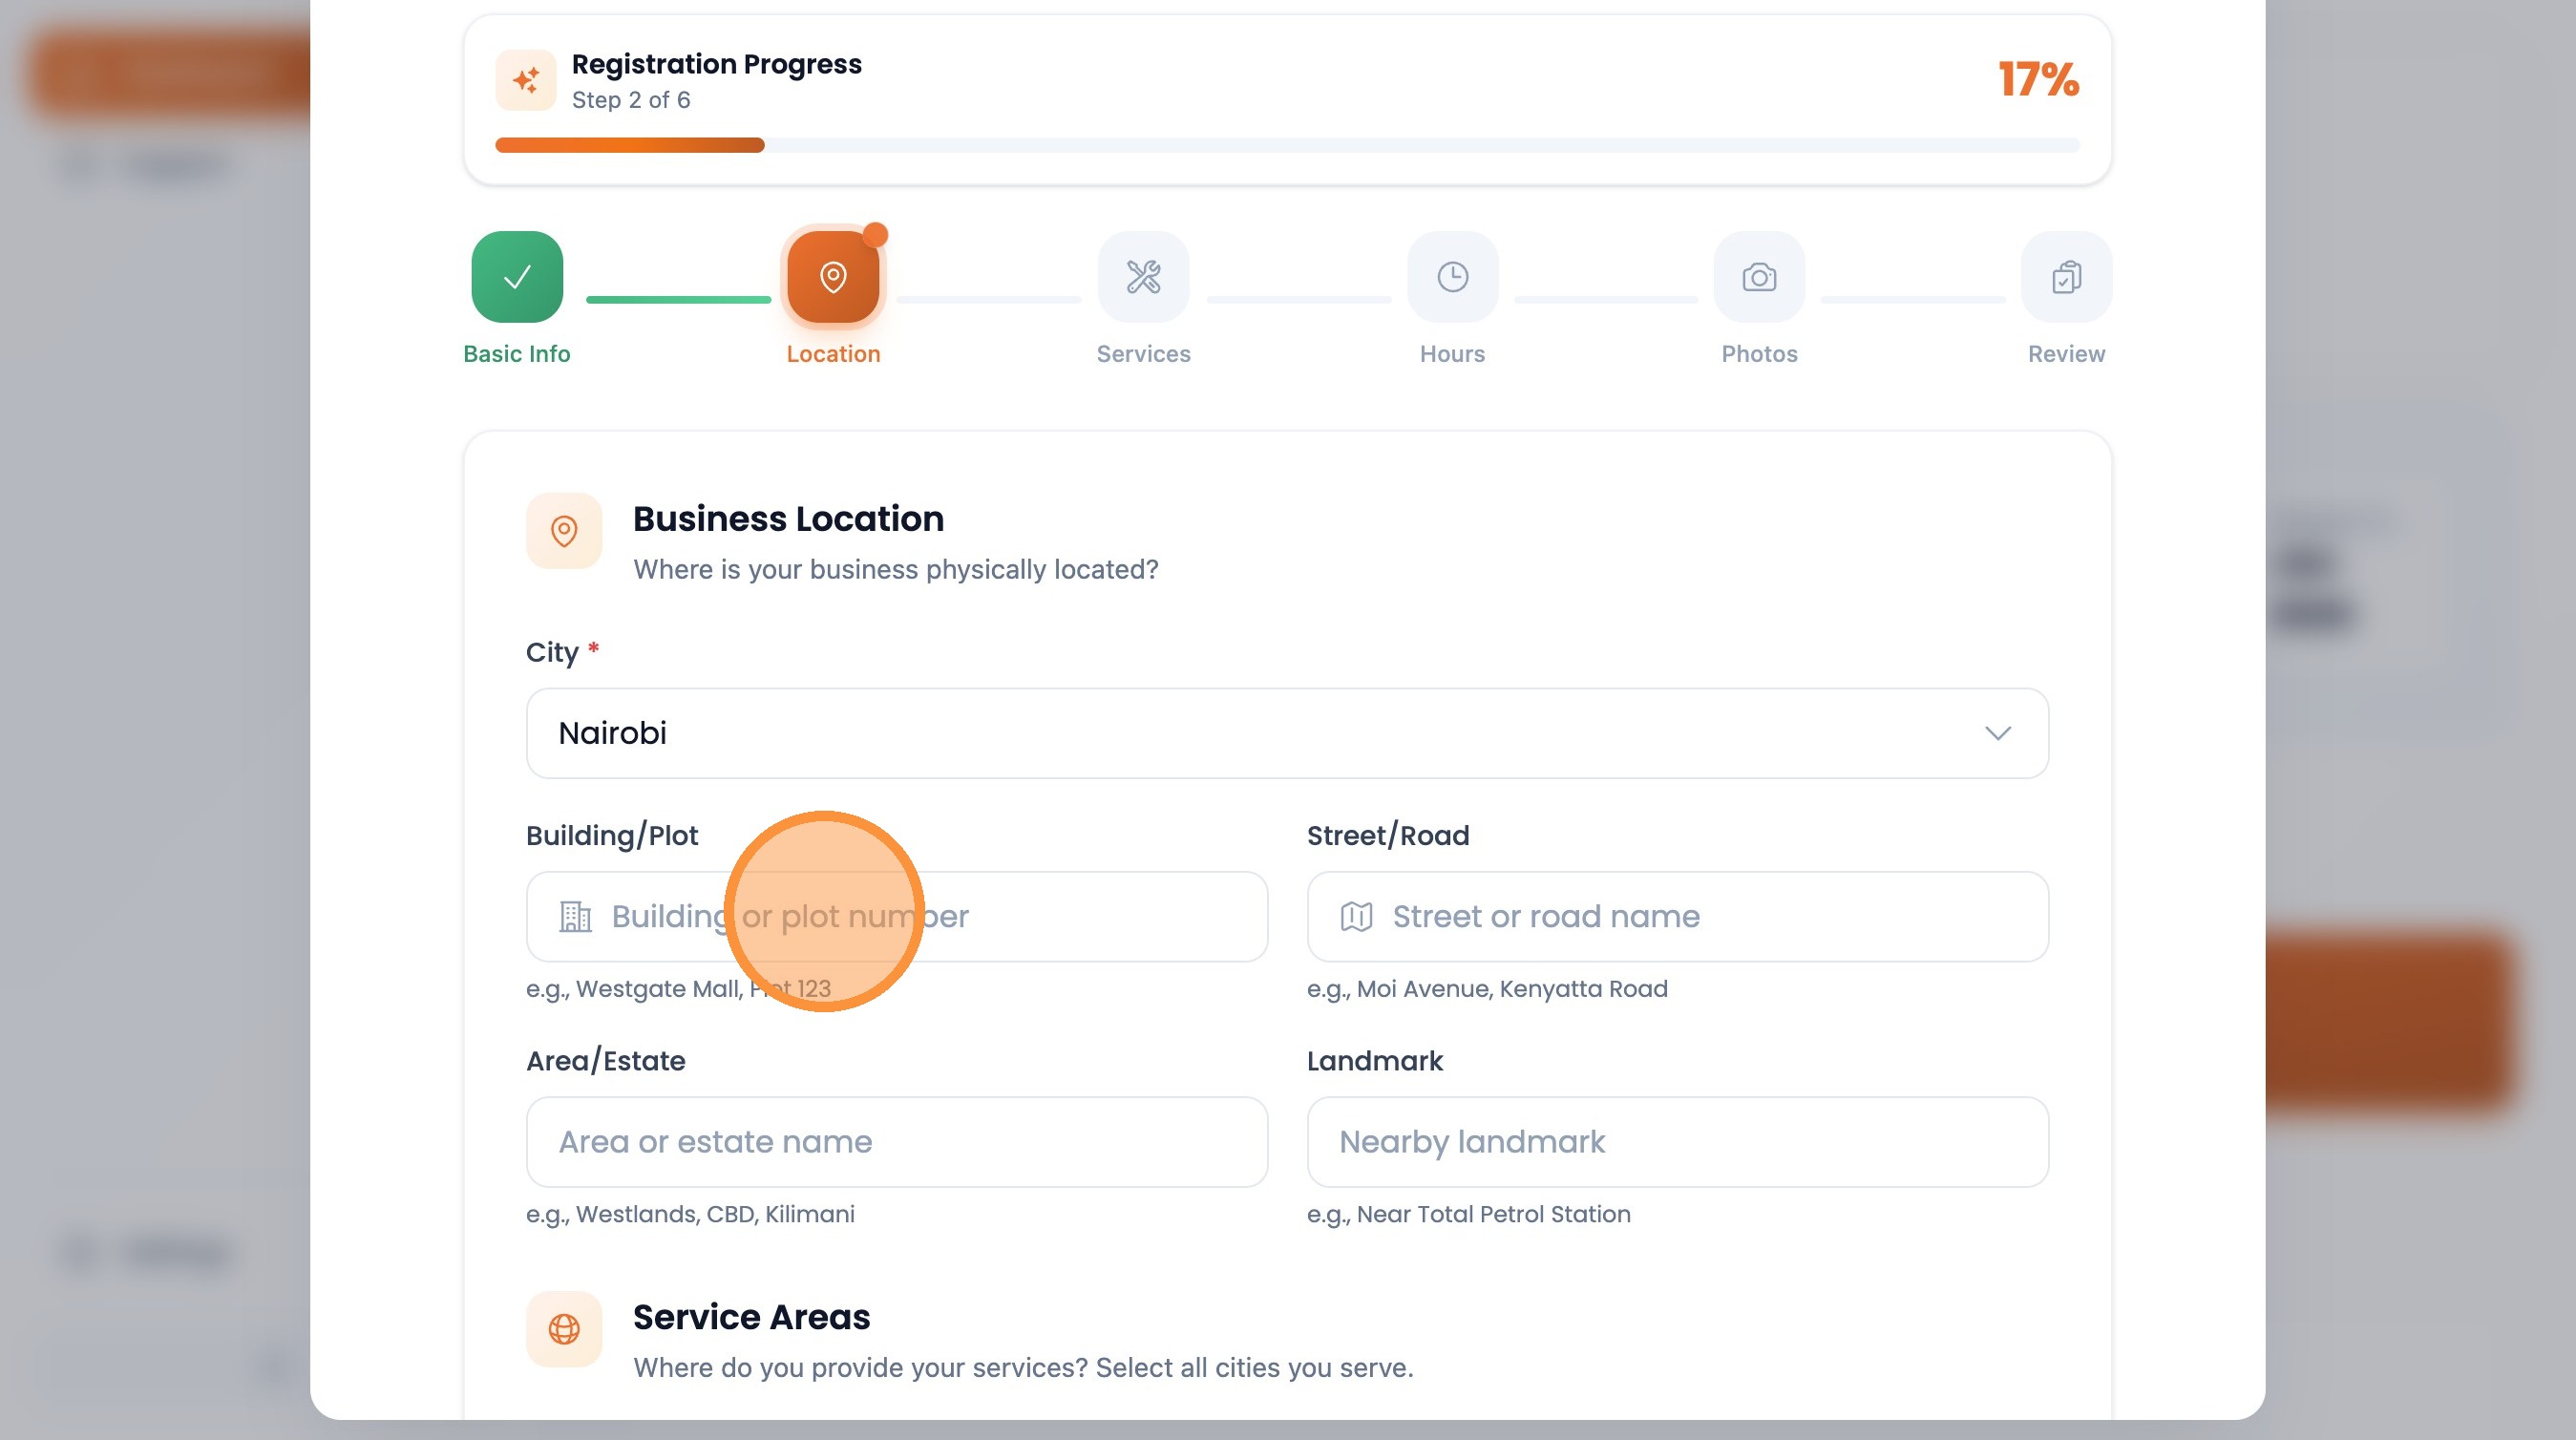
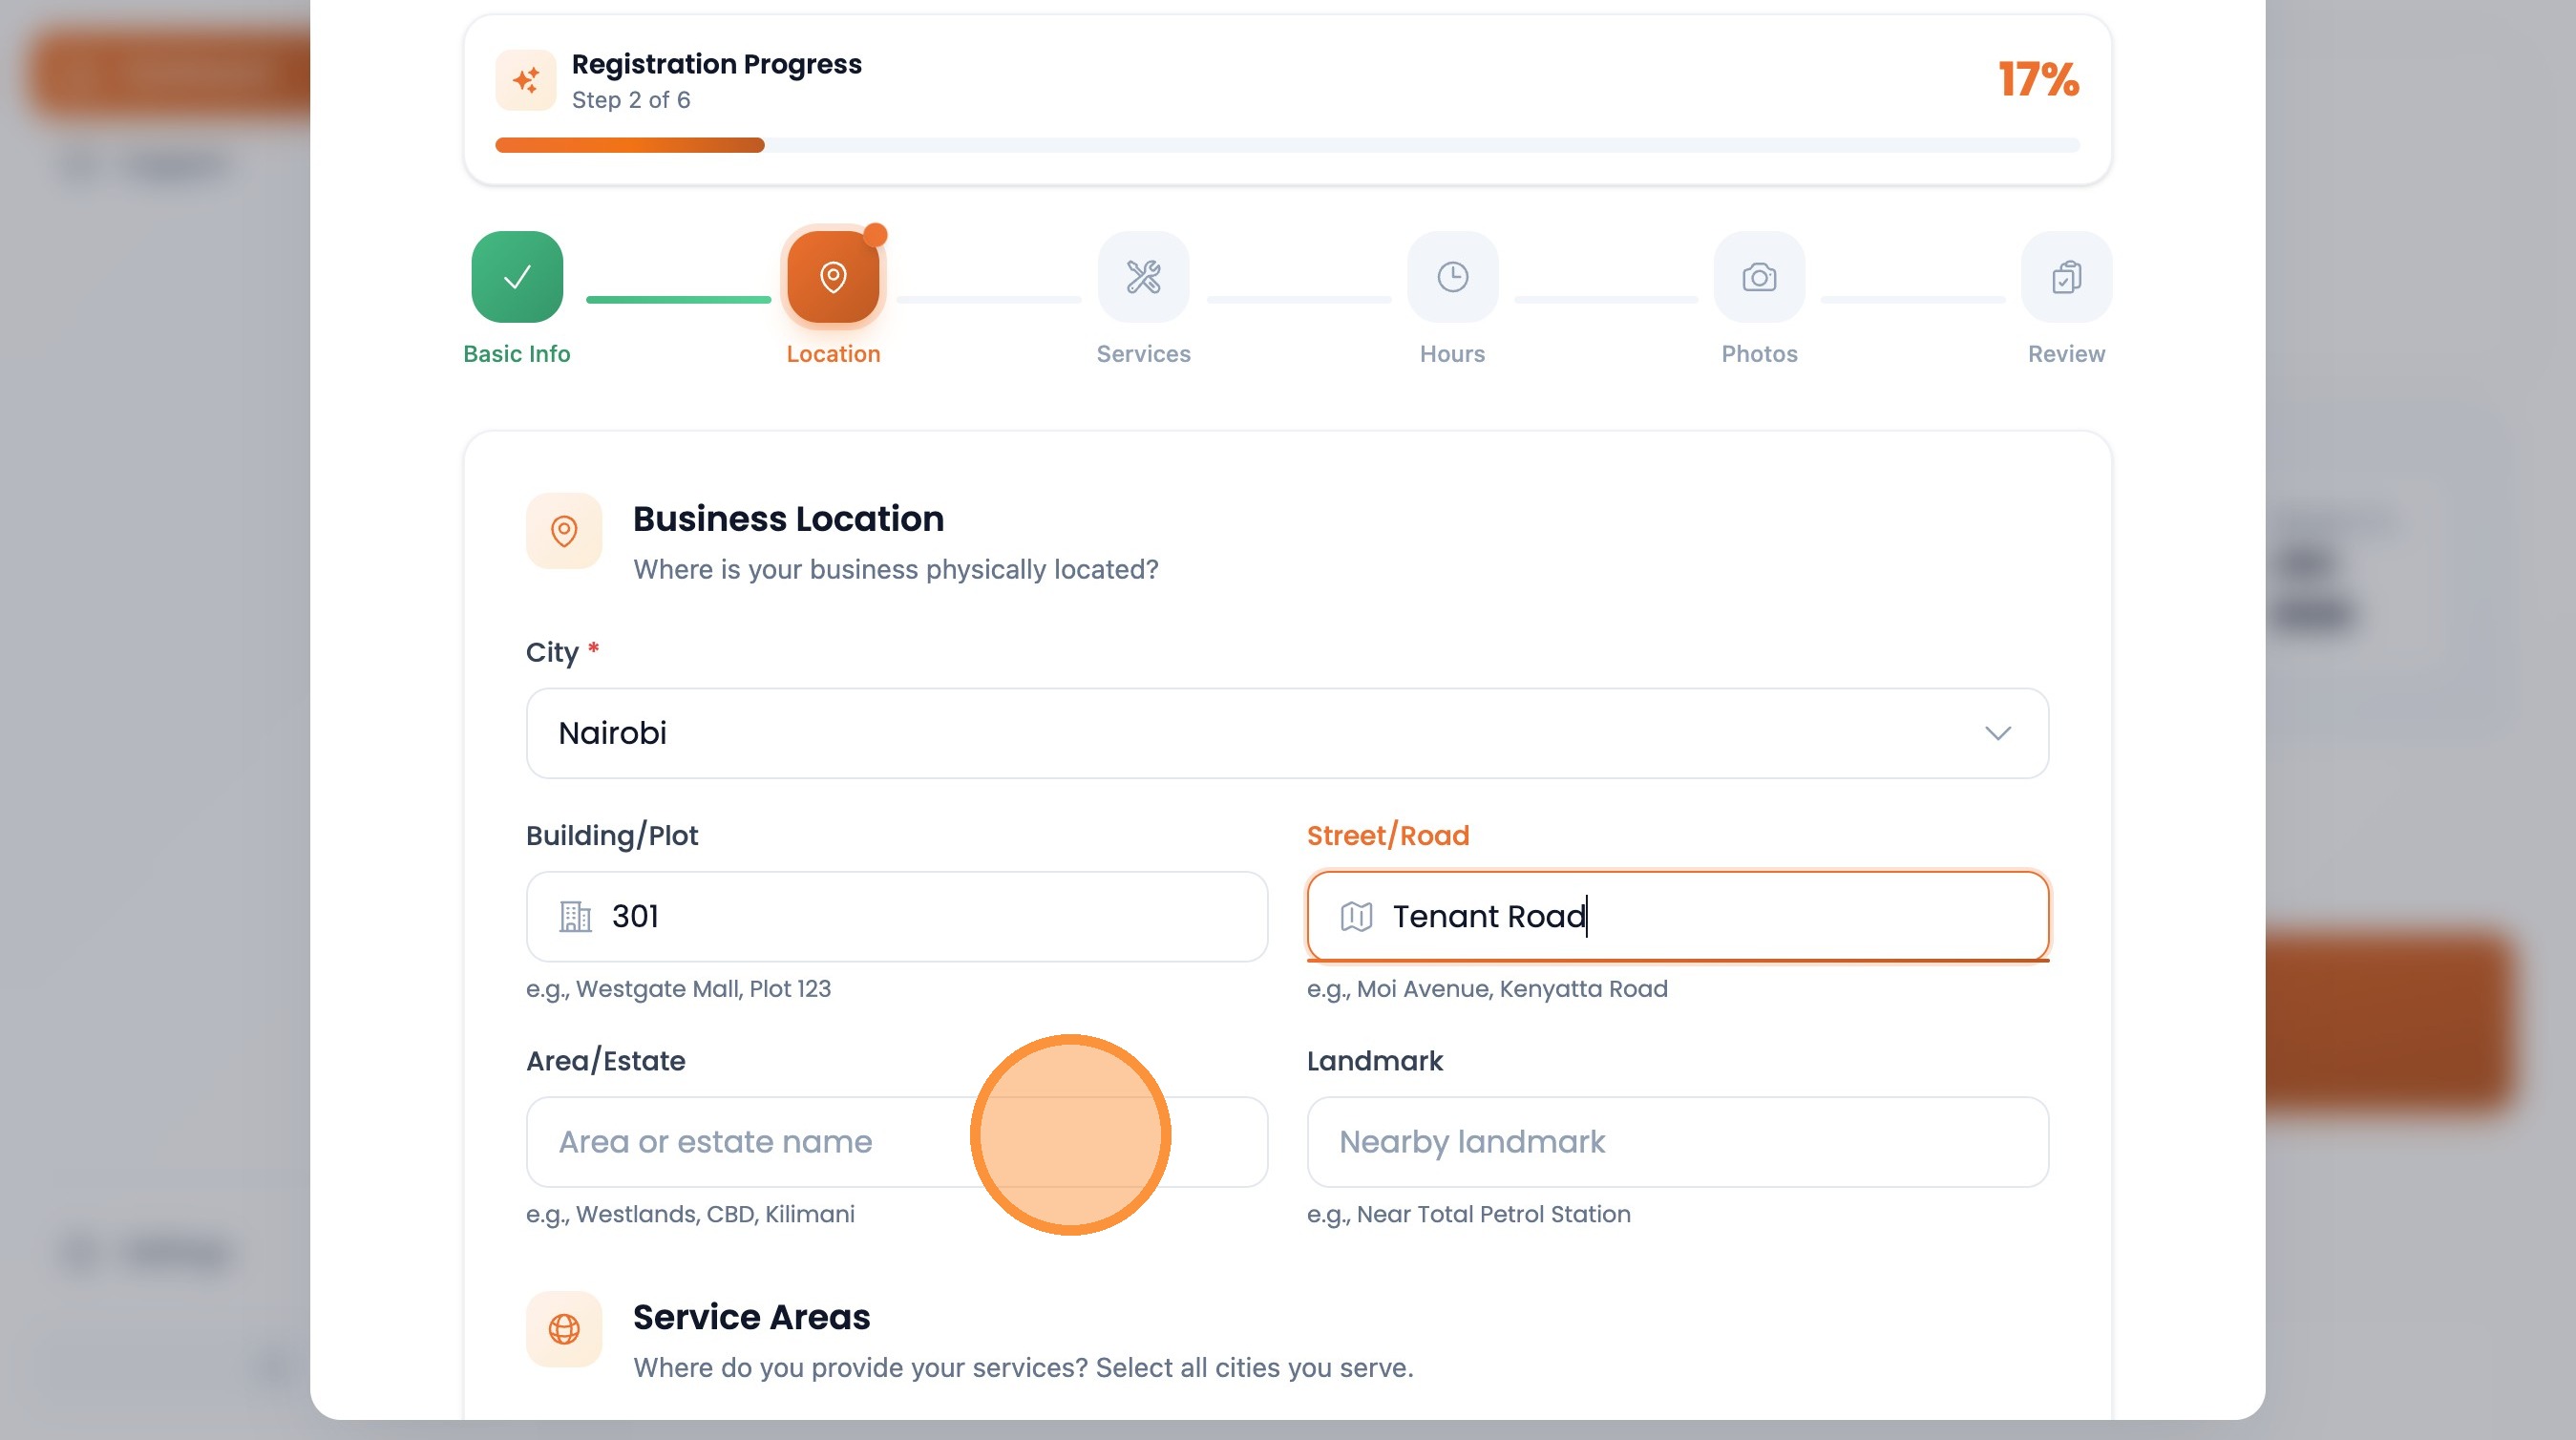
Enter the street or road name
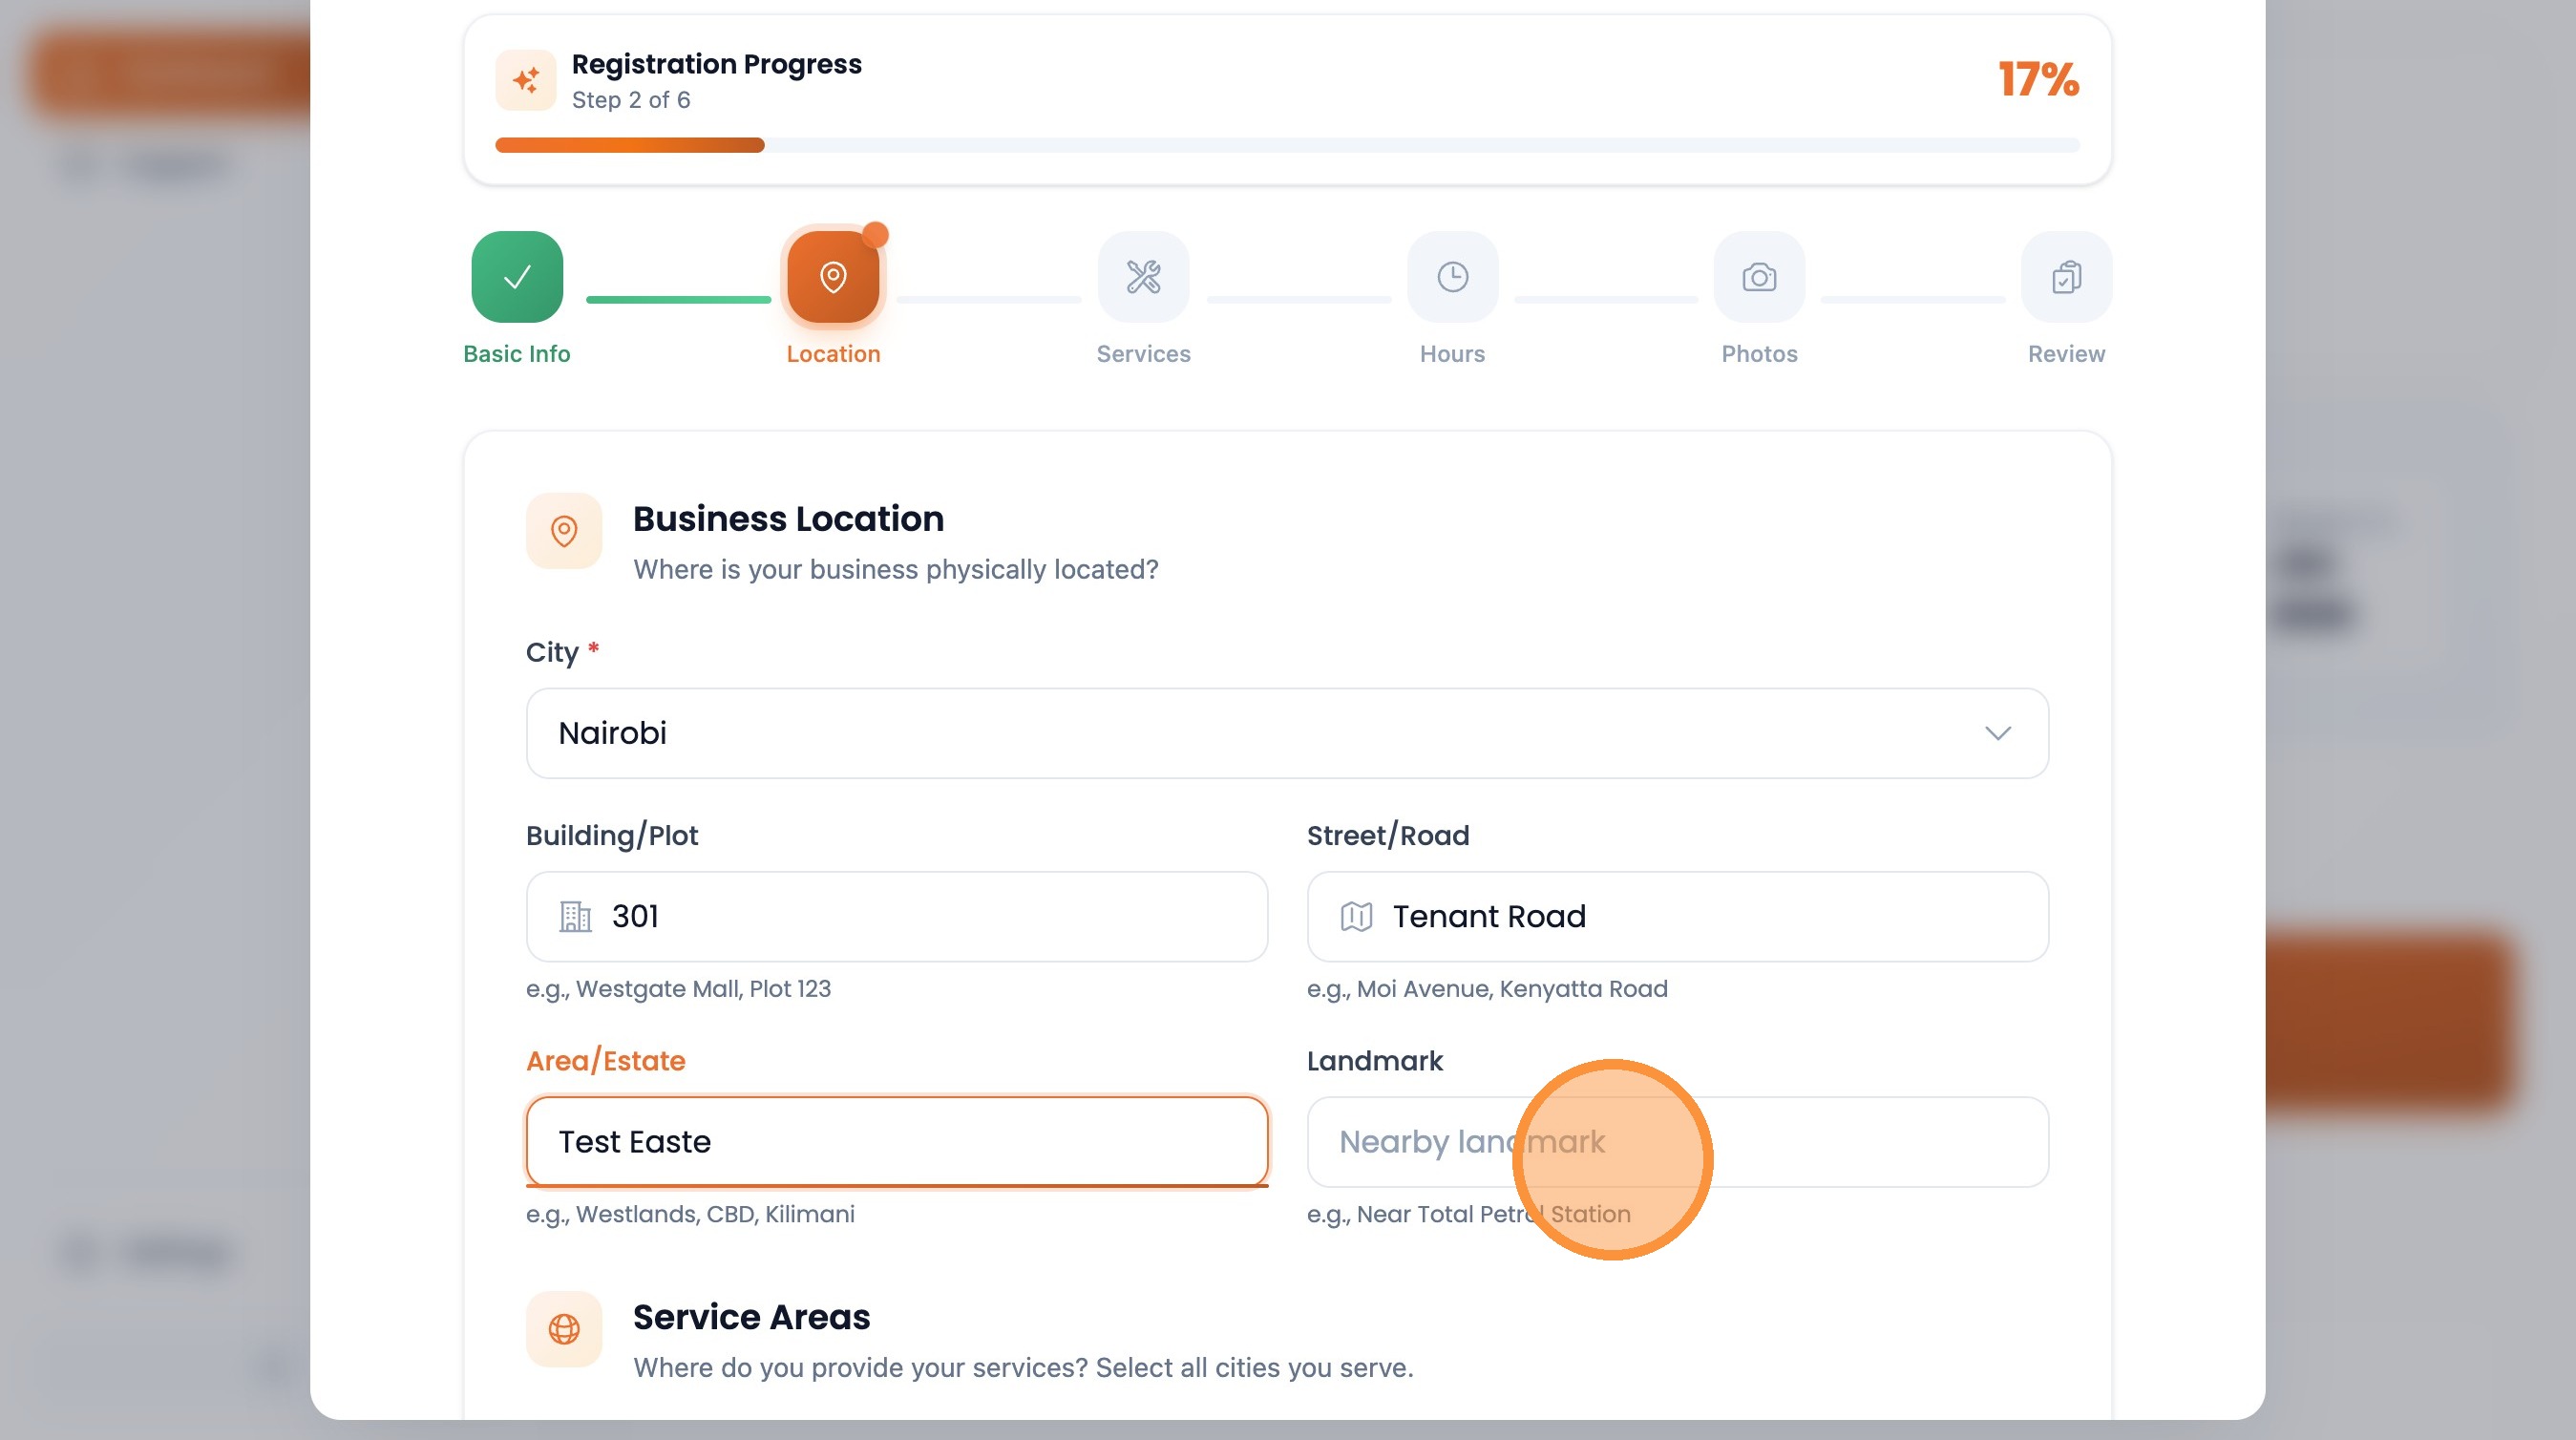
Enter the area or estate name
Enter a nearby landmark
Search and select your service areas
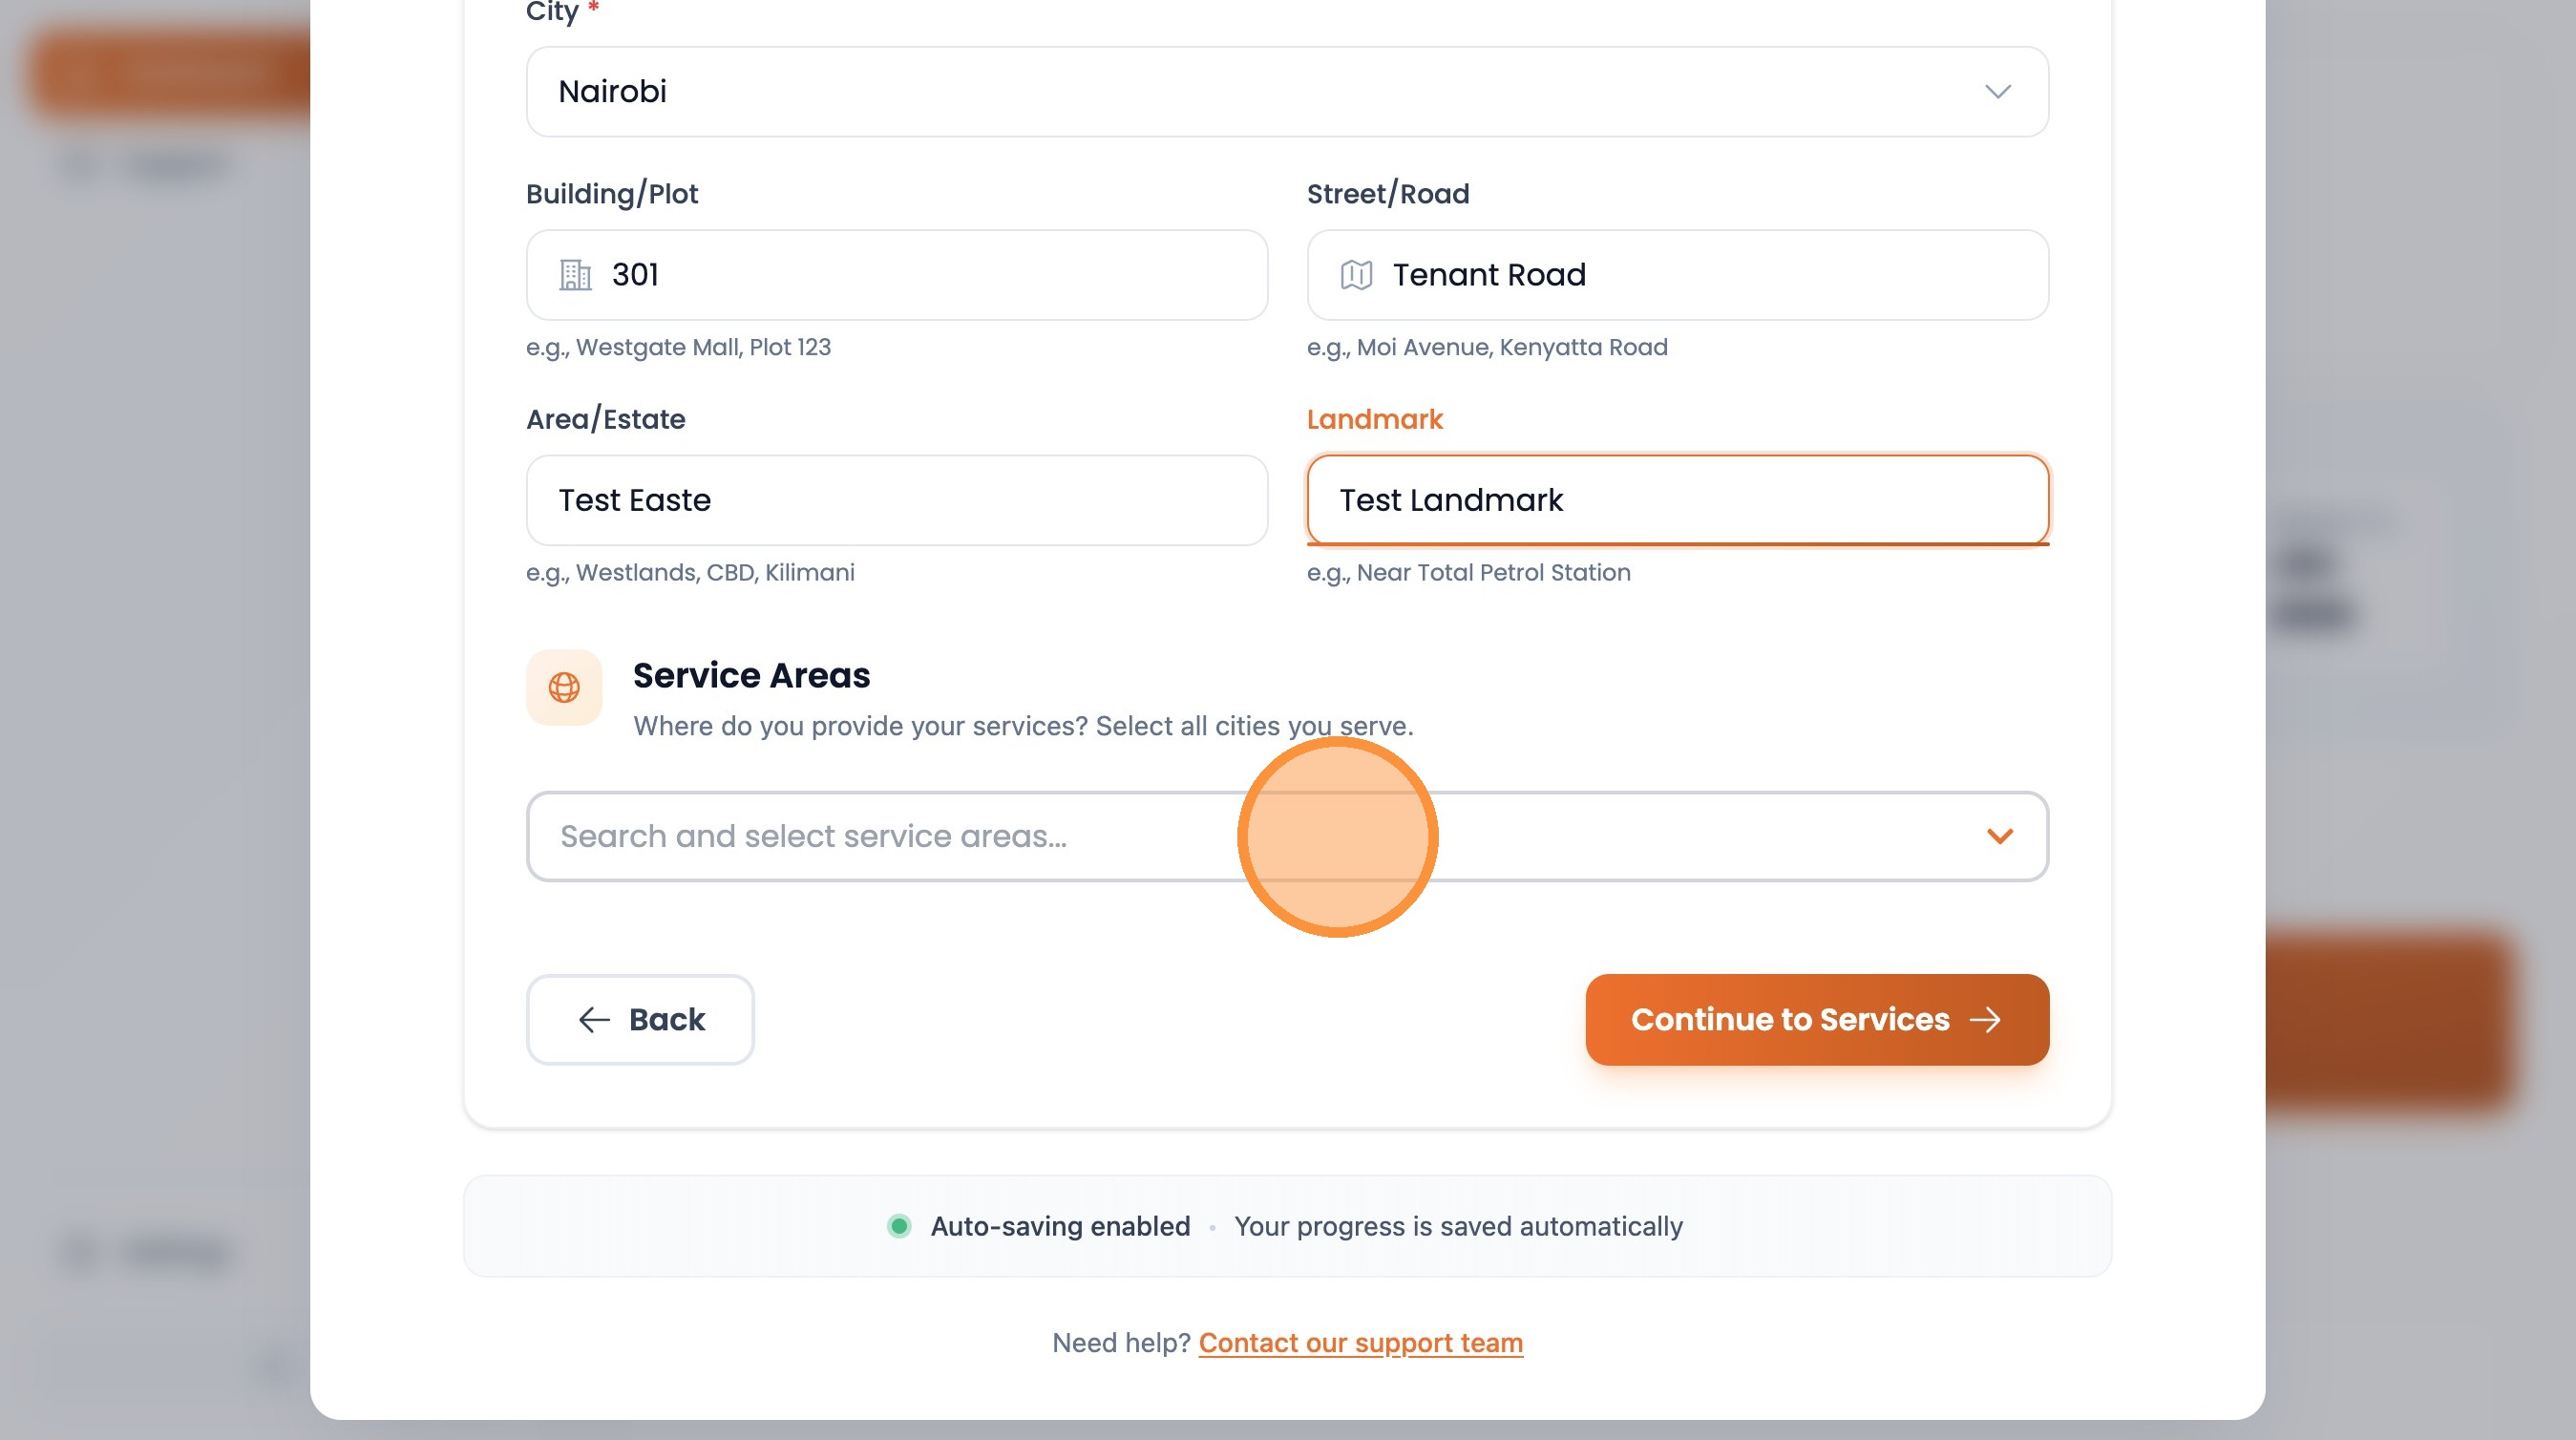
Click "Continue to Services"

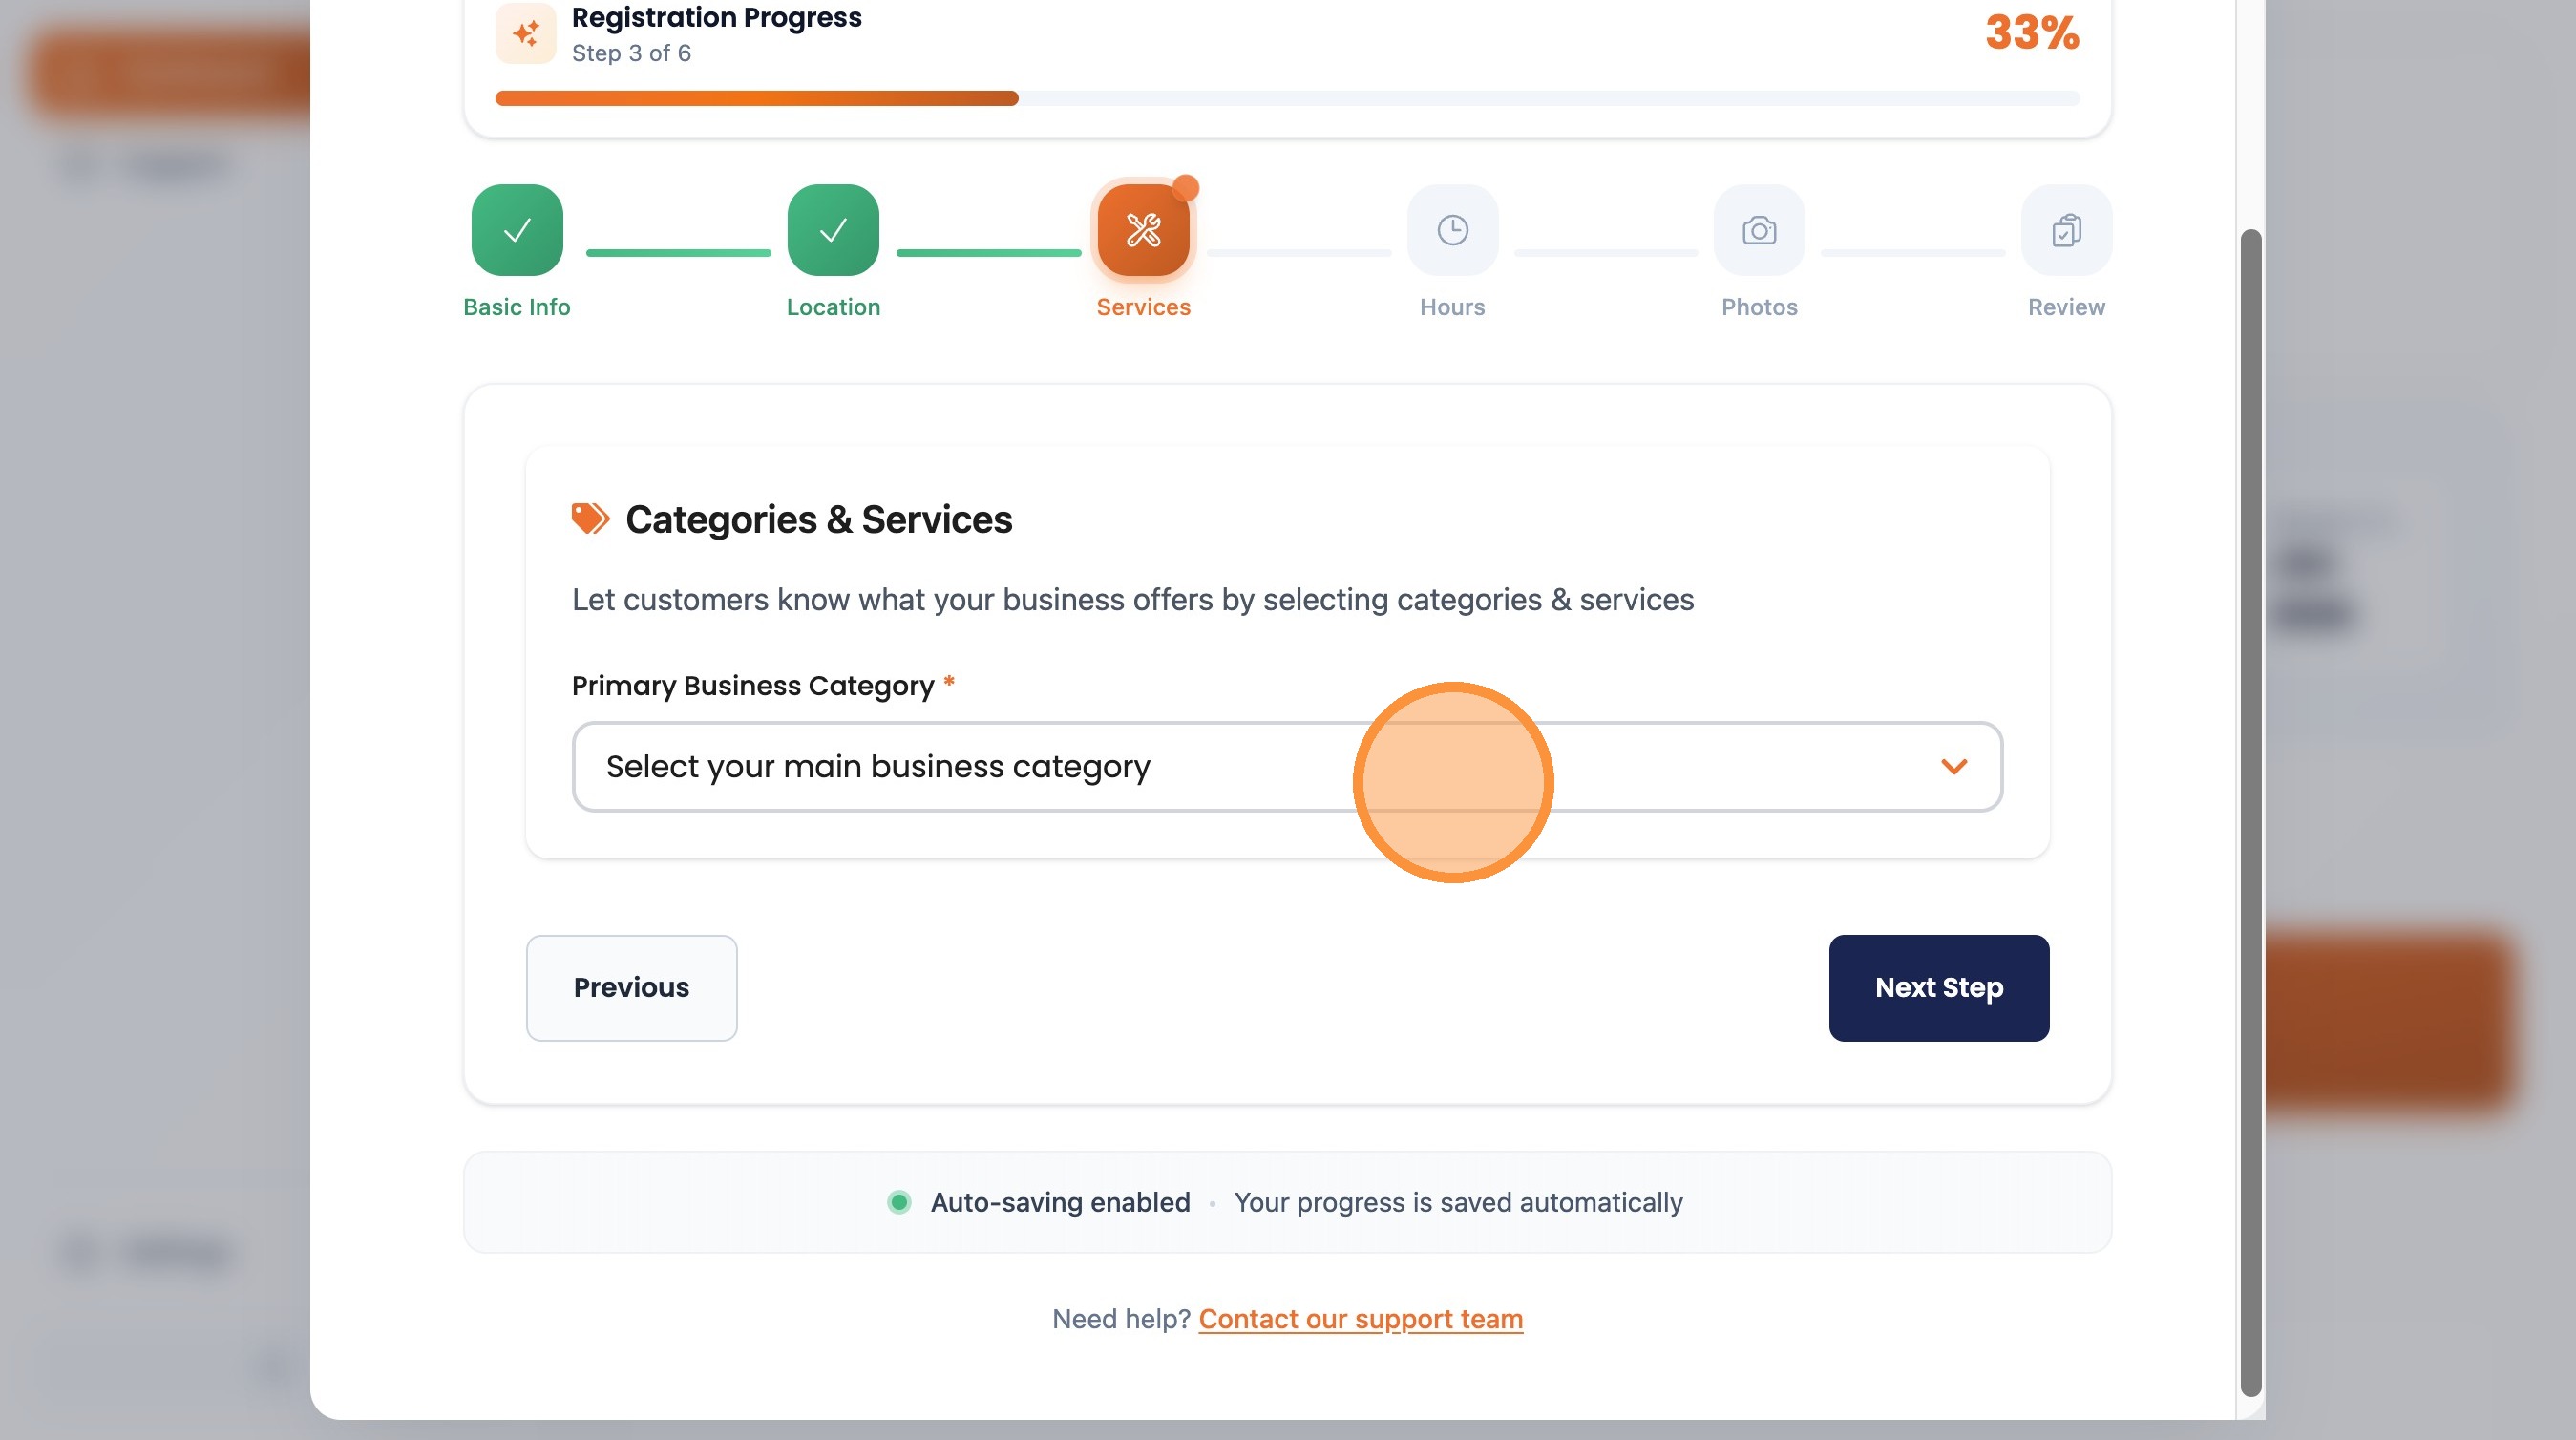
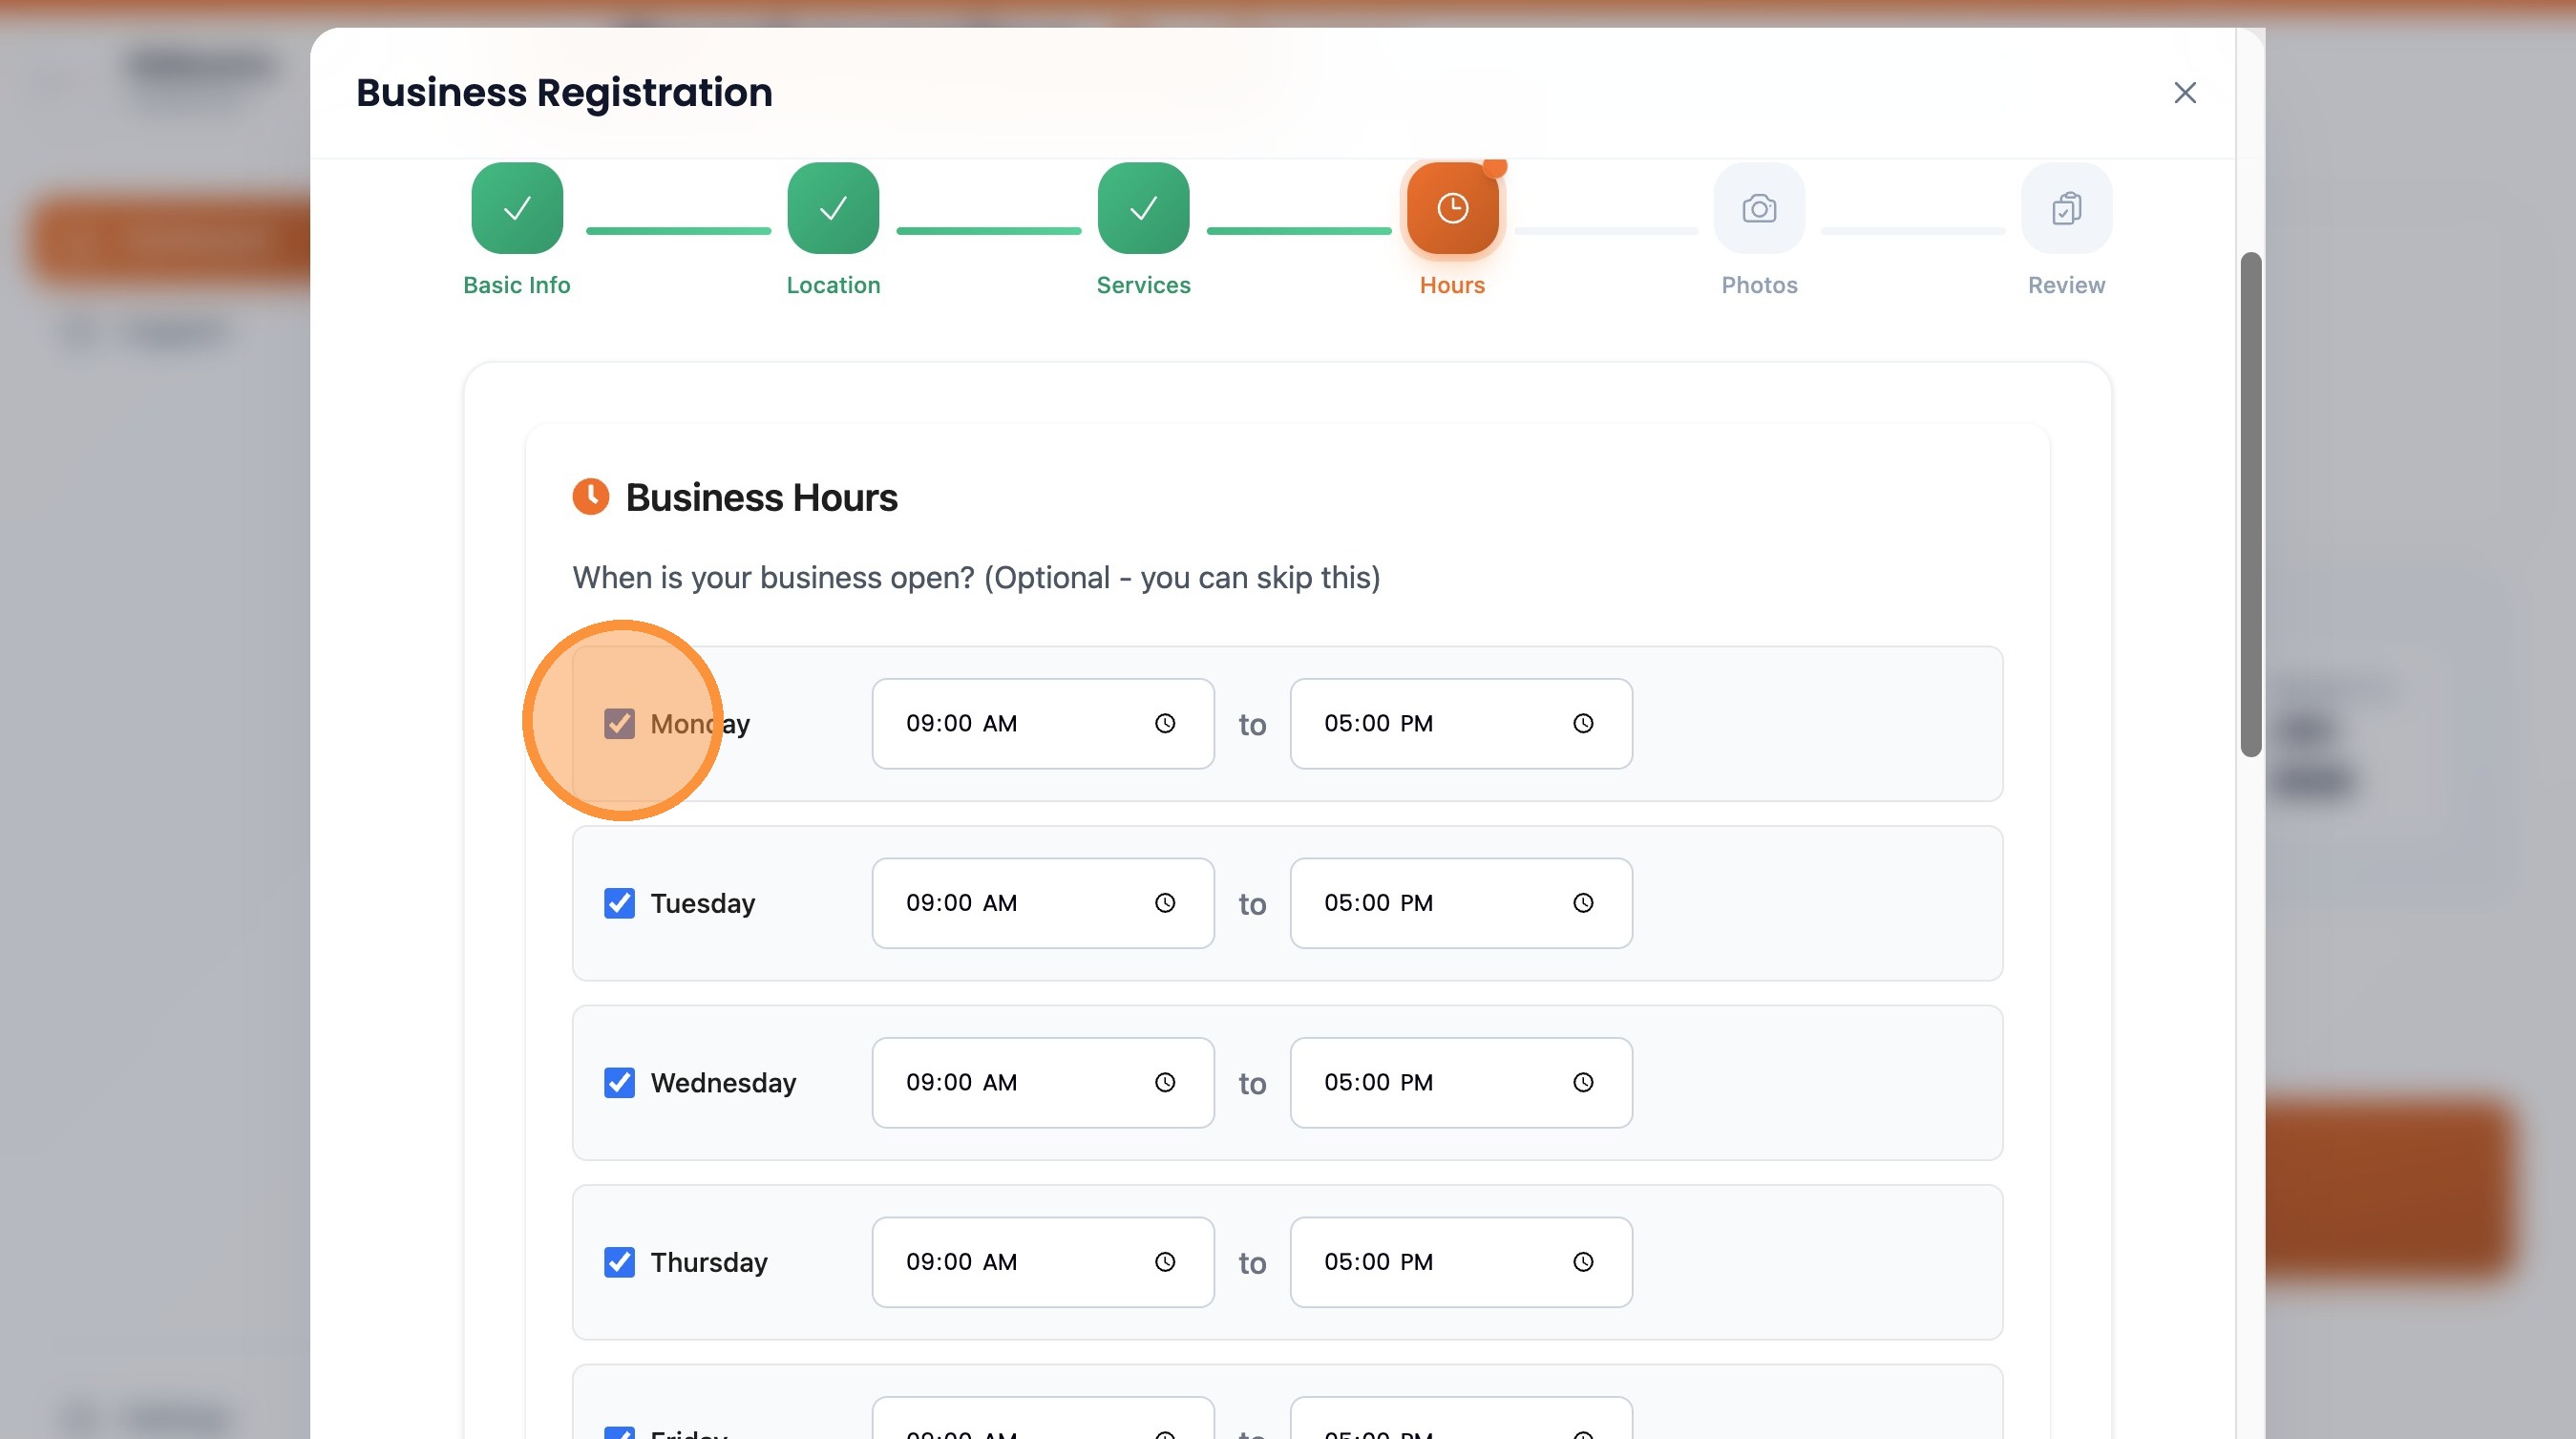
Services & Hours
Set up your business categories, services, and operating hours
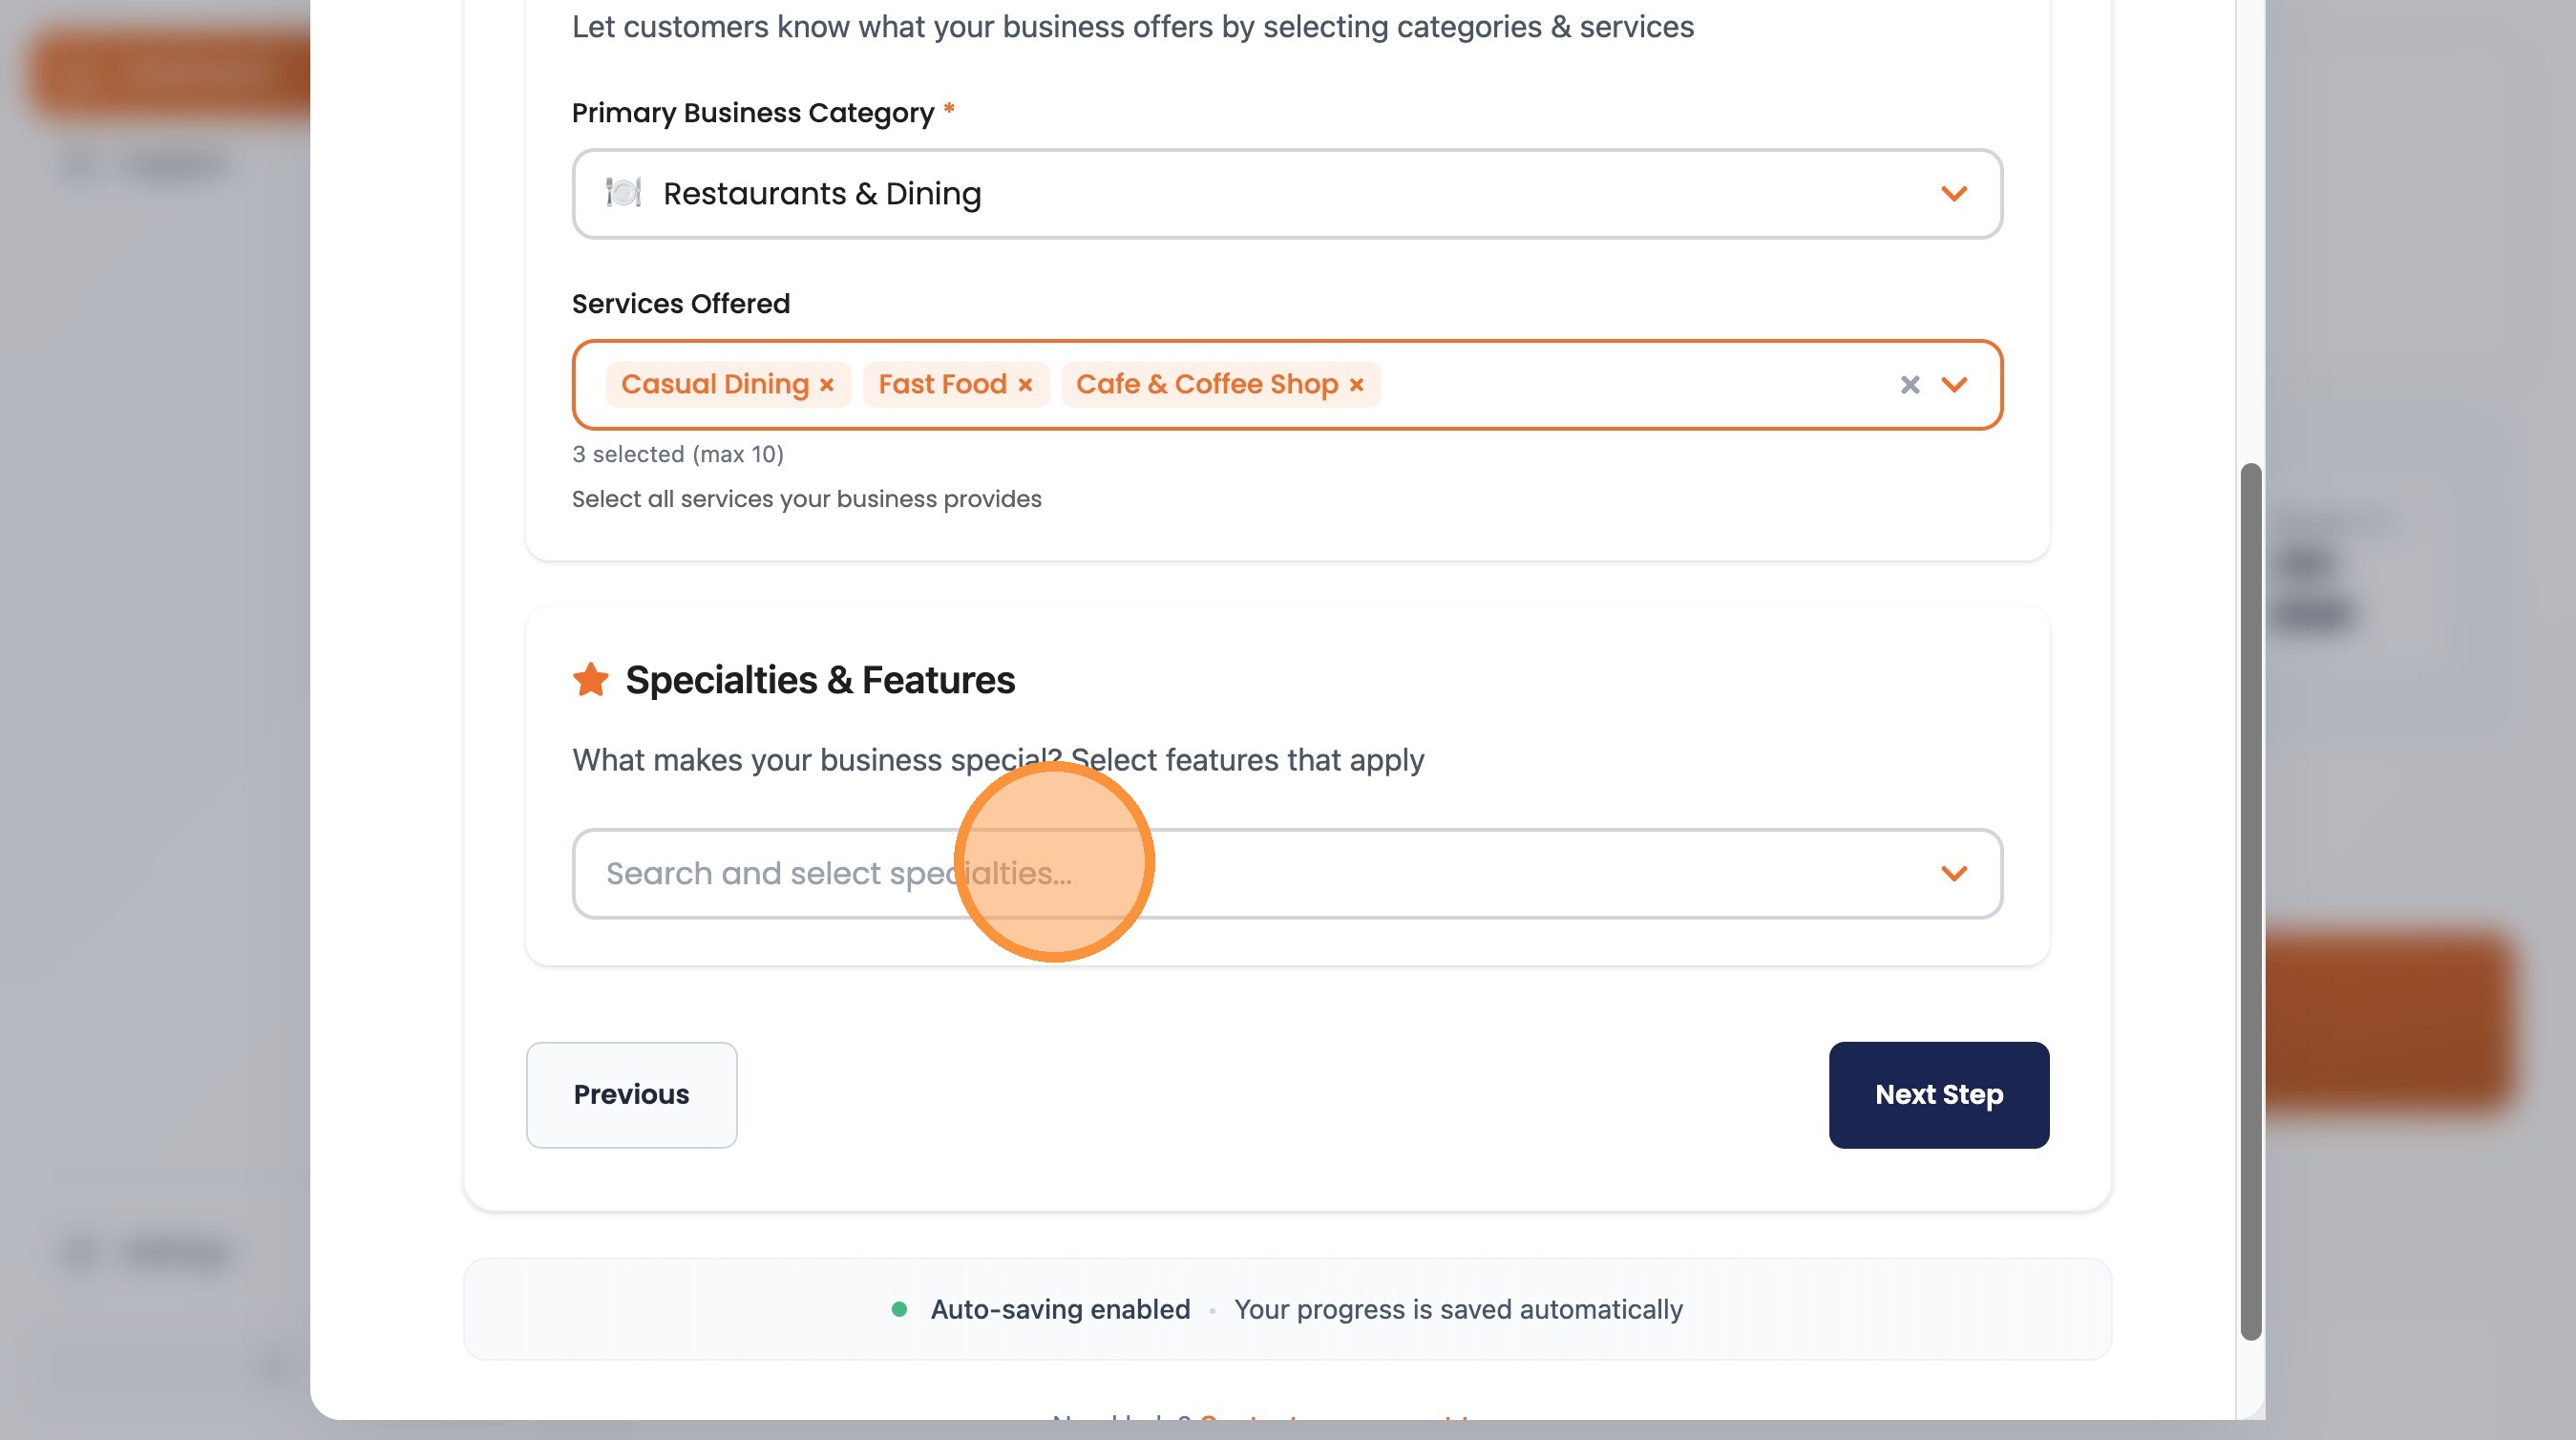
Select your main business category
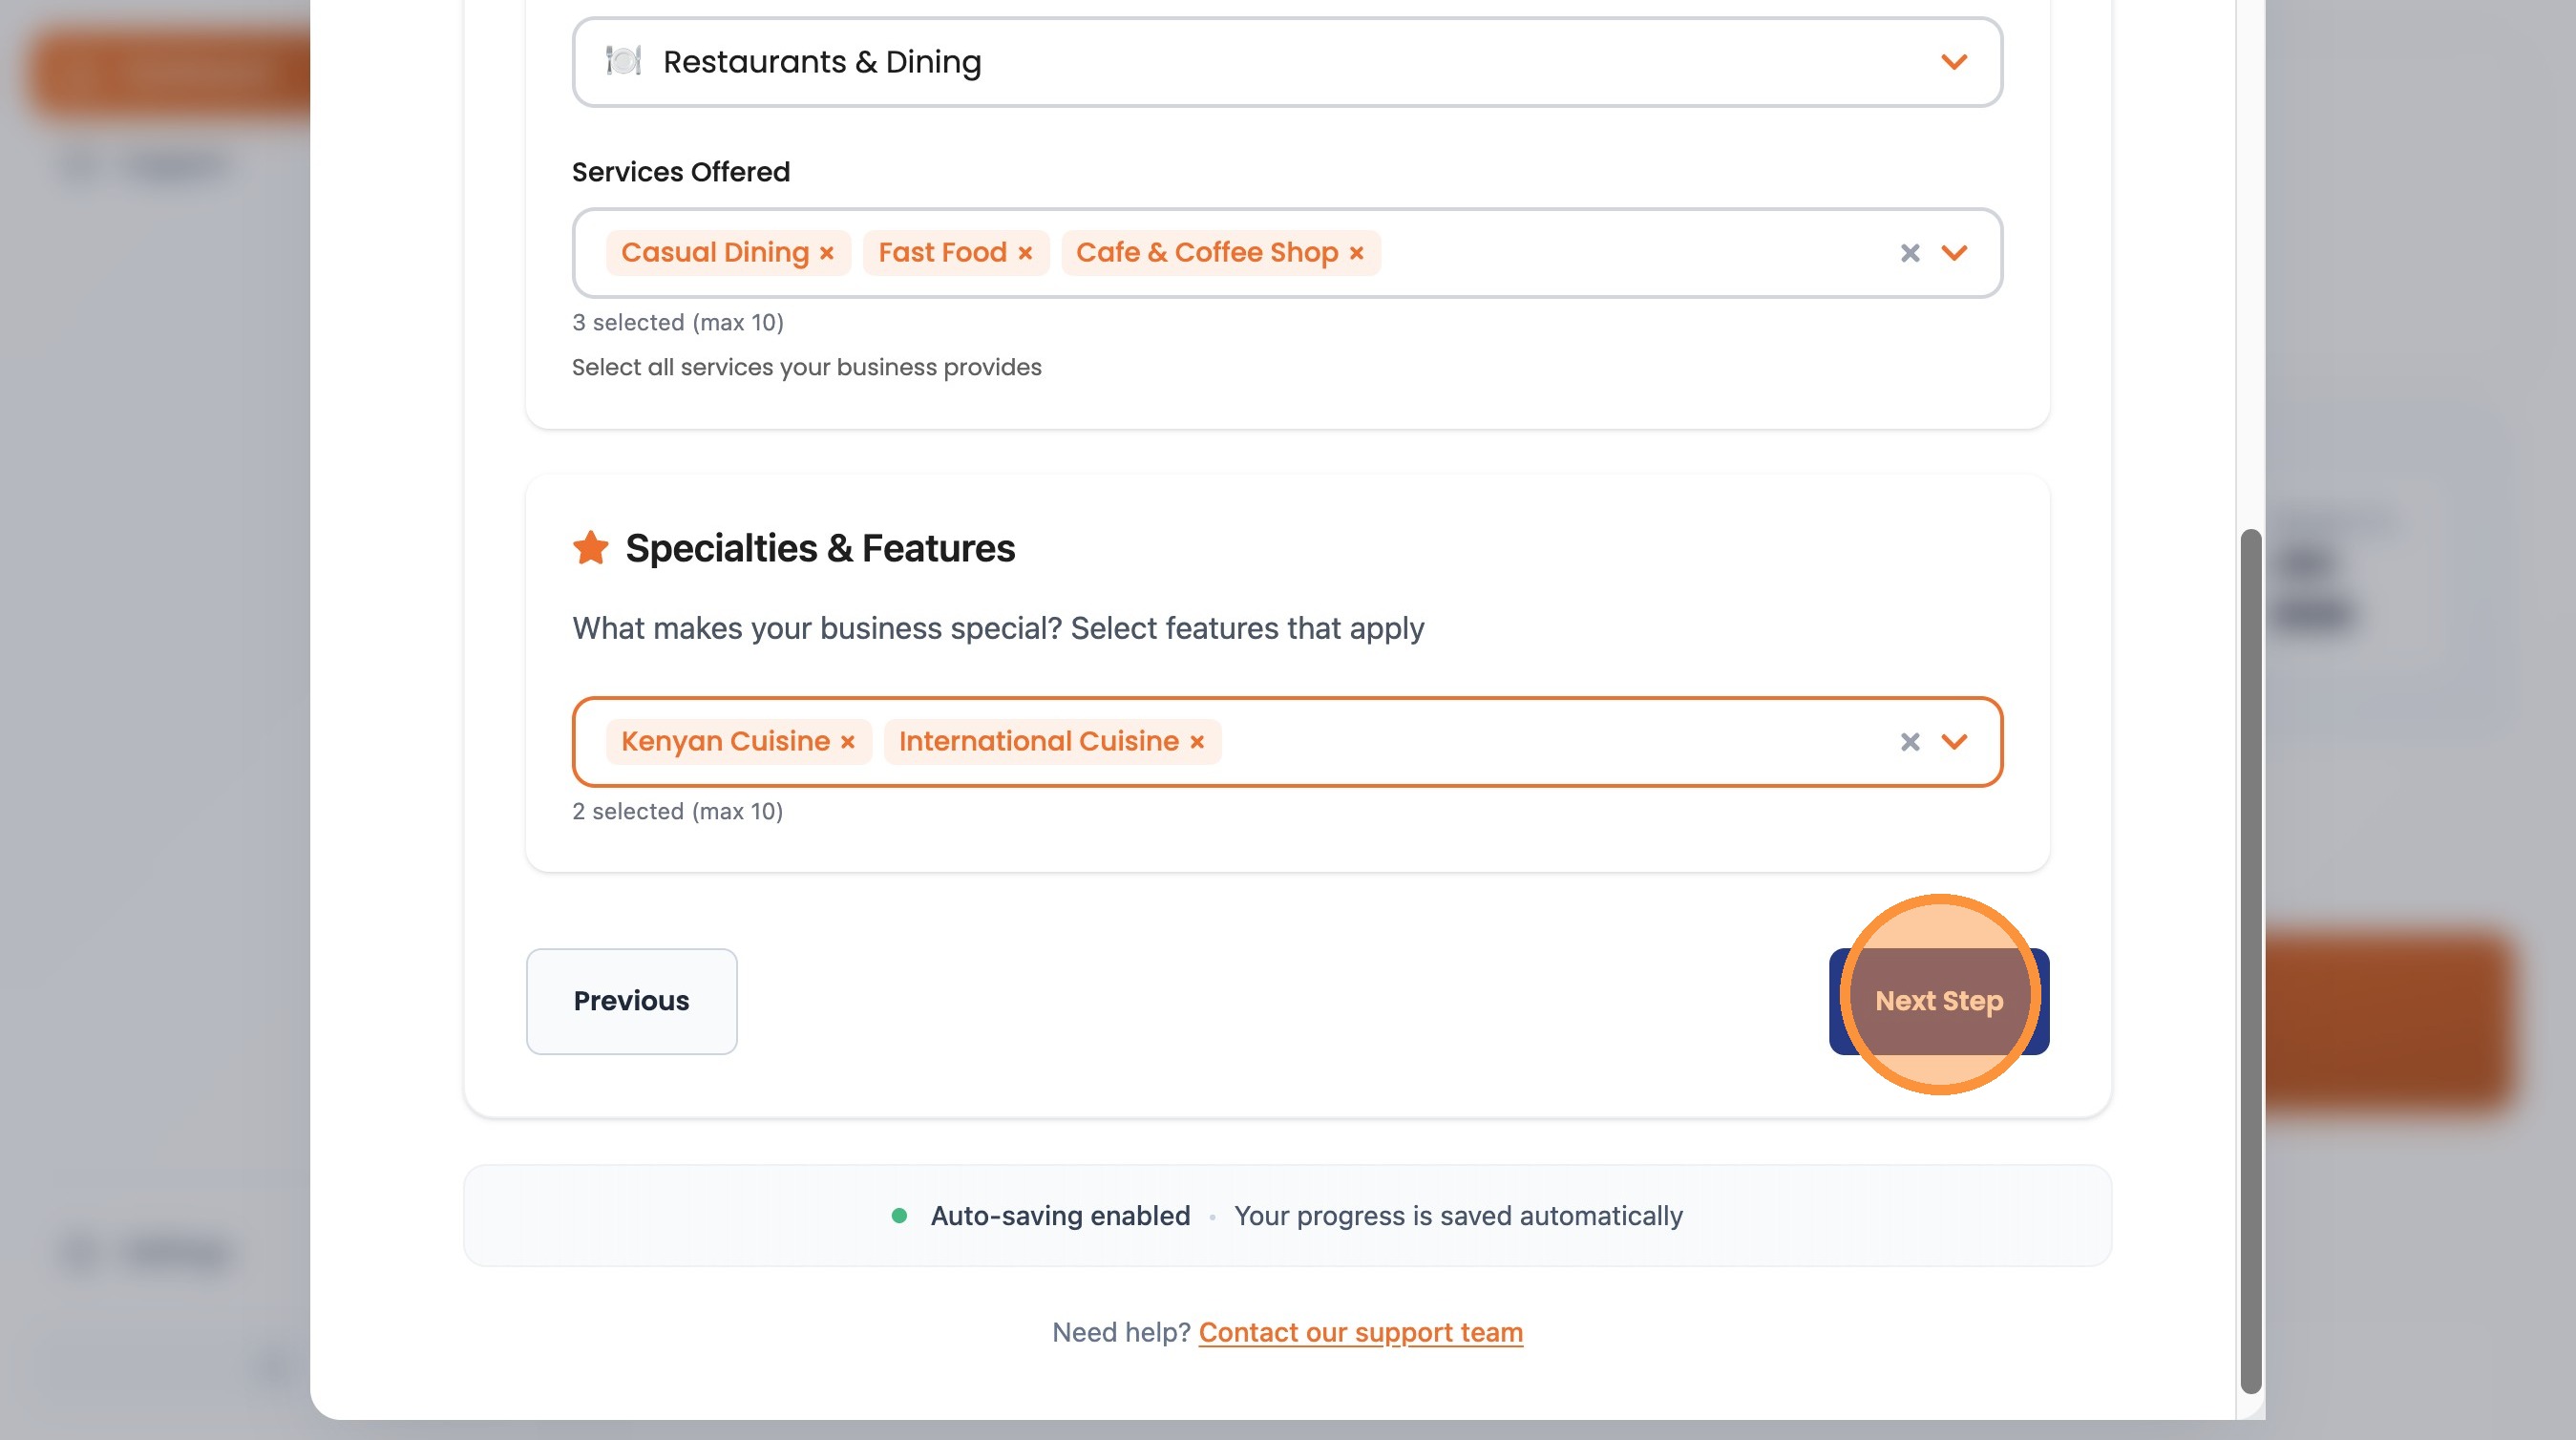
Search and select specialties (if applicable)
Click "Next Step"
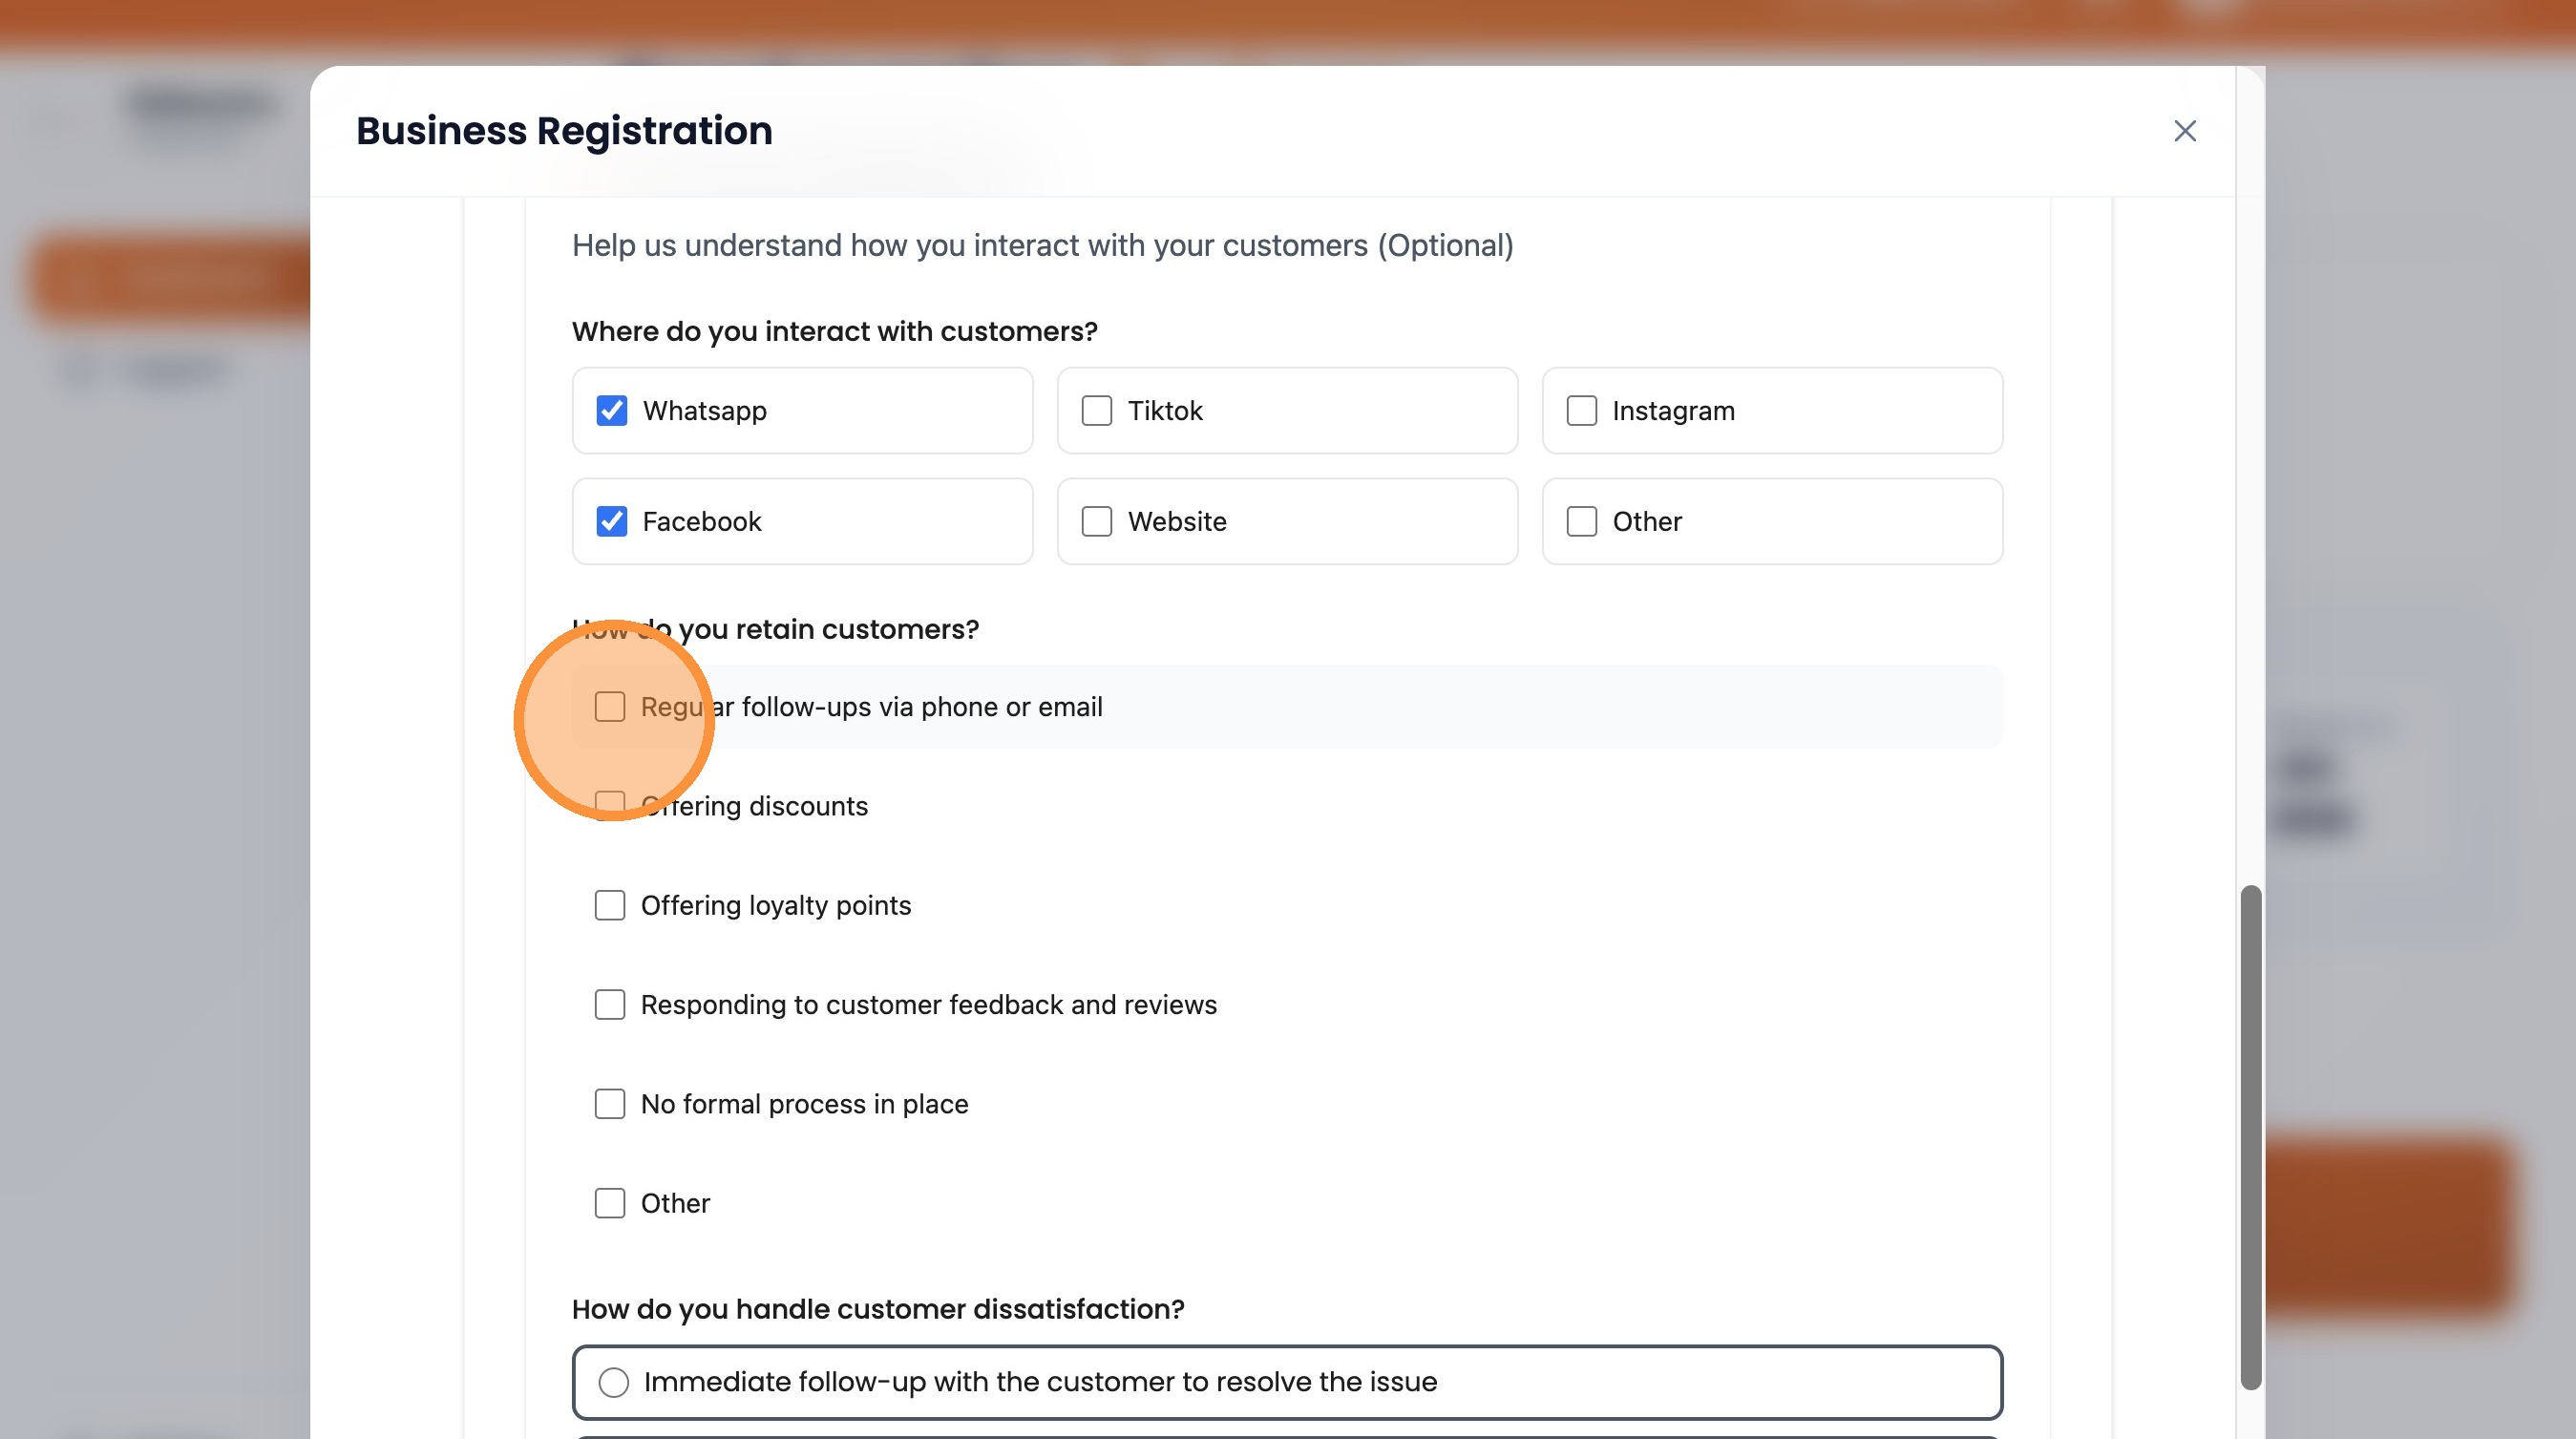
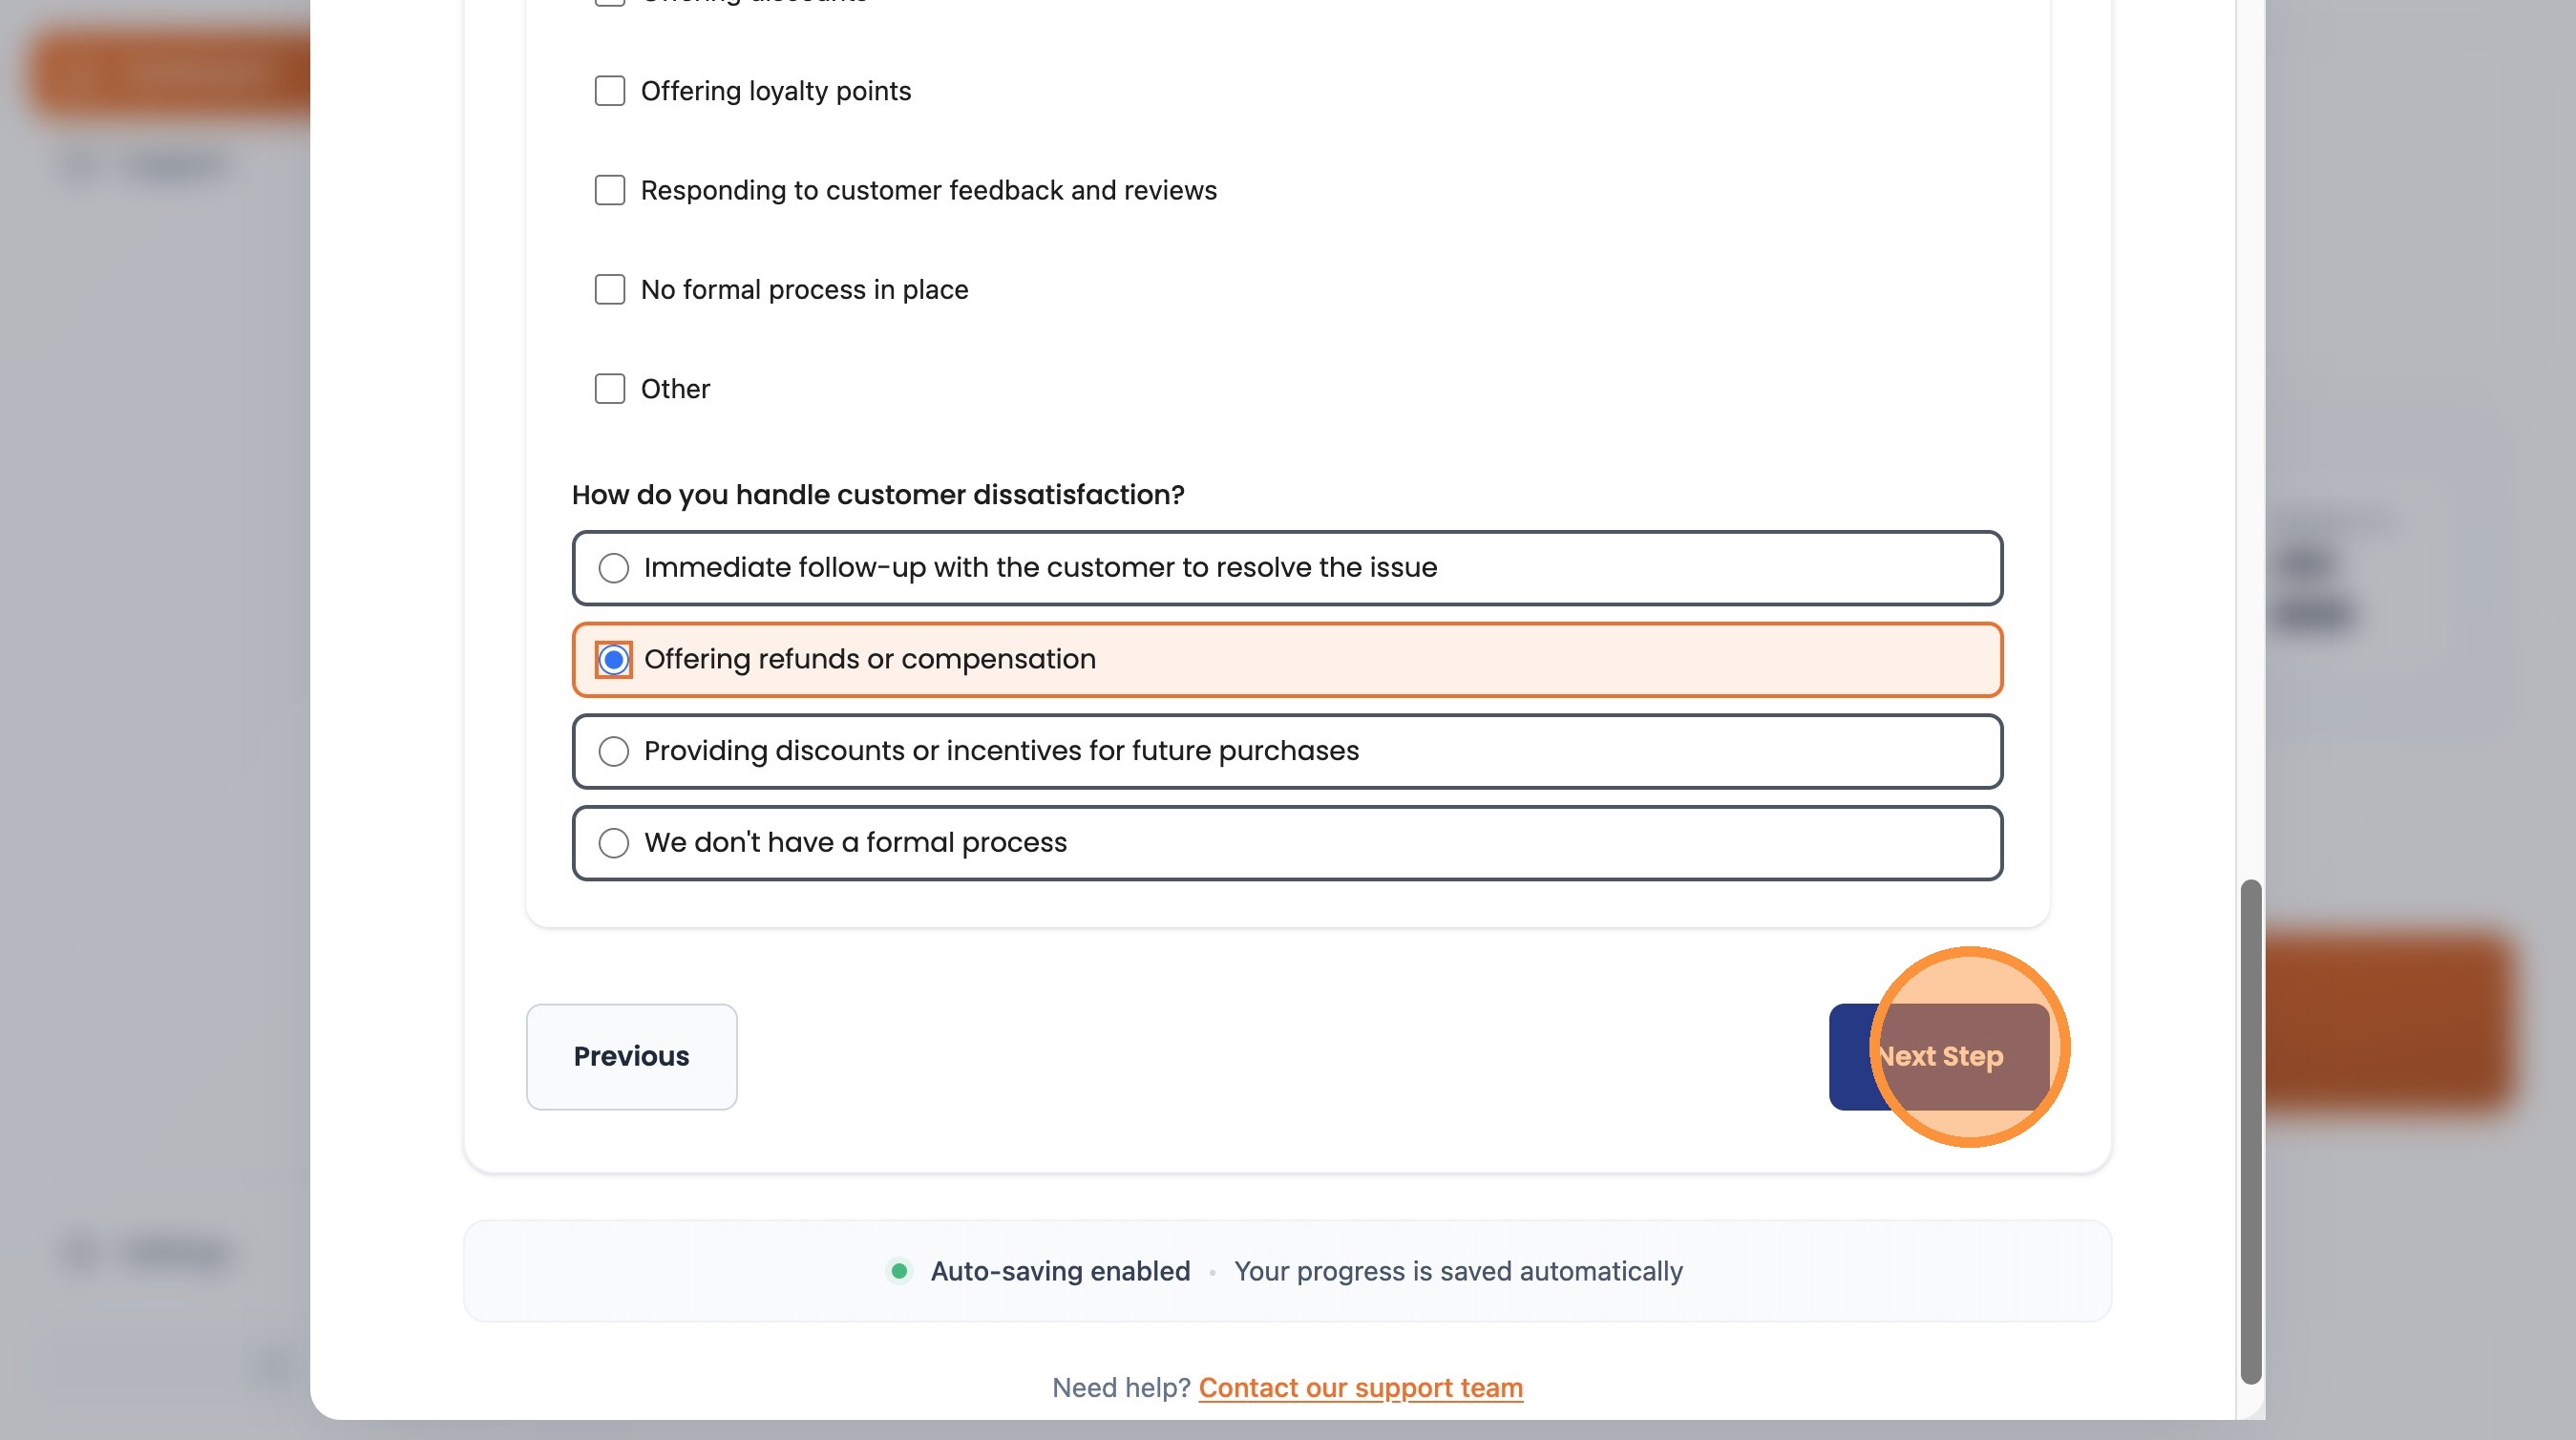
Select your customer engagement preferences
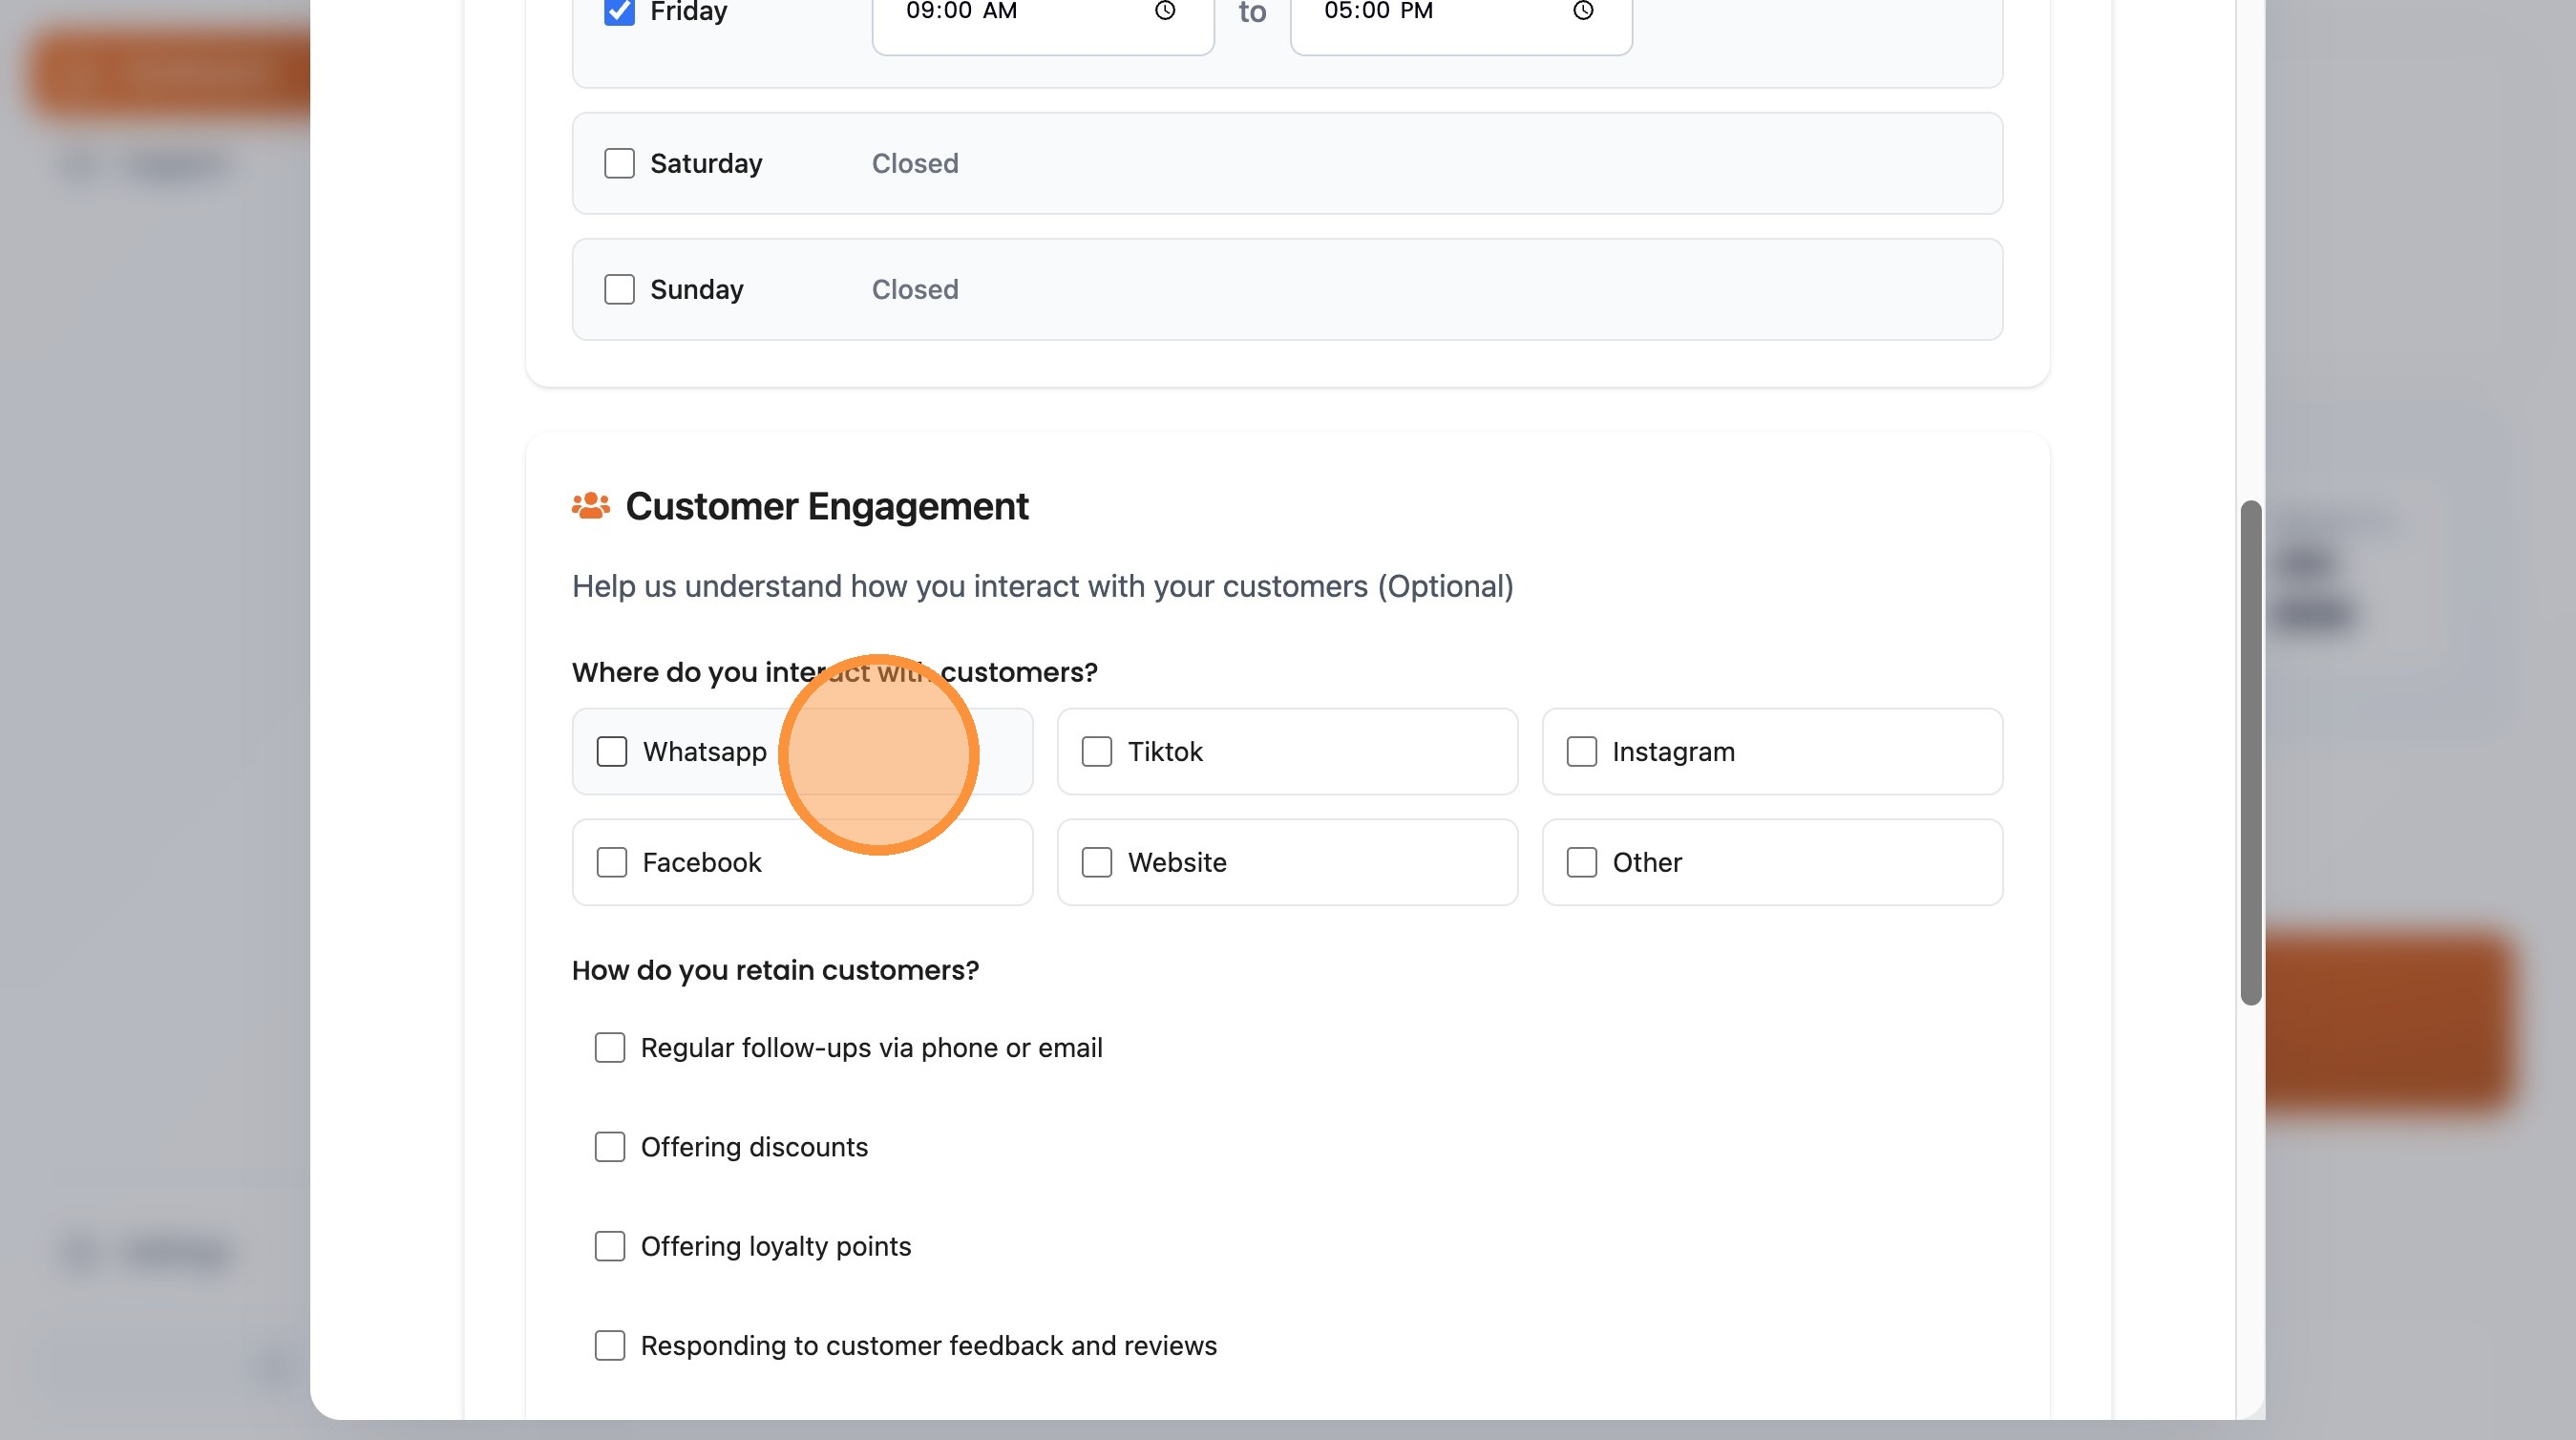
Set your business hours
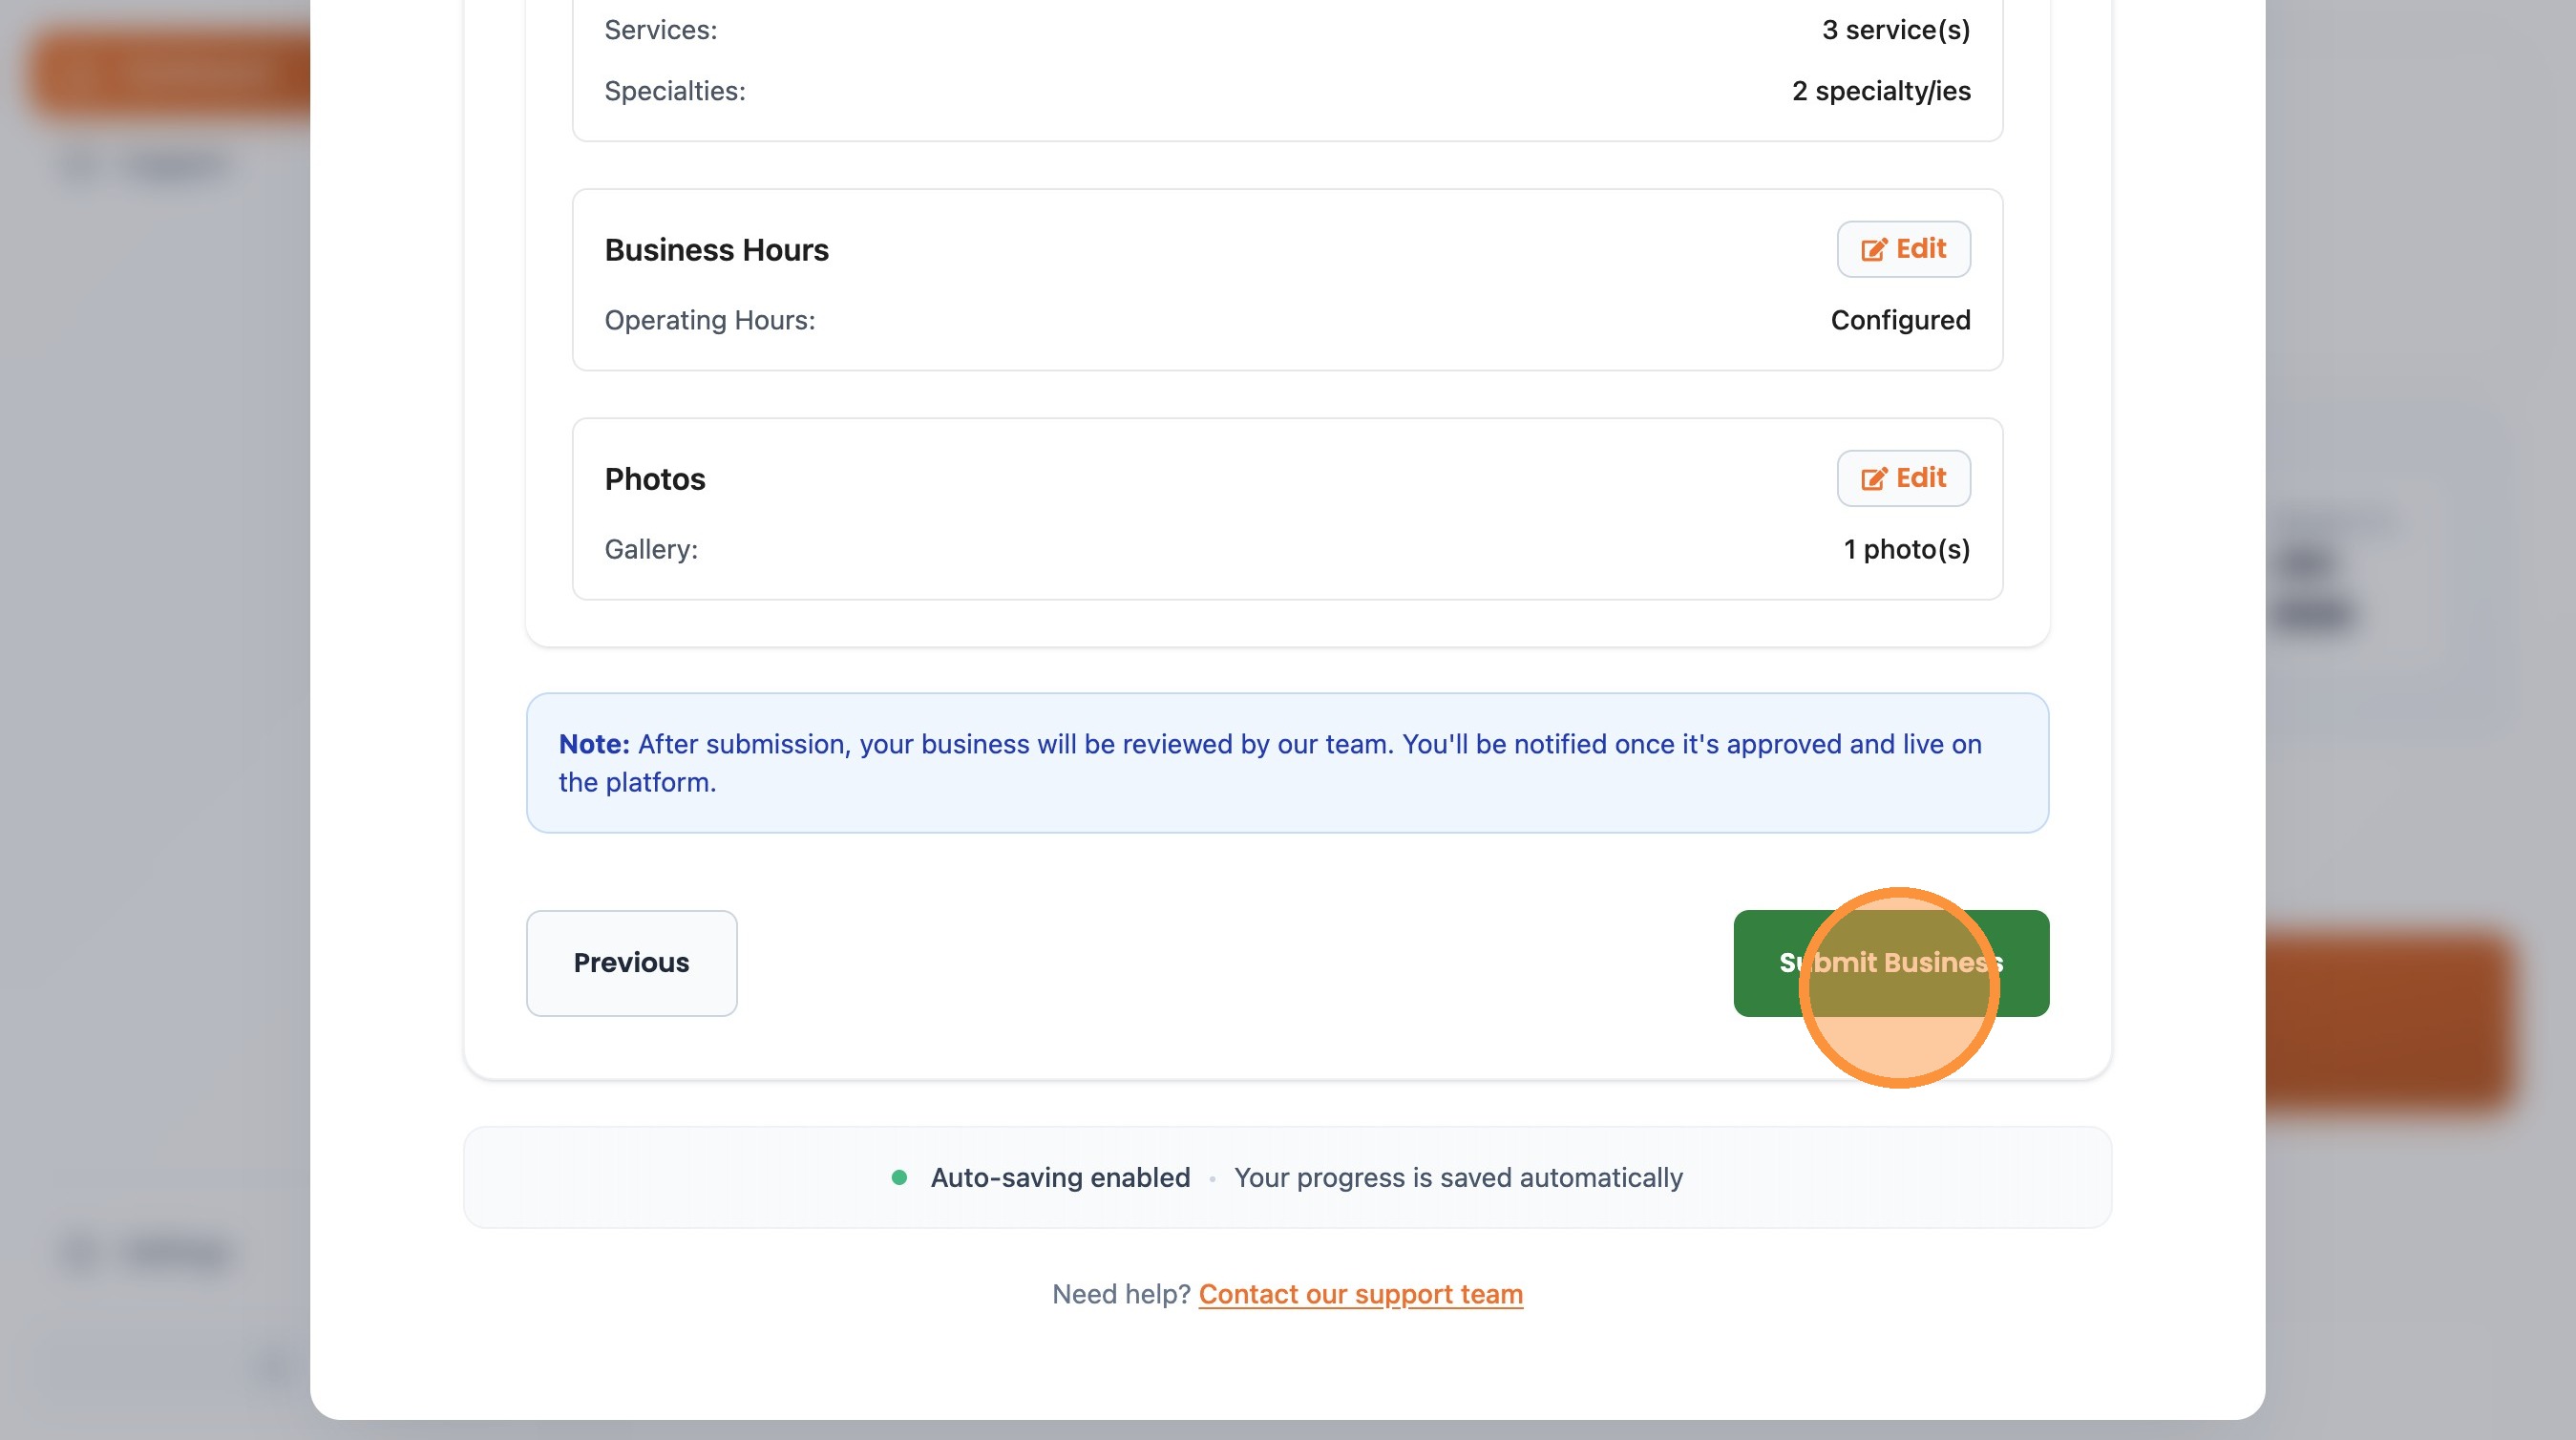
Review and finalize all sections
Click "Next Step"
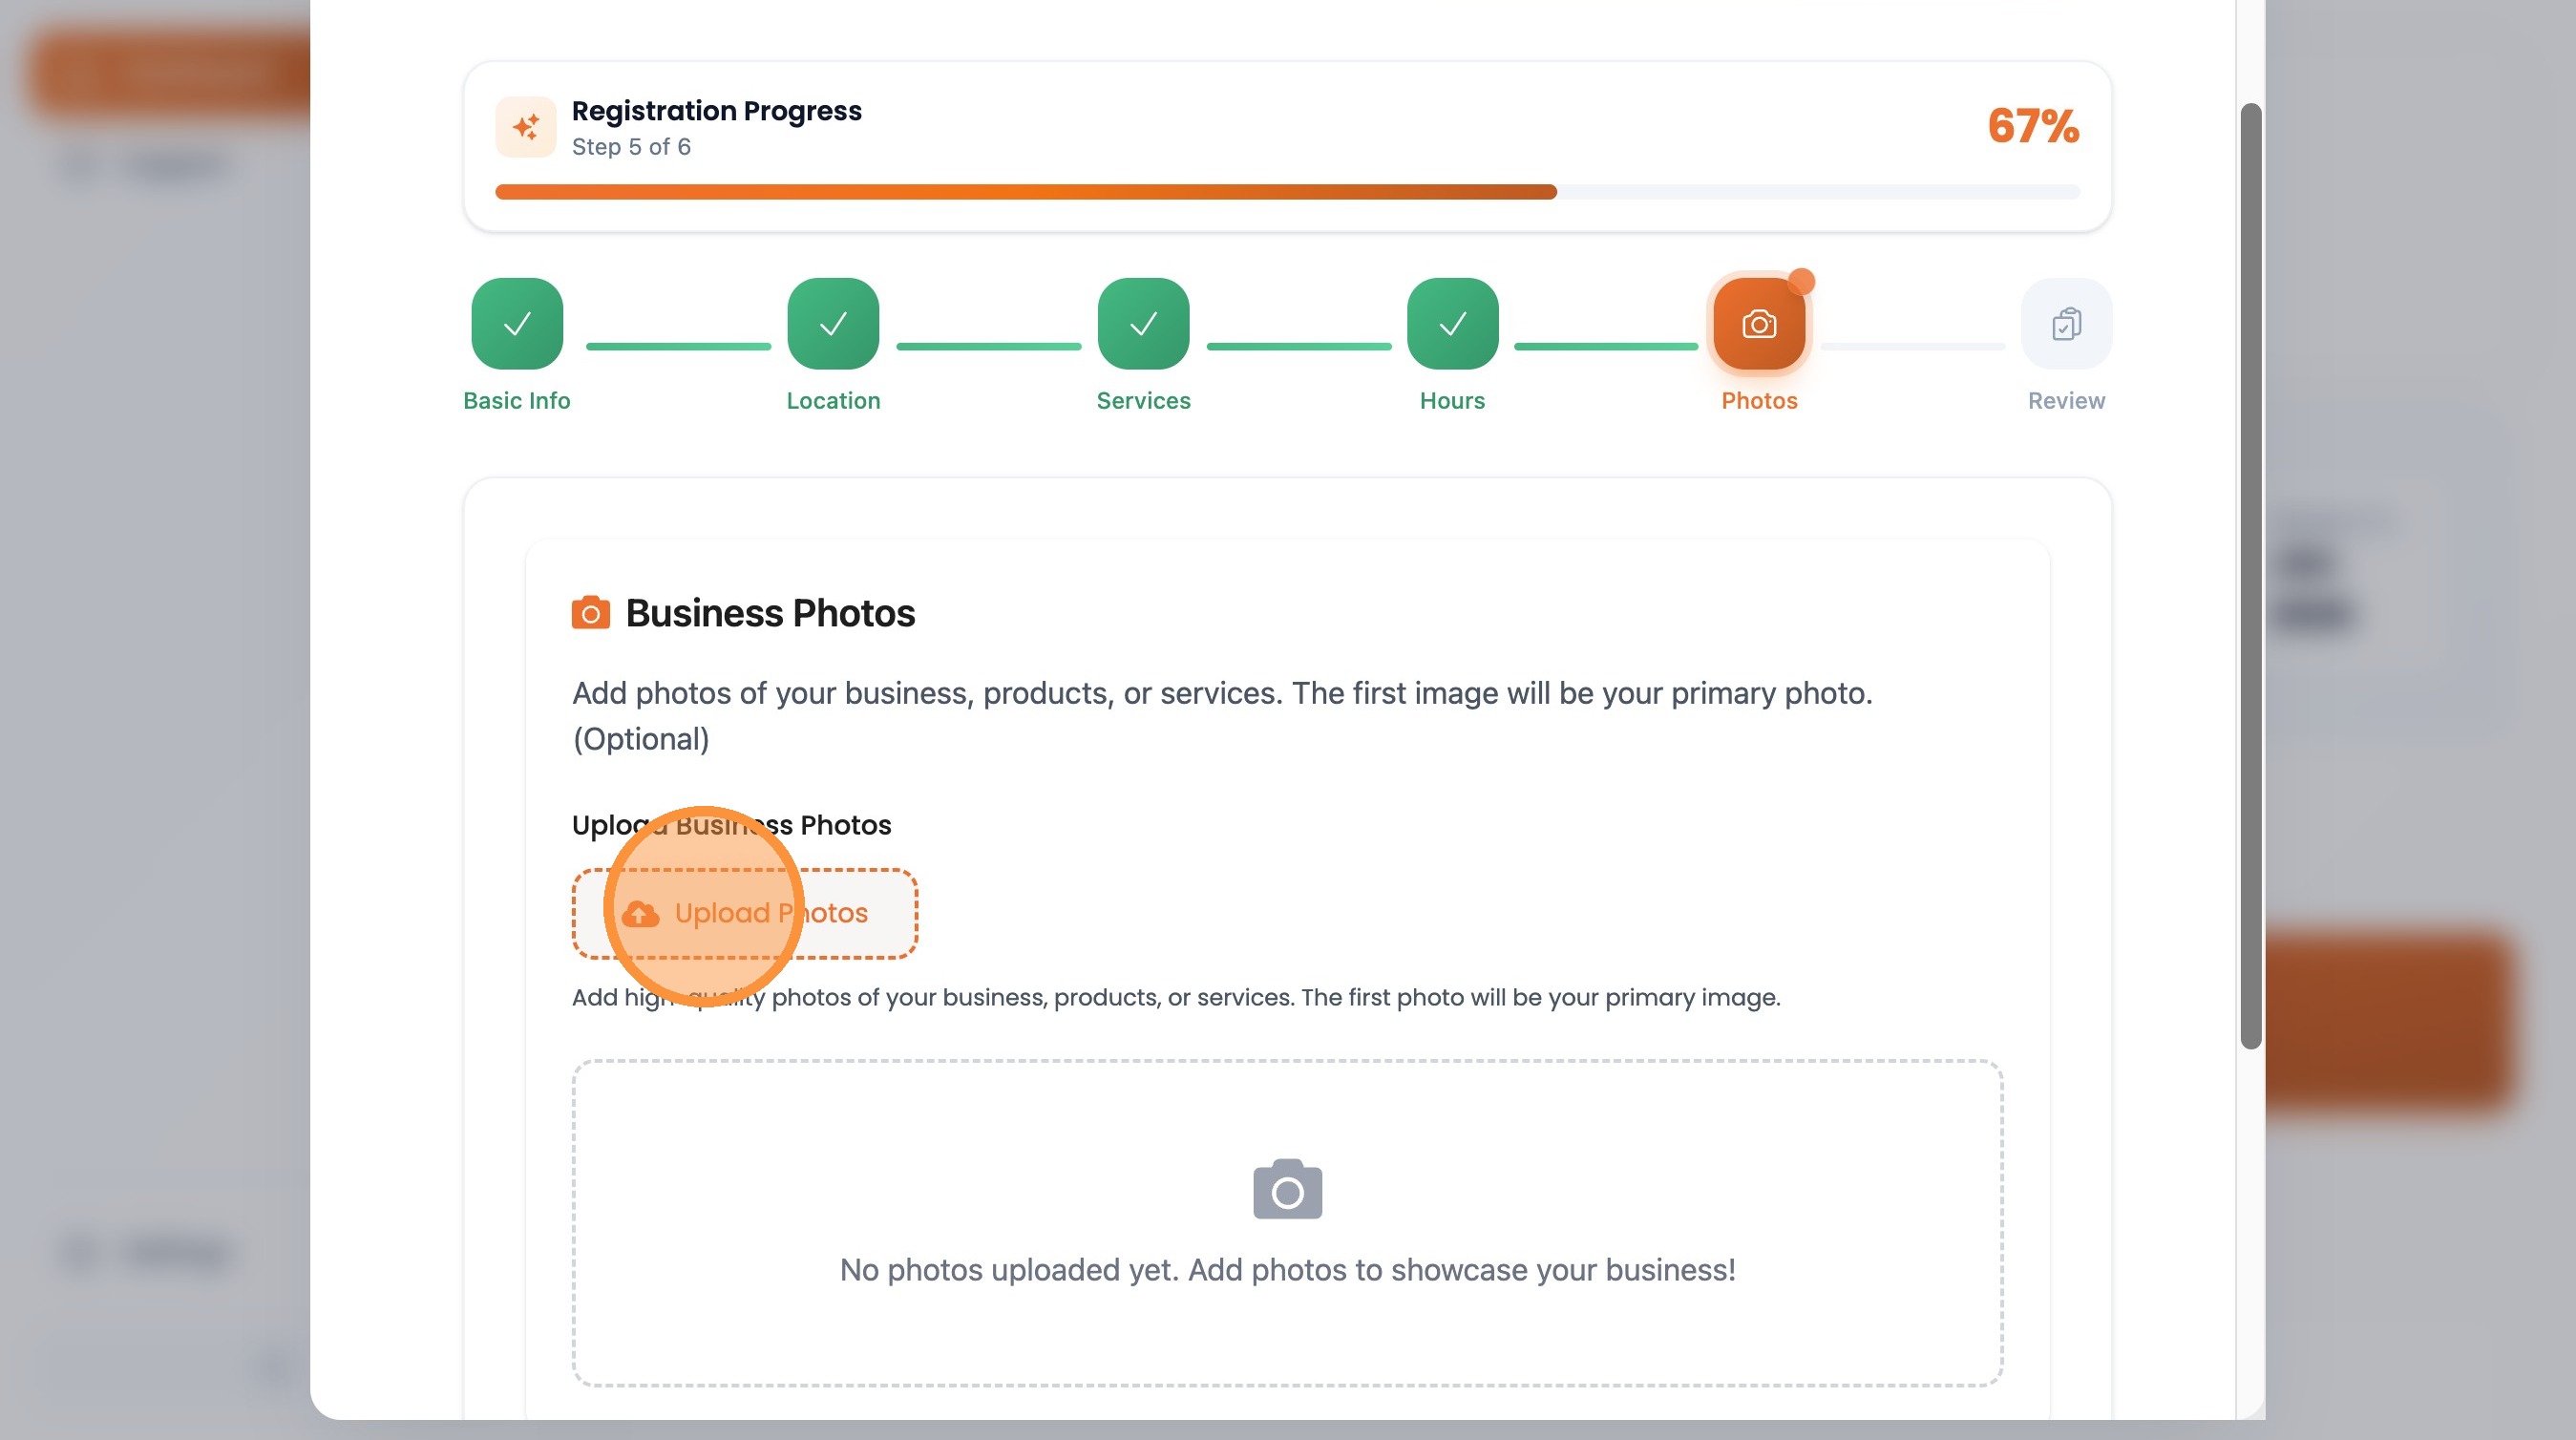
Photos & Submit
Upload photos and submit your business for review
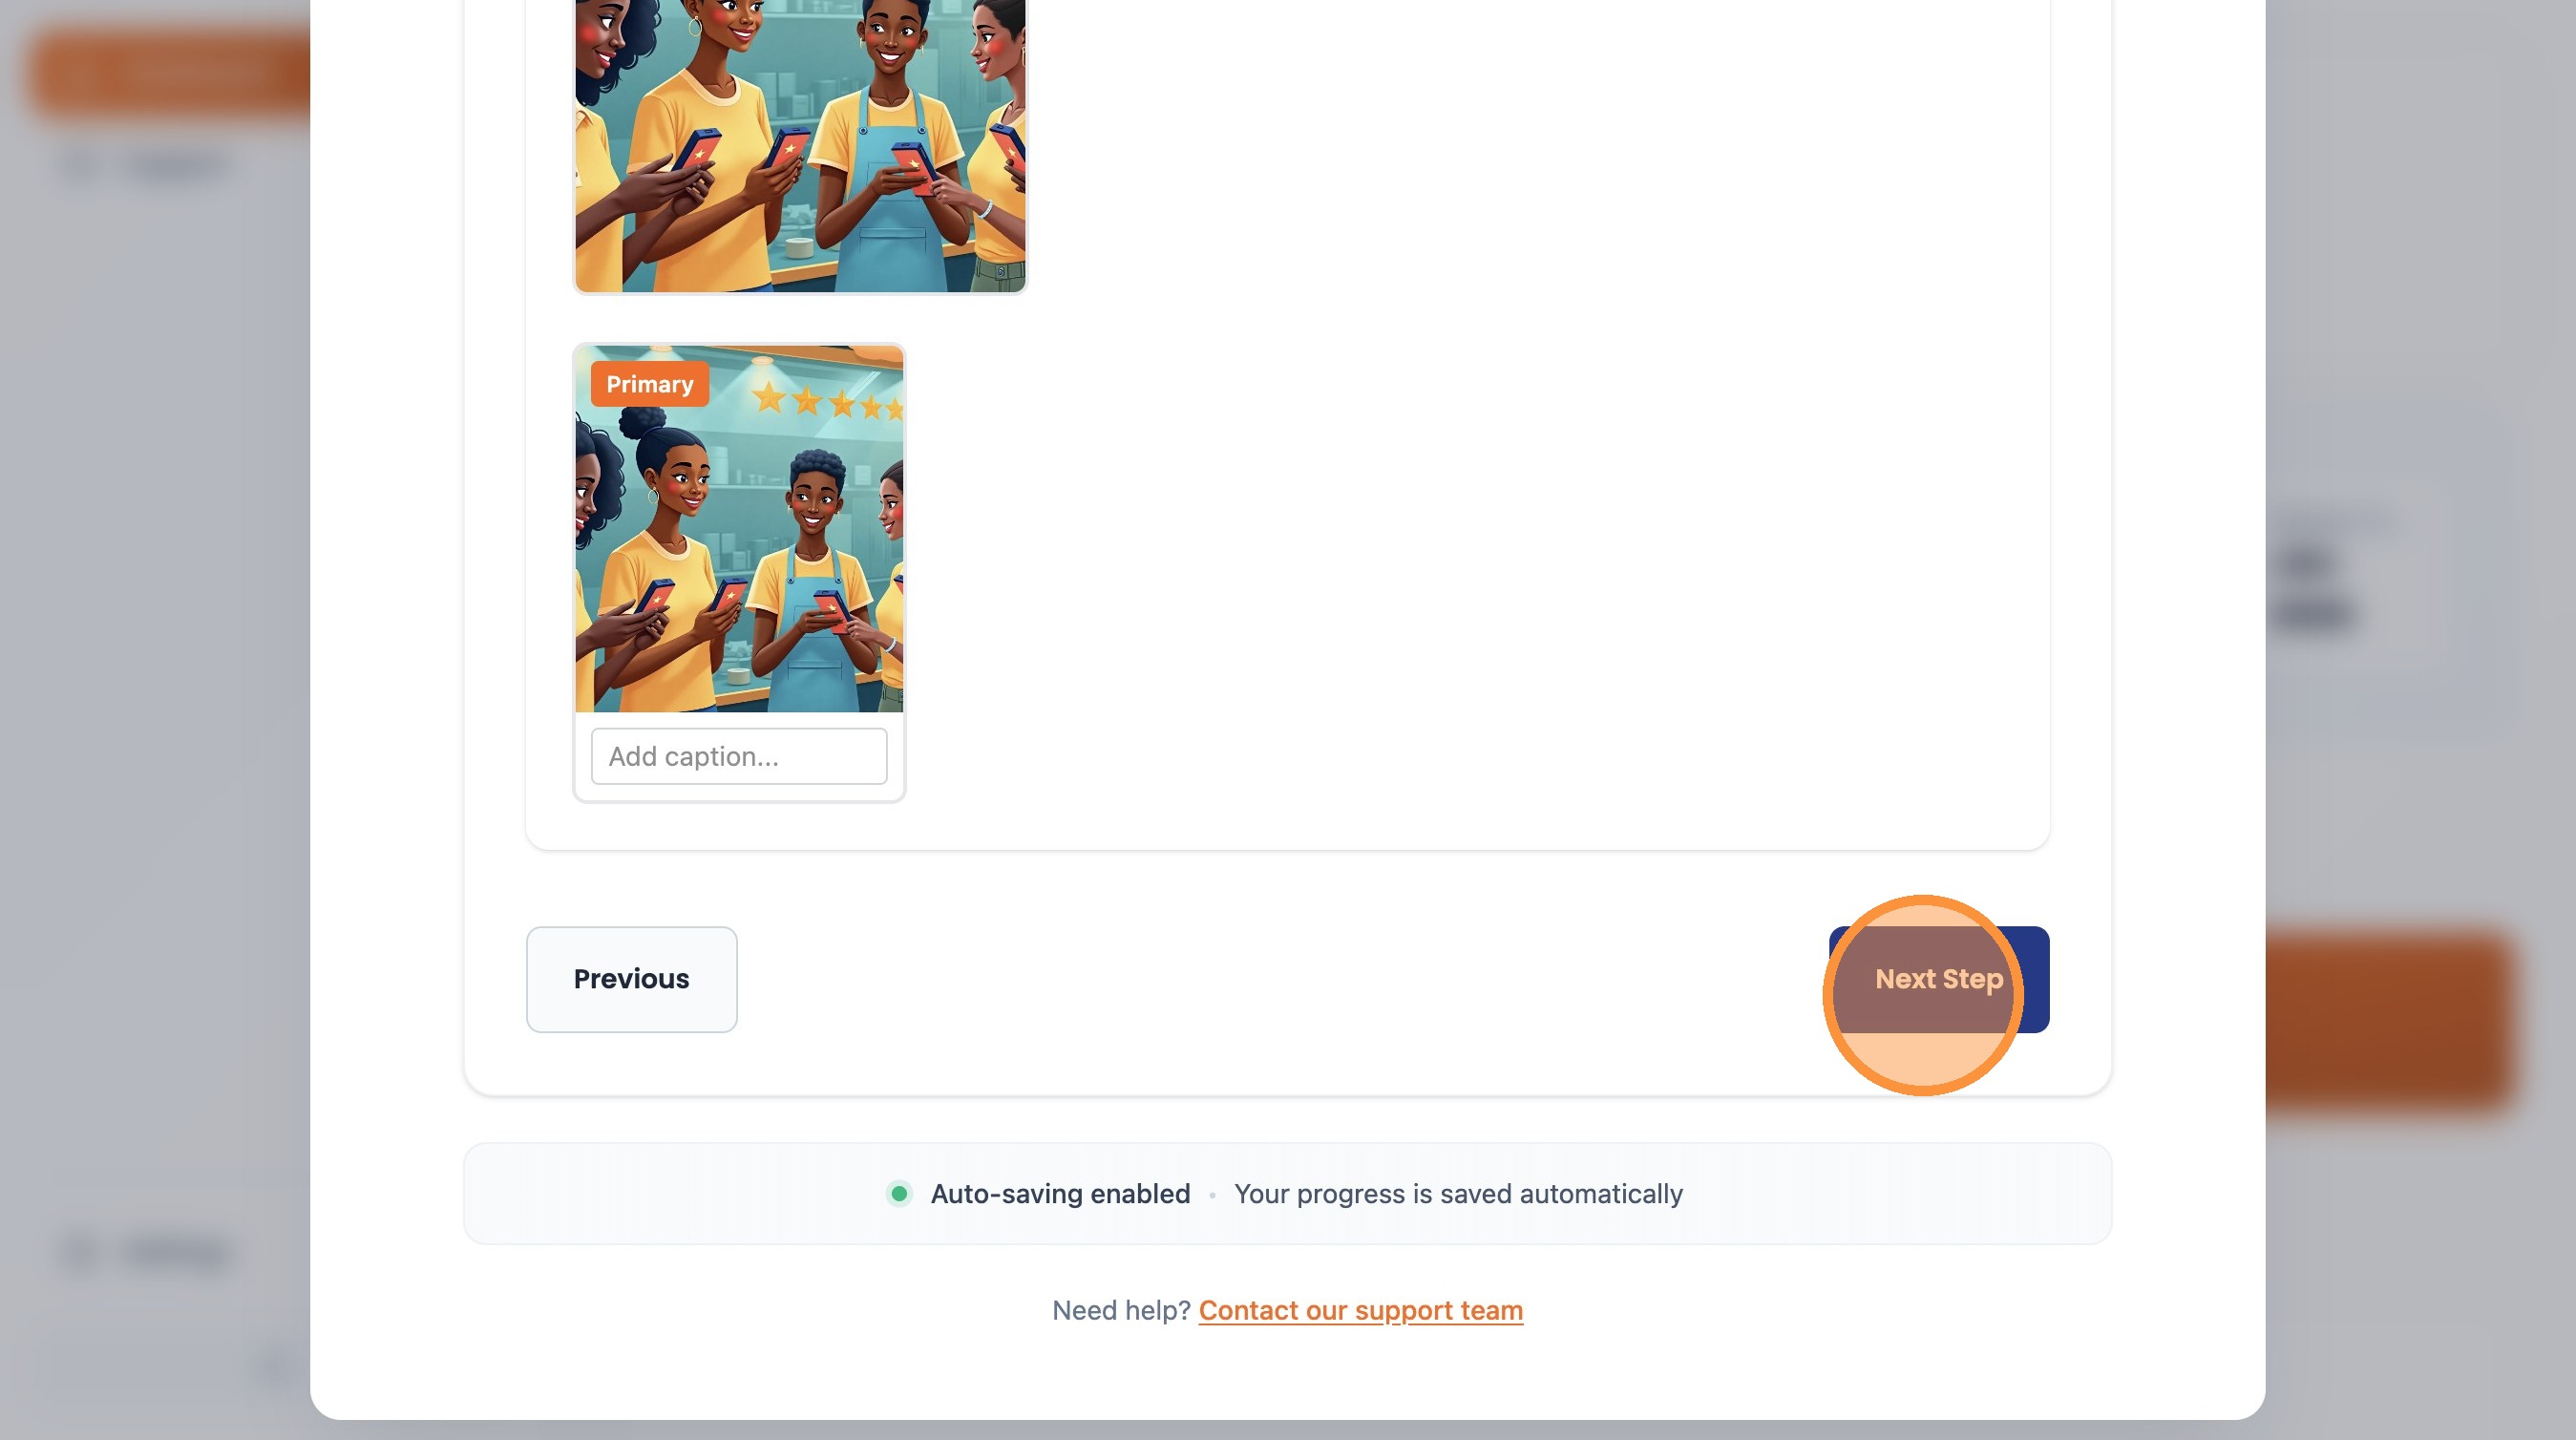
Upload photos of your business
Click "Next Step"
Click "Submit Business"
That's It!
Once you submit your business, our team will review your application. You'll receive an email notification when your business is approved.
Guide created with Scribe